Edelbrock 33503 User Manual
Page 3
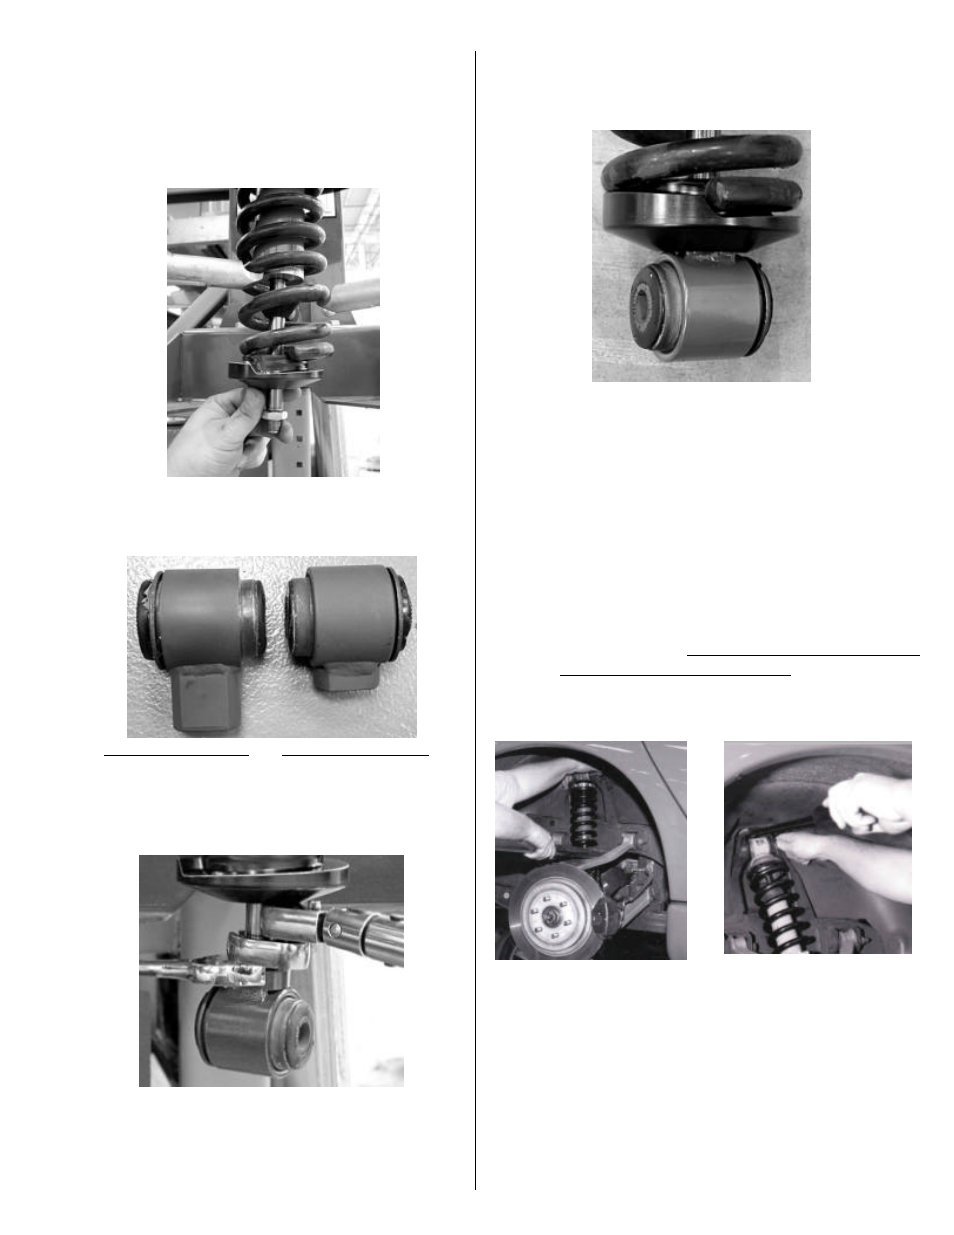
8(e) Align end of coil spring to lowest point on
spring seat before releasing the spring
compressor. (See Fig. 11).
Fig 11
Step 9
Assembly of Rear IAS shocks
9(a) Rear rod end uses the long threads. The
procedure of assembly is the same as the
front. (See Fig. 9).
Step 10 Installing IAS shocks
Reinstallation is reverse of removal.
10(a) Both front and rear may require a little gentle
persuasion with a long pry bar to push control
arms down in order to install bolts (See Fig. 12
and Fig. 12a). Shocks are mounted with the
body up & the rod end down. Do not torque
nuts at this time. Front lower bolts may be
installed with nuts to the front. This will make it
easier for reassembly.
Step 8 Assembly of Front IAS shocks
8(a) Insert the coil spring with flat ground end
against the threaded collar spring seat.
8(b) Compress coil spring until lower seat has
enough clearance to install lower spring seat
and 9/16" jamb nut (See Fig. 8).
Fig. 8
8(c) Front rod end has short threads.
(See Fig. 9).
Rear lower rod end Front lower rod end
Fig. 9
8(d) Screw rod end on with the supplied Loctite
applied, torque nut to 75 ft. lbs.
(See Fig. 10).
Fig. 10
Fig. 12
Fig. 12a