Connecting the cables – Acer PE320QK bmiipruzx 31.5" 16:9 Color Accurate HDR 4K UHD Monitor User Manual
Page 19
PE320QK User Guide English
8
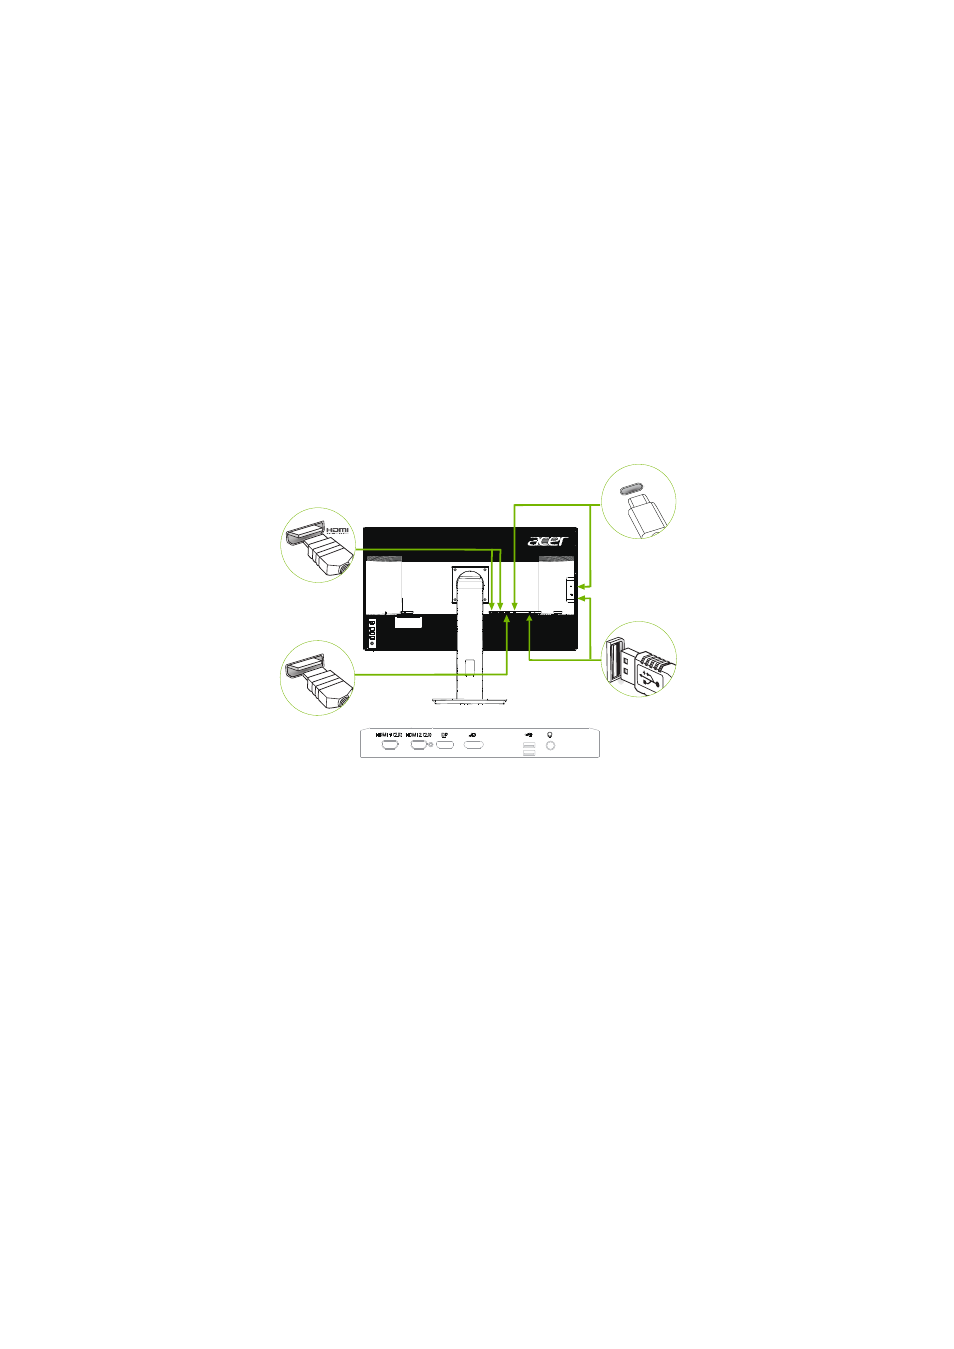
Connecting the cables
To install the monitor on your host system, please follow the steps below:
1. Turn off your computer and unplug your computer's power cord.
2.
Connect the signal cable to the DP (optional) and/or HDMI (optional) input
socket of the monitor, and the and/or DP (optional) and/or HDMI (optional)
output socket of the graphics card on the computer. Then tighten the
thumbscrews on the signal cable connector.
3.
USB 3.1 Type C-C Cable(Optional, USB Type C-C input models only)
Connect one end of the USB 3.1 Type C-C cable (optional) to your computer
and connect the other end to your electric devices.
4. Insert the monitor power cable into the power port at the back of the monitor.
5.
Plug the power cords of your computer and your monitor into a nearby electrical
outlet.
USB
DP
USB Type C
Note:
Audio output is only for audio output model. Please check user manual for more
instruction.
FreeSync (HDMI/DP):
It can allow a FreeSync supported graphics source to dynamically adjust display
refresh rate based on typical content frame rates for power efficient, virtually stutter
free and low-latency display update.