Chapter 2 hardware installation, 1 hardware connection, 2 led indicators – PLANET PRT-301W User Manual
Page 9: Hardware installation, Chapter 2
5
Chapter 2
Hardware Installation
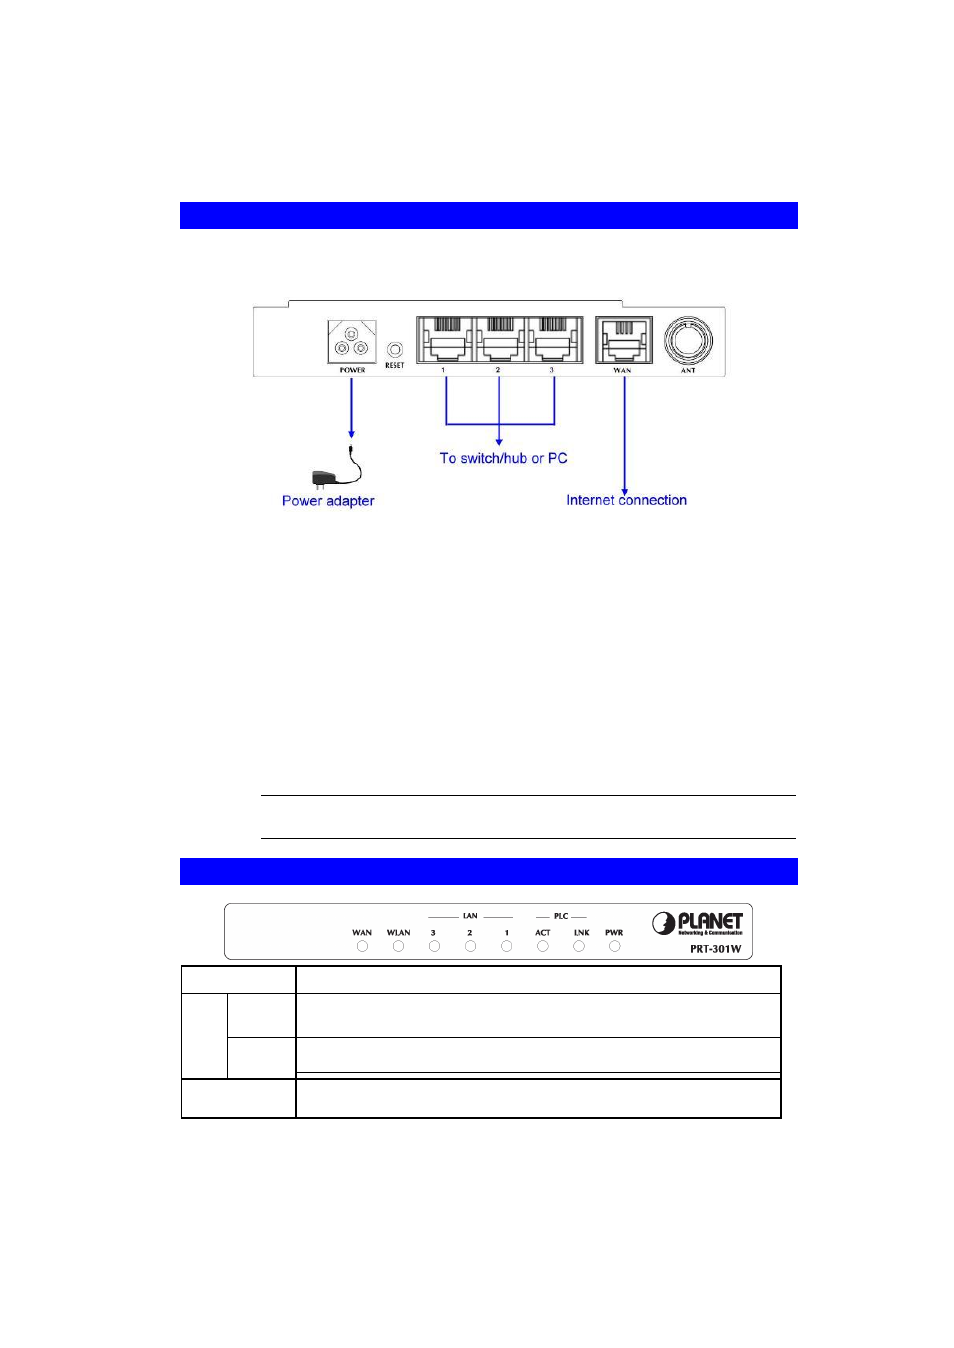
2.1 Hardware Connection
Before you proceed with the installation, it is necessary that you have enough information about
the PRT-301W.
1. Locate an optimum location for the PRT-301W. The best place for your PRT-301W
is usually at the center of your wireless network, with line of sight to all of your mobile
stations.
2. Assemble the antenna to PRT-301W. Try to place them to a position that can best
cover your wireless network. The antenna
’s position will enhance the receiving sensitivity.
3. Connect RJ-45 cable to PRT-301W LAN port. Connect one of the LAN ports on PRT-
301W to your LAN switch/hub with a RJ-45 cable.
4. Connect RJ-45 cable to PRT-301W WAN port. Connect ADSL/Cable Modem to the
WAN port on PRT-301W. Use the cable supplied with your modem. If no cable was
supplied with your modem, please use a RJ-45 Ethernet cable.
5. Plug in power adapter and connect to power source. After power on, PRT-301W will
start to operate. In the mean time, PRT-301W is connected to the powerline network.
Note:
ONLY use the power adapter supplied with the PRT-301W. Otherwise,
the product may be damaged.
2.2 LED Indicators
PWR
Router with proper power connection.
LNK
The LNK LED illuminates when a successful connection is made between
the PRT-301W and another powerline device or network.
PLC
ACT
The ACT LED is flashing when the PRT-301W is actively sending or
receiving data over the powerline network.
LAN (1-3)
The LAN LEDs serve two purposes. If the LED continuously illuminated,
the PRT-301W is successfully connected to a device through the corr e-