MAAX AMBROSIA 6636 F User Manual
Page 12
12
10024821
4.
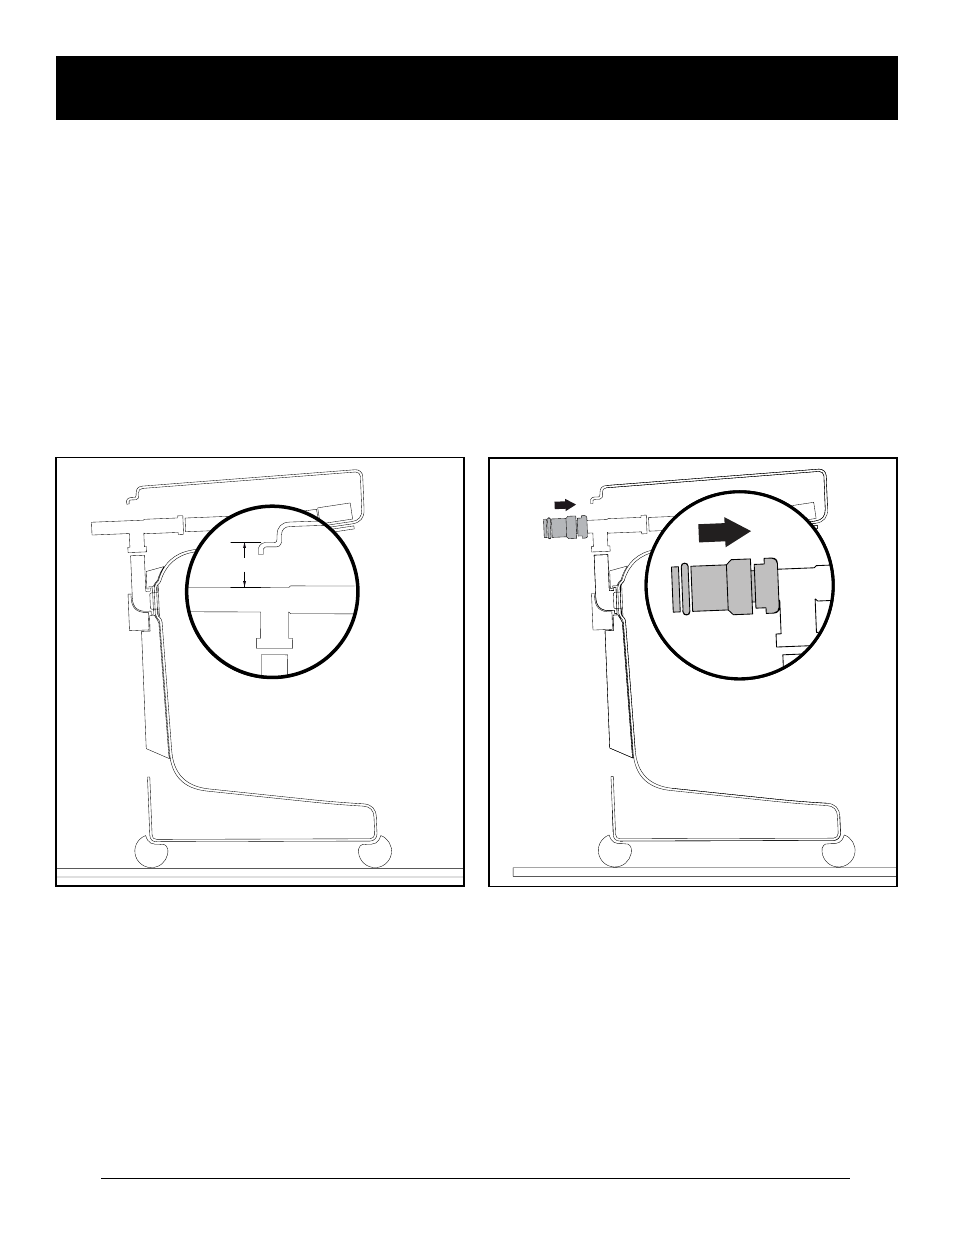
installing the drain • installation du drain
• instalación del drenaje
Déposer le bain sur le côté en prenant
soin de protéger la surface contre les
égratignures. Installer le drain et le trop-
plein selon le guide d'installation du fabricant
en s’assurant de respecter la mesure de
1 1/2 po. (Fig. A)
toujours protéger la surface de la
baignoire en la manipulant et en la
déposant au sol autrement que sur sa
base.
s'il n'y a aucun accès par le sous-sol,
installer la partie mâle du joint d’étanchéité
au bout du "T" en l'enfonçant le plus
possible. Lubrifier le joint torique au besoin
en utilisant la graisse fournie (7). Bien serrer
les bagues. (Fig. B)
1 1/2”
Fig. A
Fig. B
Asiente la bañera sobre el costado con
precaución, protegiendo la superficie
contra los rasguños. Instale el drenaje y el
rebosadero según la guía de instalación del
fabricante conservando la medida de 1 1/2"
(fig. A)
proteja en todo momento la superficie
de la bañera al manipularla y asentarla
en el piso, fuera de la base.
si no hay acceso por el sótano, instale
la parte macho de la junta de sellado en la
punta de la "T", encajándola lo más posible.
Lubrique la junta tórica si es necesario
utilizando la grasa provista (7). Apriete bien
los anillos (fig. B)
Lay the bathtub on its side carefully to
prevent scratches made on the surface.
Install the drain and overflow according to
the manufacturer’s directions, be sure to
keep perpendicular (Fig. A).
always protect the surface of the bathtub
when handling and setting it on the floor
outside the base.
if you do not have access from the room
below, install the male part of the expansion
joint at the end of the "T" by pushing it in
as far as possible. Add some lubricant to
the O-ring as needed by using the grease
provided (7). Tighten the collars properly.
(Fig. B)