Using the tear off/bin button, Adjusting the tear-off position, Epson lq-2080 – Epson 220 User Manual
Page 23
EPSON LQ-2080
2/99
EPSON LQ-2080
- 23
Using the Tear Off/Bin button
After the printer finishes printing your document, check that
the Tear Off/Bin lights are not flashing. Then press the Tear
Off/Bin button. The Tear Off/Bin lights start flashing and the
printer advances the paper to the tear-off edge.
Note:
If the Tear Off/Bin lights are flashing, the paper is in the tear-off
position. If you press the Tear Off/Bin button, the printer feeds your
paper to the next top-of-form position.
Advancing paper to the tear-off position
automatically
To automatically advance your printed documents to the tear-
off position, you need to turn on the auto tear-off mode and
select the appropriate page length for continuous paper in the
default-setting mode. For instructions, see “About Your
Printer’s Default Settings” on page 25.
When auto tear-off is on, the printer automatically advances
the paper to the tear-off position whenever it receives a
full page of data or a form feed command followed by no
more data.
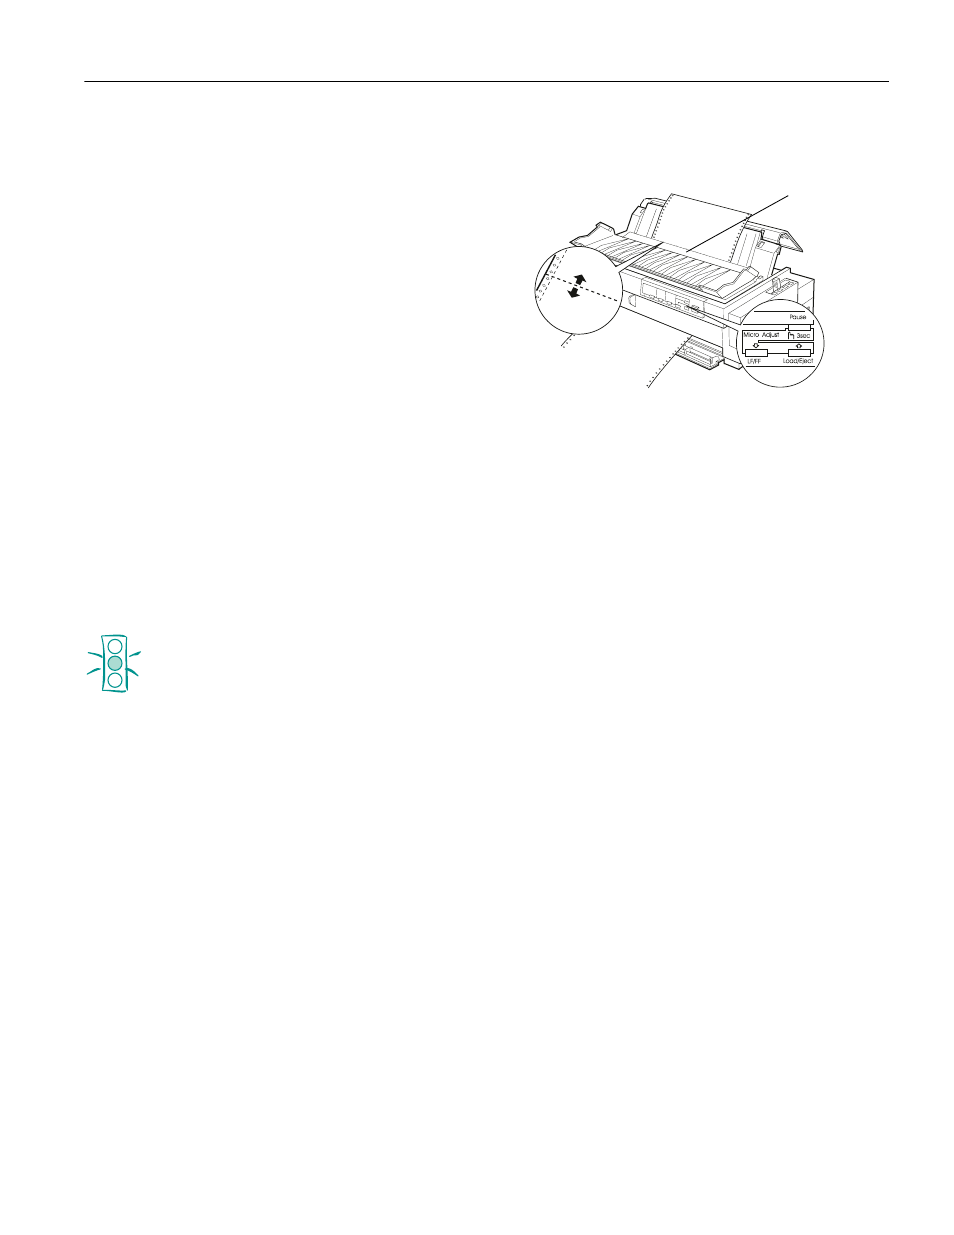
Adjusting the tear-off position
If your paper’s perforation is not aligned with the tear-off
edge, you can use the micro adjust feature to move the
perforation to the tear-off position. Follow the steps below.
Caution:
Never use the knob to adjust the tear-off position while
the printer is turned on; this may damage the printer or
cause it to lose the tear-off position. The knob can be
used when the printer is turned off only.
Note: Your tear-off position setting remains in effect
until you change it, even if you turn off the printer.
1. Make sure the Tear Off/Bin lights are flashing (the paper
is at the current tear-off position). If necessary, press the
Tear Off/Bin
button to advance the paper to the tear-
off position.
2. Open the paper guide cover.
3. Hold down the
Pause
button for about three seconds. The
Pause light begins flashing and the printer enters the micro
adjust mode.
4. Press the
LF/FF
D button to feed the paper backward, or
press the
Load/Eject
U button to feed the paper forward
until the paper perforation is aligned with the tear-off edge.
Note:
The printer has a minimum and a maximum tear-off position. If
you try to adjust the tear-off position beyond these limits, the
printer beeps and stops moving the paper.
5. After you set the tear-off position, press the
Pause
button
to turn off the micro adjust mode.
6. Tear off the printed pages.
When you resume printing, the printer automatically feeds the
paper back to the top-of-form position and begins printing.
tear-off-edge