Electrolux HD 8760 User Manual
Page 16
16
1
2
3
4
4
5
5
6
6
7
8
8
9
(5x18)
(5x18)
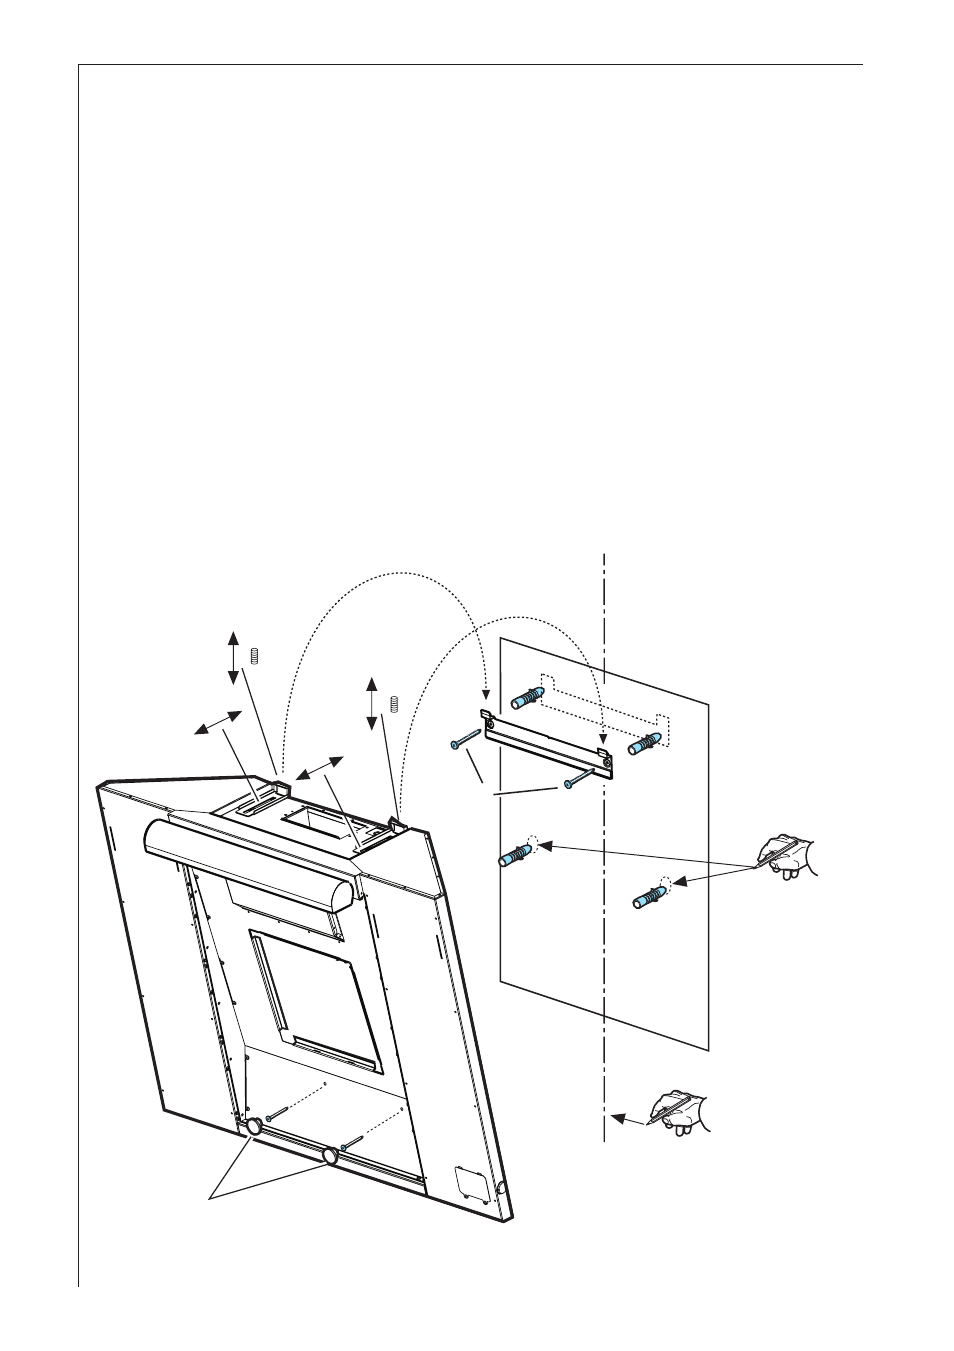
Mark the wall with a centre line, this will aid mounting procedure (1),
position the template so that the mid line printed on the template
matches with the centre line previously marked, the lower side of
the template corresponds to the lower side of the hood once
mounted (2).
Drill two holes Ø 8mm and fix the support bracket with two wall
plugs and screws (3).
Remove the front panels (see paragraph Removing the front
panels).
Hang the hood (4) adjust its position (5-6) and from the inside of the
hood sign two points for definitive fixing (7), remove the hood and
drill two holes Ø 8mm (8), fit two wall plugs, hang the hood again
and fix it securely with two screws (9). Cover the drill holes for
screws with the two screw caps provided.
Fig. 11
- EFC 650-950-600-900 (80 pages)
- EFC 6441 (24 pages)
- CHDI 8610 (20 pages)
- E30DD75ESS (3 pages)
- DL 4150 (20 pages)
- EFT60002 (12 pages)
- RH30WC60G (4 pages)
- RH30WC60GSA (4 pages)
- RH42PC60GSA (4 pages)
- 5995438602 (18 pages)
- DK 9660-9690 (24 pages)
- FM 2500DD-A (40 pages)
- Cooker Hoods (7 pages)
- ICON RHDFW60GS (2 pages)
- KLWV610GEM (2 pages)
- BVM200 (8 pages)
- CH 710 (20 pages)
- HD 8820 (18 pages)
- ERCE9020AS (7 pages)
- EFT 615 (16 pages)
- RH30WC55G (4 pages)
- EFT925 (12 pages)
- EI36HI55KS (52 pages)
- FRIGIDAIRE F30WC19E (4 pages)
- EFG 530 (16 pages)
- EFP 60202 (76 pages)
- U24211 EFT 535 (15 pages)
- EFP 60520 (24 pages)
- F30WC (8 pages)
- ICON E30DD75ESS (4 pages)
- MCH 660 (16 pages)
- DEFI UK EFC 639 X (14 pages)
- ICON E488WV120S (2 pages)
- CHDD 8795 (18 pages)
- E488WV12OS (14 pages)
- HD 8990 (20 pages)
- RH30WC40GSA (4 pages)
- EFC 630 (20 pages)
- WALL-MOUNT E36WV60EPS (2 pages)
- Vent Hood E36WV60EPS (18 pages)
- D 8360 (20 pages)
- U31180 EFC 9673 (80 pages)
- EFG 540 (12 pages)
- 20 GN (3 pages)
- CH 1200-900-600 (12 pages)