I. low flow (pm5400 model), Step 1: disassembly – Precision Medical HeliO2 Blenders User Manual
Page 9
Heliox / Oxygen Blender Service Manual
Page 7
SECTION 3: MAINTENANCE PROCEDURES, REPAIR AND CALIBRATION
I. LOW FLOW (PM5400 Model)
Step 1: DISASSEMBLY
Tools Required
#2 Phillips Screwdriver
11/32 in. Nut Driver
#3 Phillips Screwdriver
5/32 in. Long Hex Key
1/2 in. Open End Wrench
Small Retaining Ring Pliers
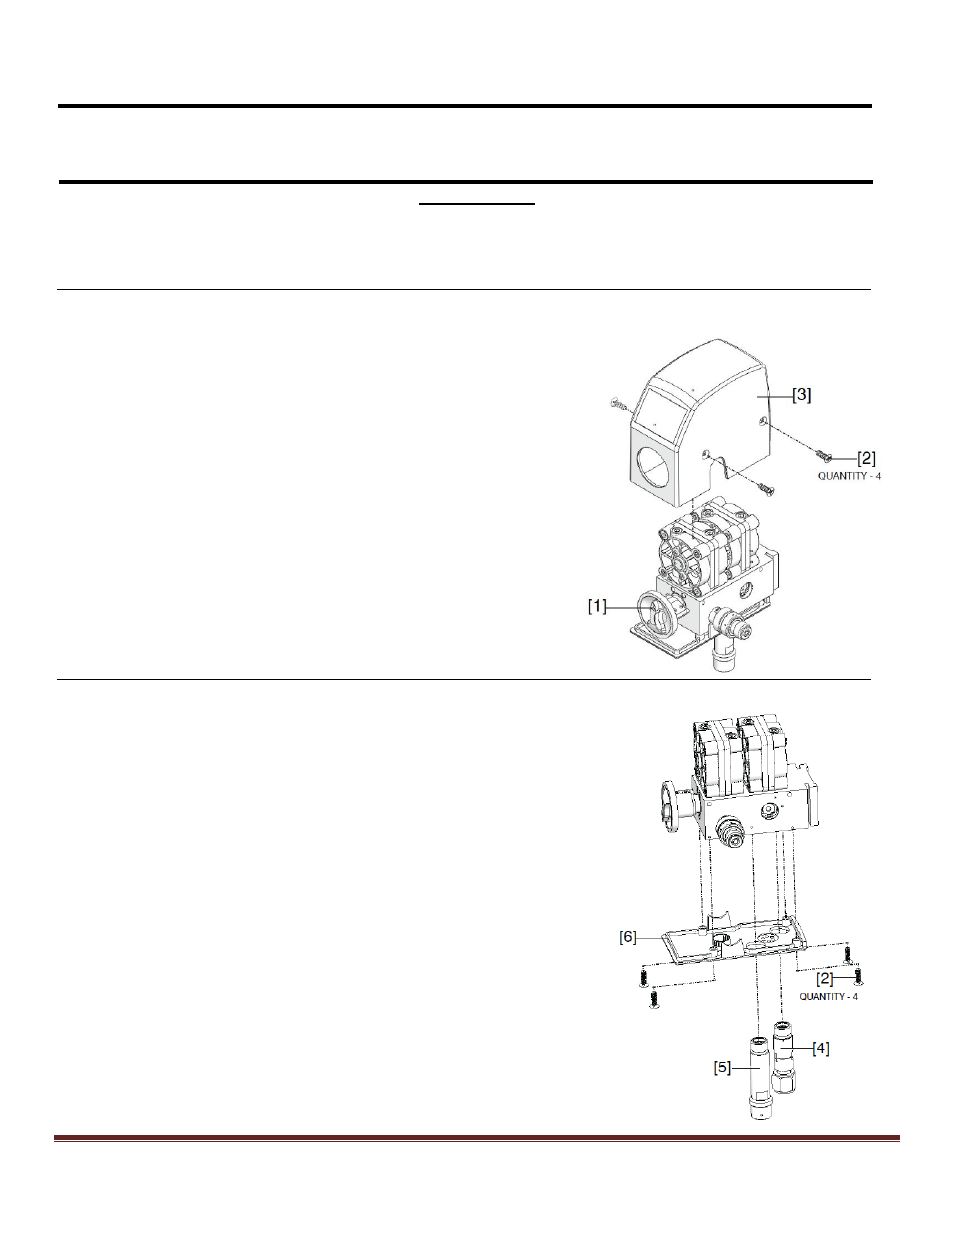
Figure A
1. Rotate dial [1] to the 60 graduation.
2. Remove the two flat head screws [2] on each side of the
top cover [3].
3. Remove top cover by pulling upwards.
The cover will not come off unless the dial is at the 60
graduation
Figure B
4. Use a ½ in. open end wrench to unscrew and remove the
Heliox [5] and Oxygen [4] inlet assemblies from bottom of the
Blender.
Oxygen inlet has left hand threads.
5. If manifold outlet assembly is present, unscrew the stem using
a 5/32 hex key and holding the manifold outlet assembly to
the bottom of the Blender.
6. Remove the four flat head screws [2] from bottom cover [6].
7. Remove bottom cover.