Step 2: cleaning, Low flow, Figure f – Precision Medical HeliO2 Blenders User Manual
Page 11: Figure g
Heliox / Oxygen Blender Service Manual
Page 9
LOW FLOW
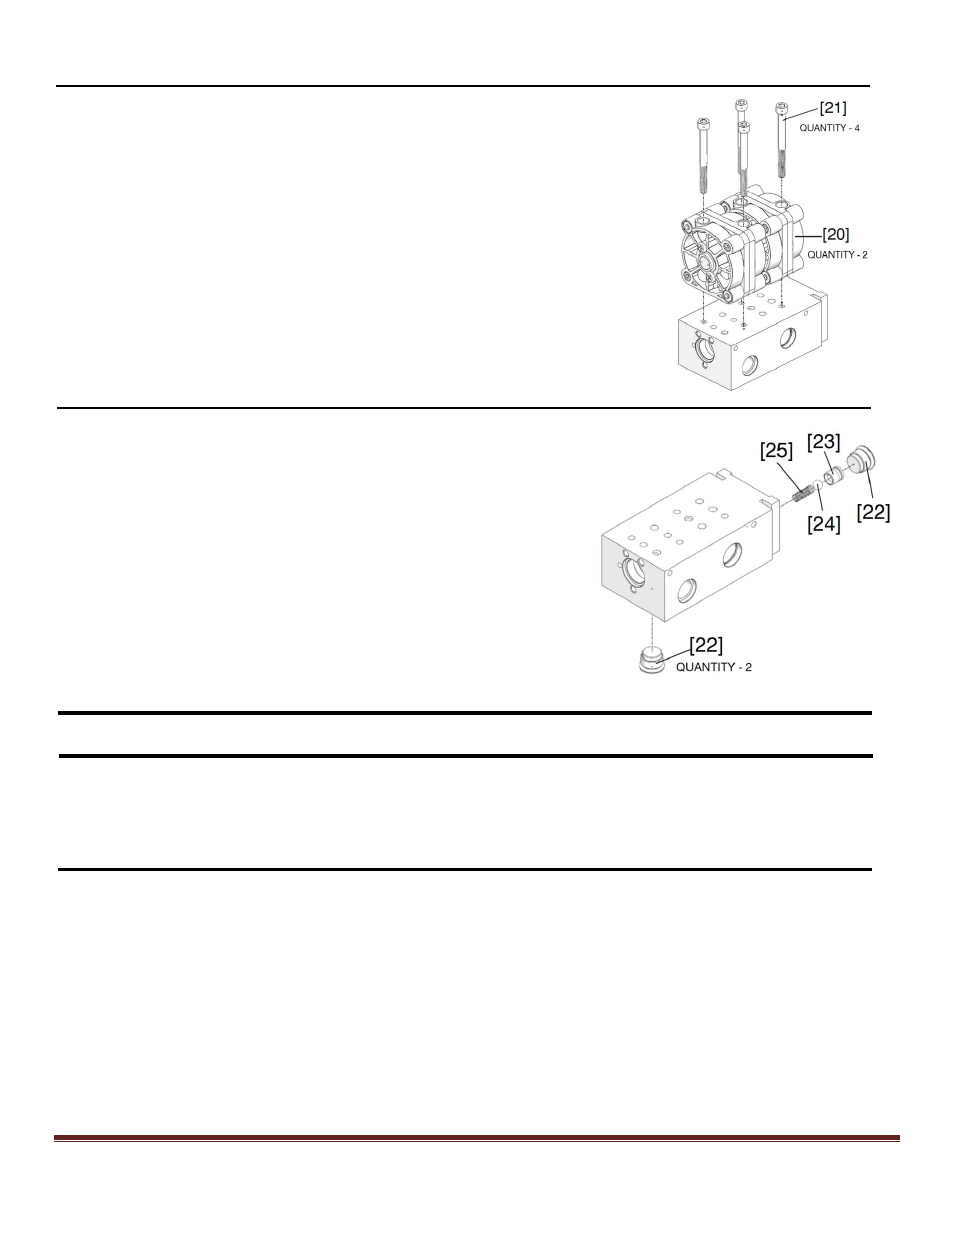
Figure F
16. Remove each diaphragm housing assembly [20] from the manifold by
removing the two hex socket head screws [21] on the top of each
diaphragm housing with 5/32 hex key.
Figure G
17. Using 5/32 in. long hex wrench, unscrew and remove plug
[22] from the bottom of the manifold block.
18. Remove rear plug [22] from the back of the manifold block.
Insert a long 5/32 hex key through rear plug opening,
unscrew and remove the alarm bypass body [23], ball [24]
and spring [25].
Step 2: CLEANING
Precision Medical, Inc. recommends using an ultrasonic cleaner for cleaning all non-elastomeric and non-
metallic components. However, cleaning with an all-purpose liquid cleaner and rinsing with clean, warm water
may be substituted. Both methods require thoroughly blow drying all passages before reassembly. Follow the
ultrasonic cleaner manufacturer instruction.