Phase 2 – preparation of counter-wall, Installation and use manual chapter 3 picasso – MCZ Picasso User Manual
Page 8
INSTALLATION AND USE MANUAL
Chapter 3
PICASSO
page
8
3
Technical service – all rights reserved by mcz spa
Reproduction prohibited
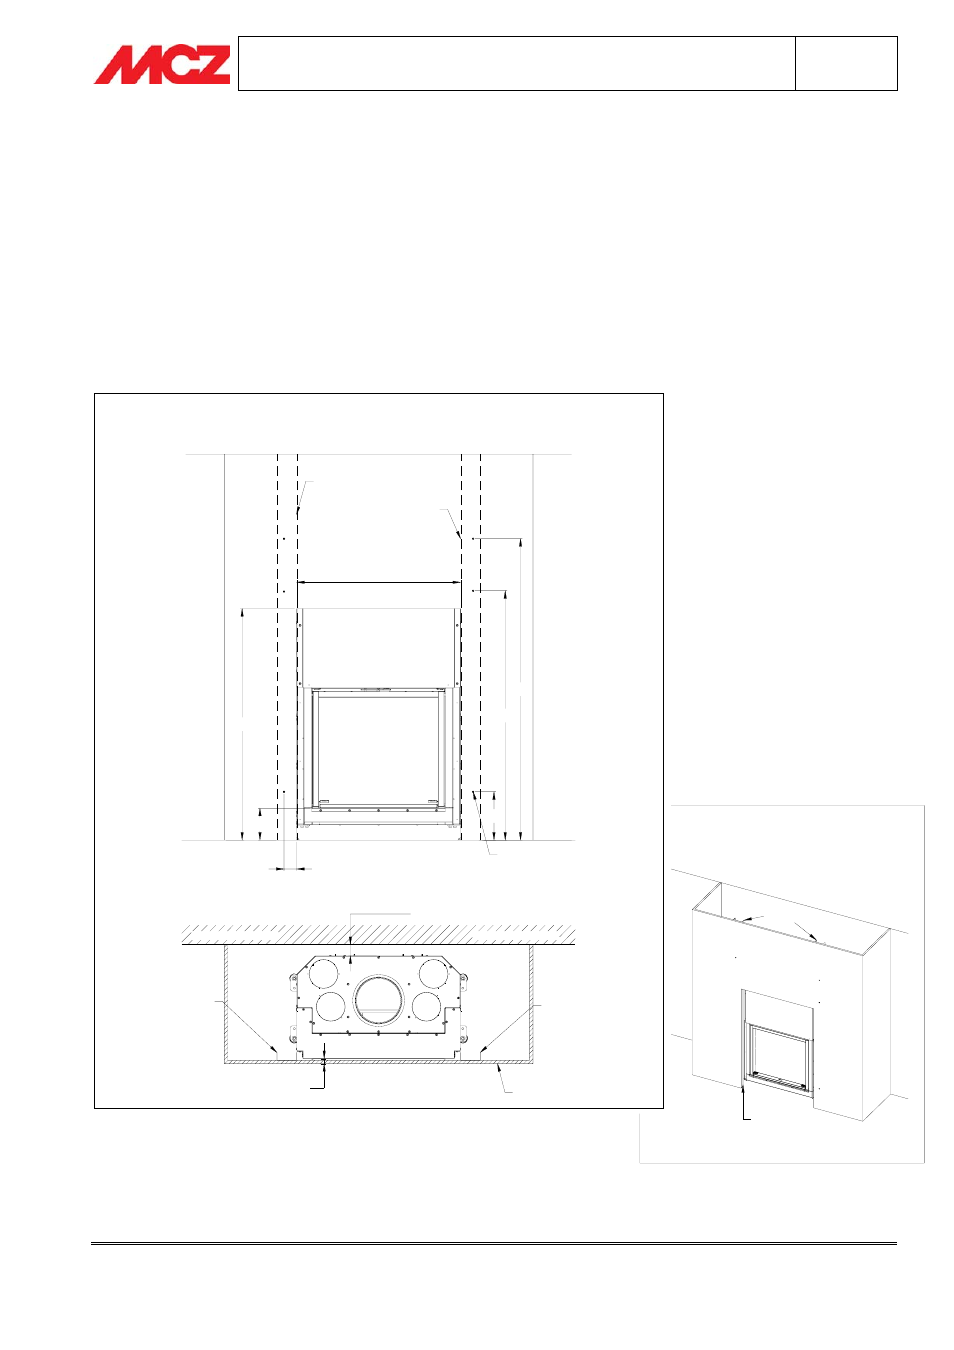
3.3. PHASE 2 – PREPARATION OF COUNTER-WALL
Before proceeding with the installation of the Picasso cladding, you must create the counter-wall:
for this
purpose, consider an external distance from the fireplace stove of about 27-30 mm. This measurement must be
measured based on elements 1 (steel structure), 2 (lh side frame) and 3 (rh side frame).
Make an opening on the front part of H=1200 mm and L=850 mm; reinforce the counter-wall with metal uprights
placed flush with the hole in a vertical direction and resting on the floor. For greater safety you can use 1+1
uprights per side.
Drill a hole in the counter-wall at the M6 threaded bars at the rear of each marble component. Six holes are
required, located as shown in the figure below.
N.B. The dimensions shown in the figure are approximate and must be verified in situ
165
1200
65
850
1562
1292
250
MONTANTE
MONTANTE
FORI DA REALIZZARE
SULLA CONTROPARETE
PER FISSAGGIO PICASSO
DISTANZA DI
SICUREZZA
27
MONTANTE
MONTANTE
CONTROPARETE
MURO PERIMETRALE
MURO PERIMETRALE
MONTANTE
MONTANTE
A FILO FORO