Ab a – MCZ Boxsystem 75 FR User Manual
Page 19
Chapter 4
INSTALLATION AND USE MANUAL
page
19
Installation and assembly
Technical service – MCZ S.p.A. all rights reserved - Reproduction prohibited
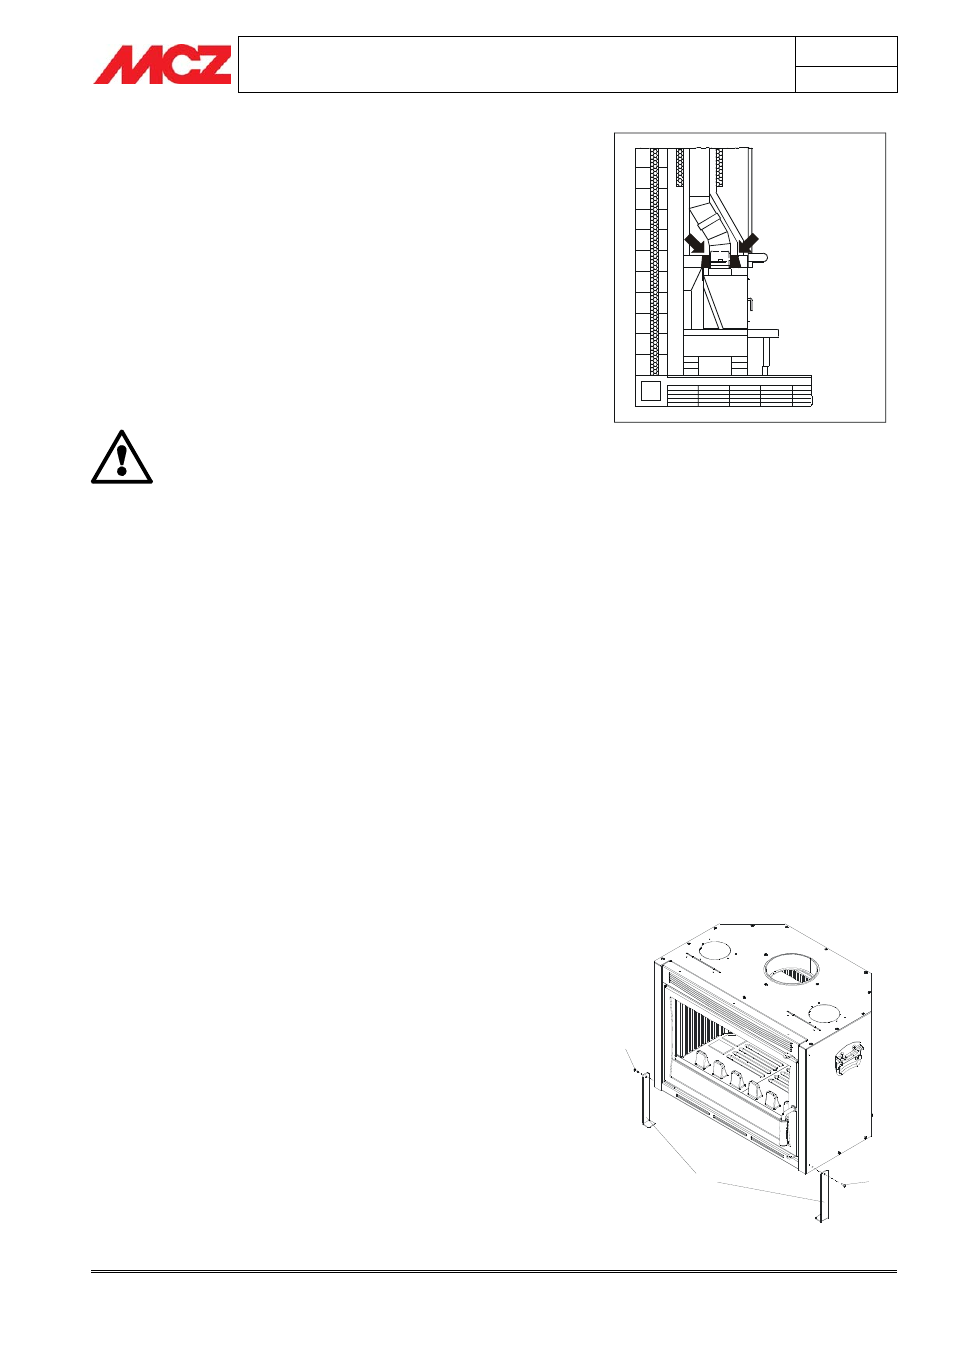
4.5.2. Connection using the telescopic connection
To simplify assembly of the insert it is possible to use the telescopic
connection, an optional accessory that MCZ makes available to its
installers and that allows to easily install the flue gas connection and
the SmartBox.
The telescopic connection can be fixed to the top part of the prehood
ring and, thanks to this accessory, the smoke outlet of the insert is
precisely determined and it is possible to freely create the entire
connection to the chimney flue without being obstructed by the volume
of the machine.
Once the connection has been completed, seal the section between the
pipe and entrance with refractory mortar or ceramic fibre. This
operation requires great care, and the seal must be airtight
since any passage of air may compromise the draught.
(figure 4)
Any increase in the section of the connecting pipe
must start immediately above the hood of the
fireplace and not part-way along the flue pipe
section
When the installation is complete, the connecting
pipe must be insulated with ceramic fibre or other
material capable of withstanding temperatures of at
least 600 °C.
When the infilling operations are finished and the product is inserted,
just extract the upper deflector from inside the fire mouth of the
SmartBox, insert your hand inside the smoke outlet of the insert, turn
the handle inside the telescopic connection and pull downwards. The
telescopic connection will descend perfectly to the smoke outlet of the
SmartBox, thus completing the connection to the chimney flue.
4.6. PARTICULARITIES OF THE SUPERCLIMA MODEL
Unlike the SmartBox and ClimaSystem inserts, the Superclima has a
compartment (M) located under the insert that contains the fan. This
compartment can be used as a support if cladding is built around the
self-supporting structure of the insert, or it must be inserted on the fire
bed of the firebox if Superclima is used to recover an old fireplace.
4.6.1. Superclima as a self-supporting structure
For those who are building the entire fireplace structure around the
Superclima or have an existing fire mouth available which is large
enough to allow full-height assembly of the insert, the two front
support brackets (B), provided in the package, can be used to balance
the structure which rests only on the fan compartment box.
For installation, unscrew the two front screws (A), attach the supports
(B) as shown in the figure and screw the screws (A) back on.
Otherwise, for those who are unable to use this installation procedure,
proceed as described in the following section.
4.6.2. Insertion of Superclima in a firebox
To install Superclima inside a firebox, first of all you must disassemble
the motor housing (M) and all the internal components
according to diagram 1 and create the compartment to hold this
A
B
A
Infill of flue gas connection