Scenario cladding assembly – MCZ Scenario Forma 95 GAS Left User Manual
Page 8
INSTALLATION AND USE MANUAL
Chapter
2
SCENARIO
pag.
8
Chapter
2
Technical service – all rights reserved by MCZ
GROUP spa. Reproduction prohibited
3. SCENARIO CLADDING ASSEMBLY
For the Scenario cladding to be properly installed we recommend you follow the assembly
sequences in order as listed in the manual.
3.1. SCENARIO CLADDING COMPONENTS
The cladding must always be kept upright and exclusively moved with a trolley. You must
be particularly careful to prevent the components contained in the package from
mechanical blows comprising their integrity. Moving the product must always be done
with care. If possible, unpack the product neat to the area where it is to be installed.
The materials which make up the packaging are not toxic or harmful, so no special
procedures for disposal are required. Their storage, disposal or possible recycling are
therefore the responsibility of the final user, in compliance with current legislation on the
subject. Do not store Scenario cladding without the relative packing.
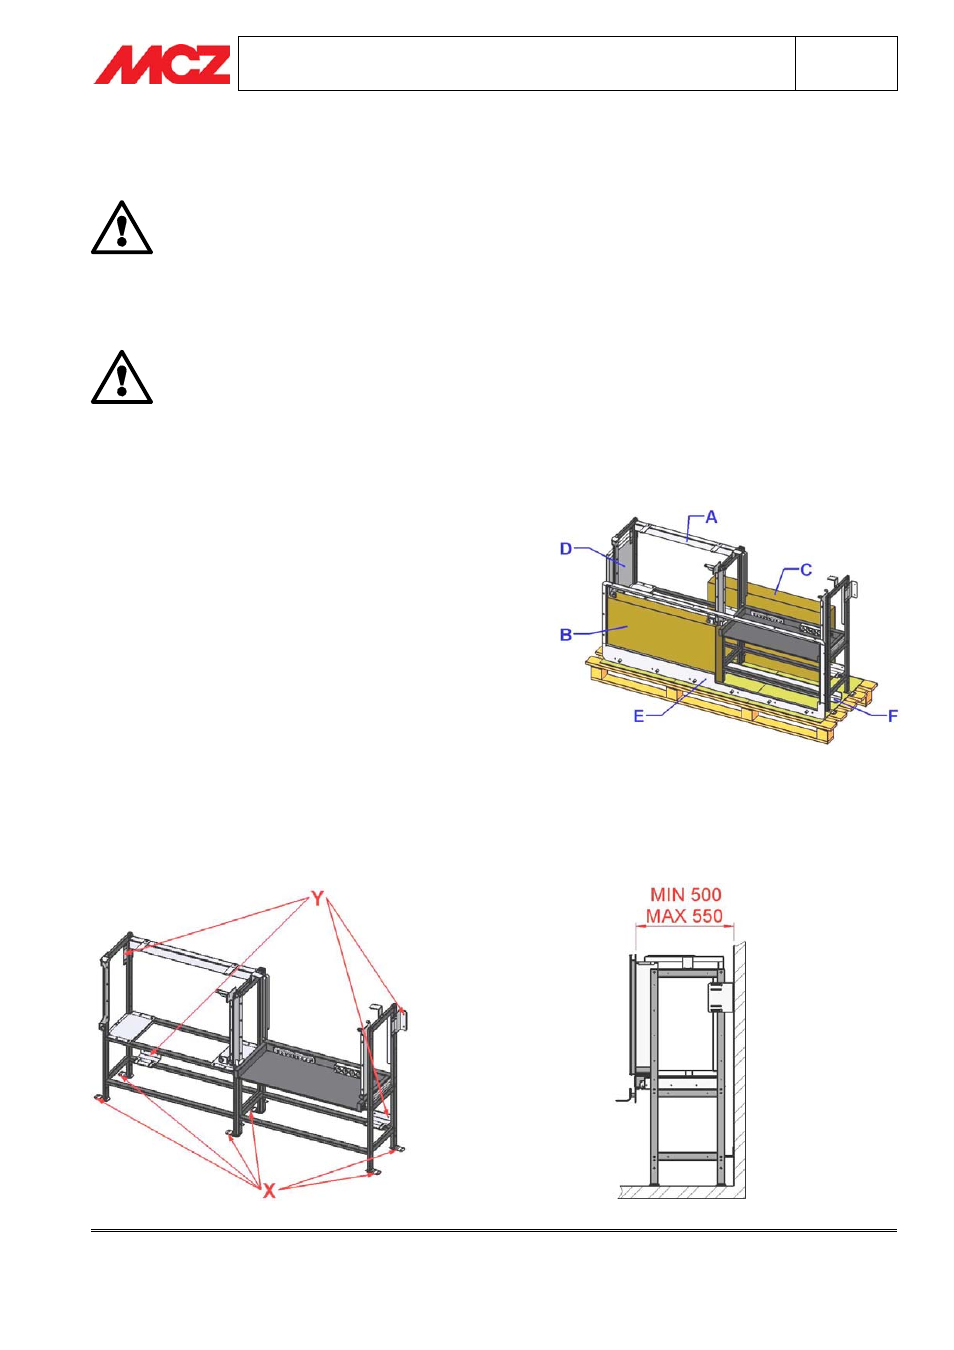
The cladding is delivered on one sole package containing:
-A: cladding frame (already in the left or right version),
-B: package containing the LCD LOEWE television,
-C: package containing the aesthetic glass,
-D: package containing the insulating panels,
-E: aesthetic frame,
-F: shelf.
3.2. POSITIONING THE CLADDING FRAME
Position the frame in the place chosen for installation and adjust it to level by screwing and unscrewing the
dedicated feet.
The frame is to be secured to the floor and wall or only to a wall, Mcz recommends always securing the frame in
the lower part (floor or wall) and the upper part.. To anchor the frame to the floor secure brackets “X” using the
apposite brass plugs and screws supplied. To anchor the frame to the wall secure brackets “X” using the apposite
brass plugs and screws supplied.
Example of cladding left