6goal net assembly, Rebounder set-up – Crivit FT-1400 User Manual
Page 6
6
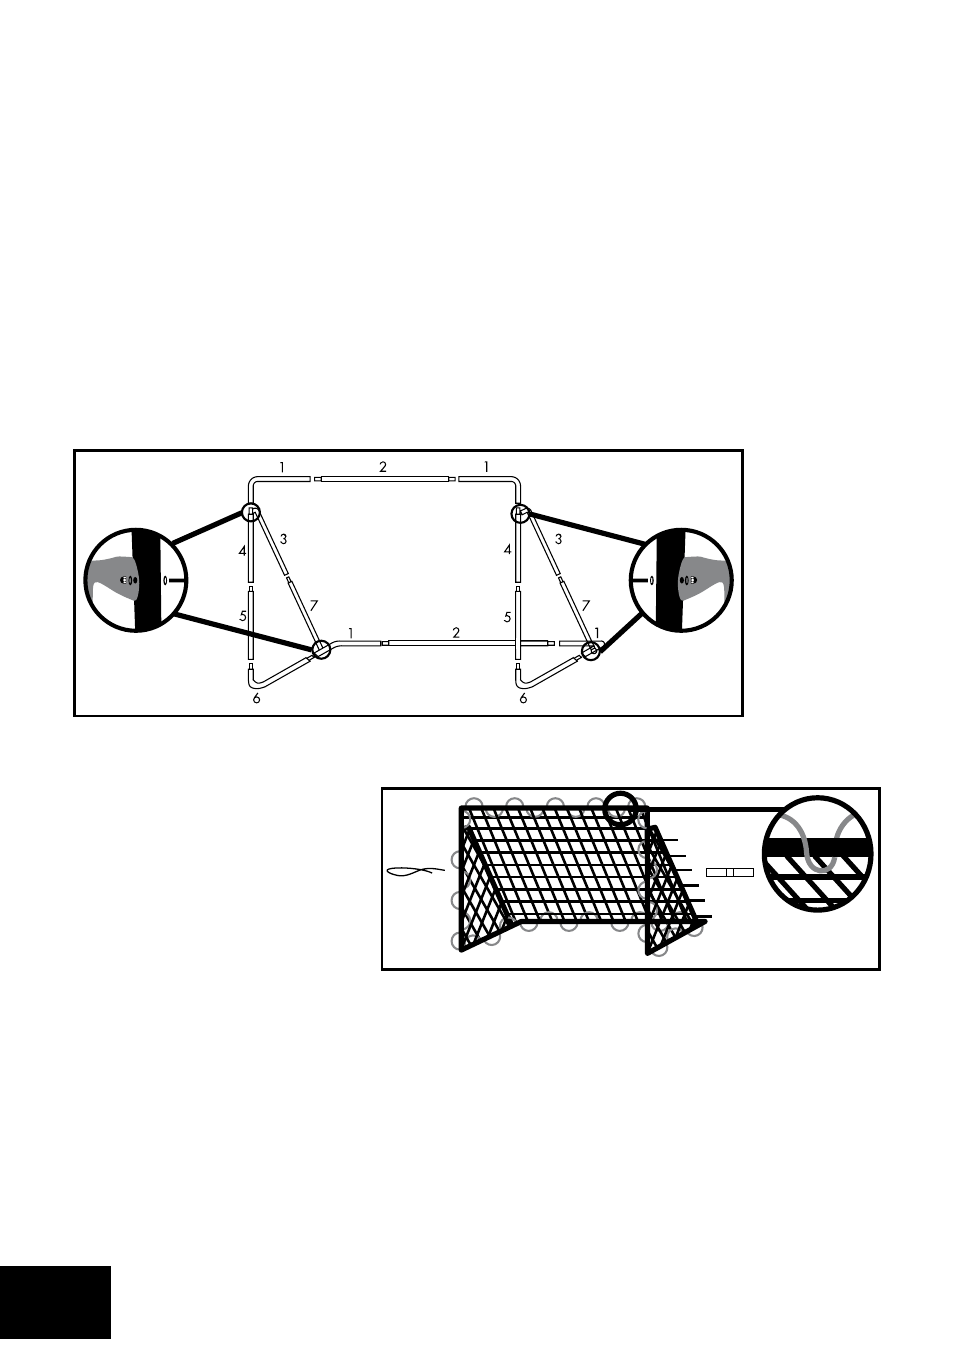
Goal net assembly
Hook the net onto the assembled
goal frame, then move it to the
correct position. The red flags
mark the top corners of the goal.
Secure the net using the
preinstalled hook-and-loop
fasteners on the crossbars
(3, 7).
Use the additional hook-and-loop fasteners to secure the net on the goal in the desired
position to allow the net to then be secured to the goal frame using the ropes.
Please refer to fig. 2 for the rope allocation. Secure one end of a rope to the goal frame.
Then feed the rope through a loop and wrap around the goal frame between the loops.
Finally, secure the end of the rope on the goal frame again.
rebounder set-up
note:
Carry out the construction process with 2 persons.
• Frame set-up
Connect the tubing as numbered (see fig. 1).
When connecting the parts be sure the safety catches are securely seated the
openings.
• Screw in the marked parts as illustrated, using the included screws and washers.
note:
• The screw head must face the inside of the goal to prevent injuries!
• If the locking pins cannot be pushed in to enable the connection of the pipe sections
together with one other, press the pin‘s locking device into the right position within the
pipe.
fig. 2
fig. 1