Make electrical connections, Install decorative flues – Electrolux PL36WC50EC User Manual
Page 8
- 9 -
MAKE ELECTRICAL CONNECTIONS
WARNING: Electrical wiring must be done by a qualified person(s) in accor-
dance with all applicable codes and standards. This range hood must be
properly grounded. Turn off electrical power at service entrance before wir-
ing.
1. Remove the wiring box cover. Remove a knockout from the wiring box.
2. Secure the conduit to the wiring box through a conduit connector.
3. Make electrical connections. Connect white to white, black to black and green to
green.
4. Replace wiring box cover and screws. Make sure that wires are not pinched
between cover and box.
FIG.13
WIRING BOX
COVER
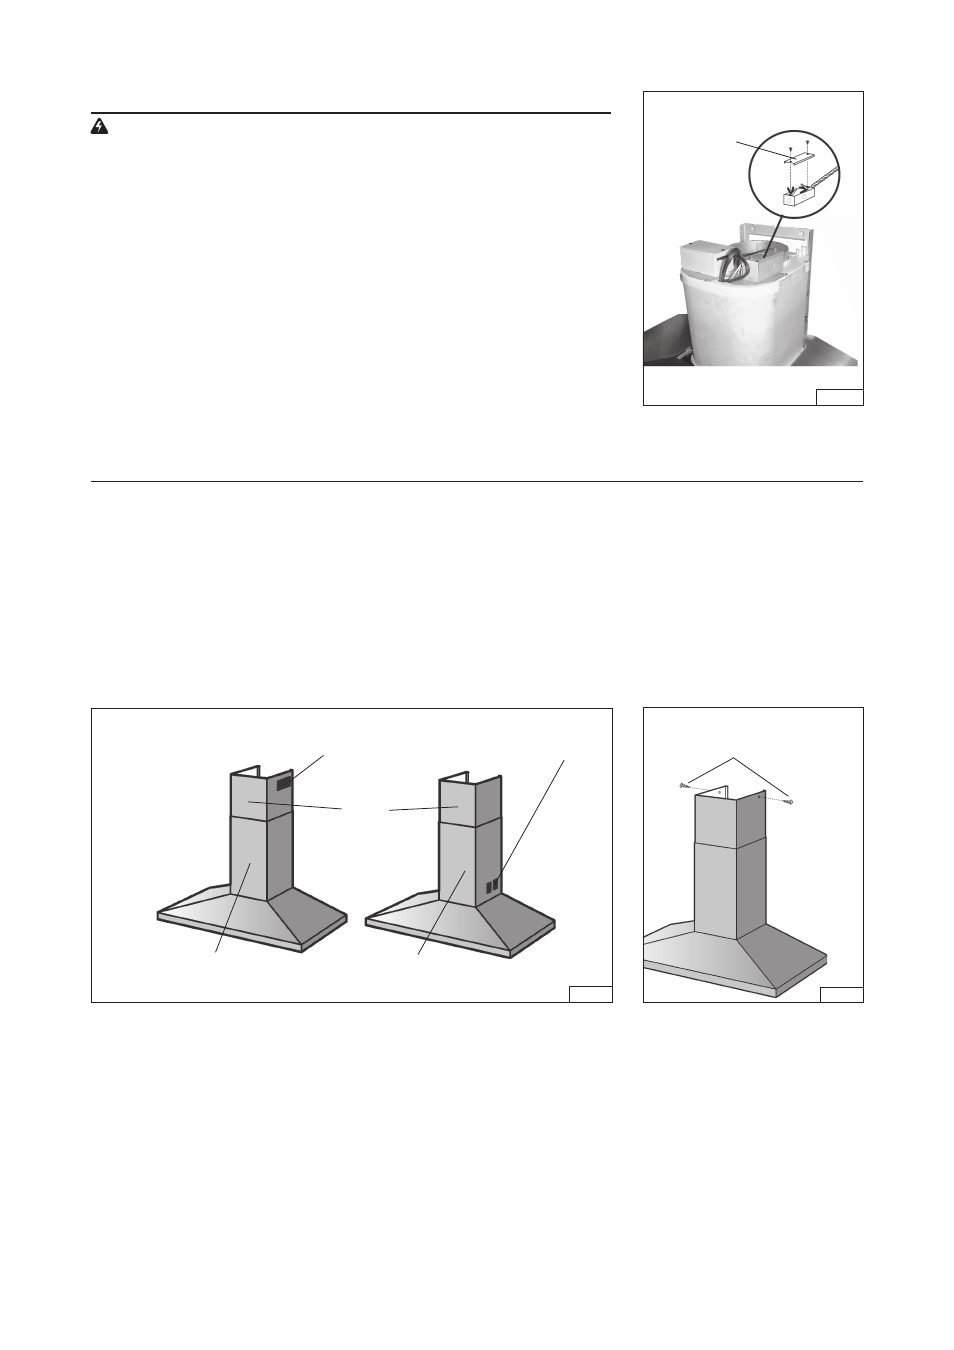
INSTALL DECORATIVE FLUES
1. Carefully place the decorative flue on the hood. Fig. 14.
- On ducted installation in rooms with 8-foot ceilings, the air vents are concealed. Install the flue with the air vents down.
- On non-ducted installations in rooms with 8-foot ceilings, the air vents are exposed. Install the flue with the air vents
up.
- On ducted and non-ducted installations in rooms with 9-foot ceilings, the vents are exposed. Install the flue with air
vents up.
ROOMS WITH 10-FOOT CEILINGS (DUCTED HOODS ONLY)
Rooms with 10-foot ceilings require flue extension model FXWC50EC available from your local dealer.
Discard the upper flue supplied with the product. Replace it with the flue extension.
2. Raise the upper flue until its holes align with holes in the flue mounting bracket (located on ceiling). Fig. 15.
3. Secure the upper flue with (2) 3.9x9.5mm mounting screws. Fig. 15.
LOWER
FLUE
FIG. 14
UPPER
FLUE
UPPER FLUE
VENTS EXPOSED
LOWER
FLUE
UPPER FLUE
VENTS
CONCEALED
3.9x9.5mm
MOUNTING SCREWS
FIG.15