Installation and network configuration, Mounting, Connection of lan cable – Eiki PJNET-30 User Manual
Page 7
Pj-to NetDIrector
QUICK SETUP GUIDE
ENGLISH
Setting up
Installation and network configuration
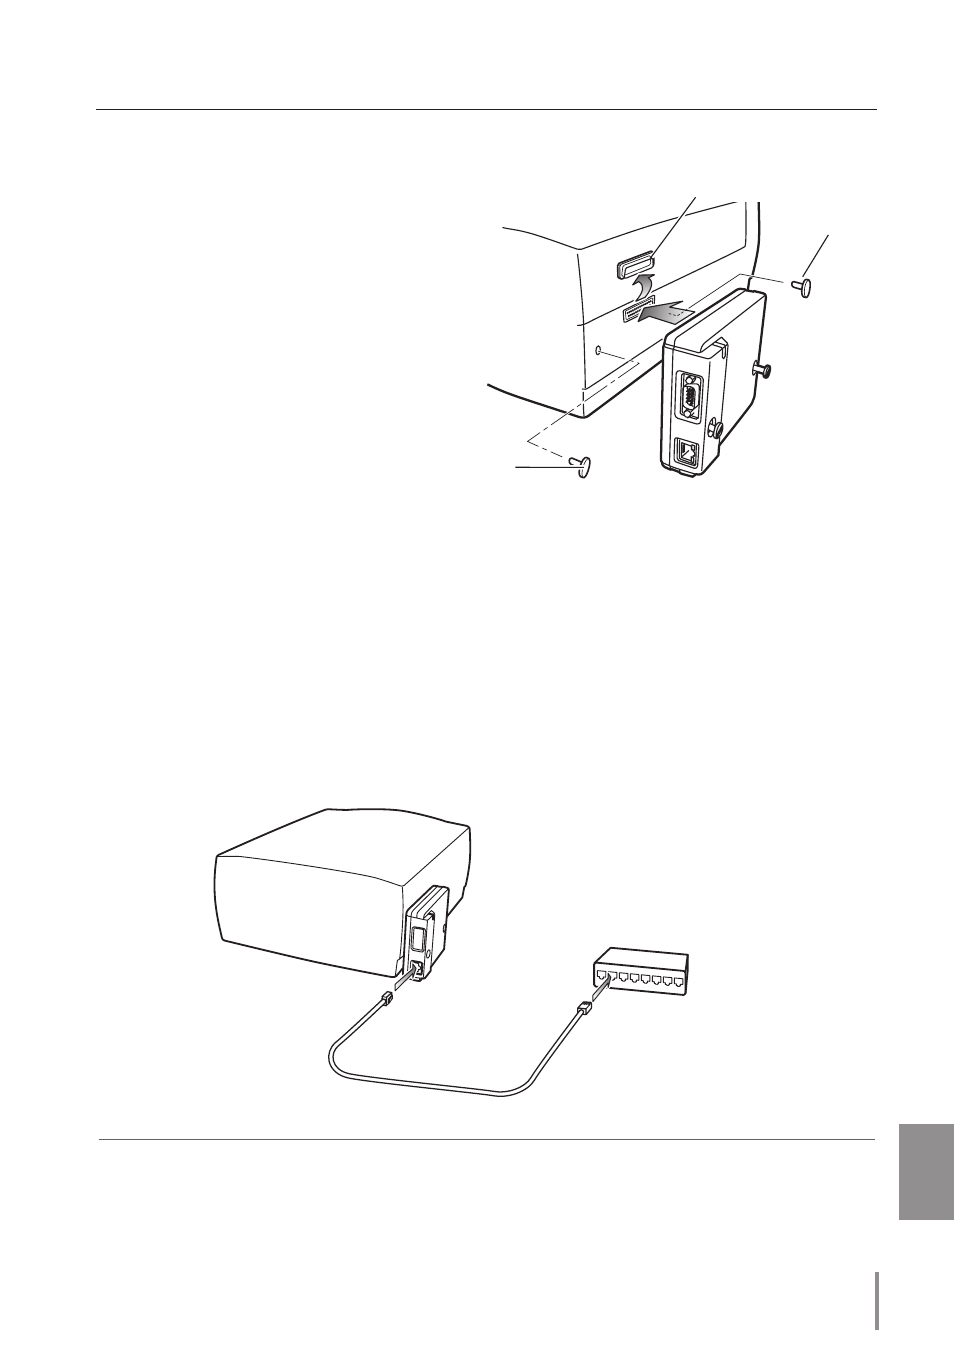
Mounting
1
Disconnect the AC plug from the projector.
2
Remove the connector cover and screw
covers (2 pieces) from the projector and
insert plug on this product to the option
connector.
3
Tighten two screws by using a coin etc.
Connection of LaN cable
To connect to the network, it is required to use the UTP (Unshielded Twisted Pair) straight cable
with RJ-45 plug. There are two different types of cables depending on whether the network is
constructed with 10Base-T or 100Base-TX. Prepare the Hub (10Base-T or 100Base-TX) to distrib-
ute the network cable if required.
1
Disconnect the AC plug from the projector.
2
Connect the UTP straight cable to the LAN port on the network unit.
3
Connect the UTP straight cable to the hub.
✐
AC cord must be disconnected when mounting or removing this product otherwise it may dam-
age the product.
✐
Use the UTP cross cable when you connect the computer and projector directly not using the hub.
✐
When you connect the projector into the 10Base-T network, use cable with category 3 or 5. When
you connect the projector into the 100Base-TX network, use cable with category 5.
✐
The length of cable between hub and projector should be less than 100m.
Hub
(10Base-T, 100Base-TX)
UTP straight cable
Projector
Connector Cover
Screw Cover
Screw Cover