Profile accessories, Circle cutting accessories, Setting the working depth – Powerplus POWX093 ROUTER 1500W +12 ROUTER BITS EN User Manual
Page 8: Fine adjustment
POWX093
EN
Copyright © 2013 VARO
P a g e
| 8
www.varo.com
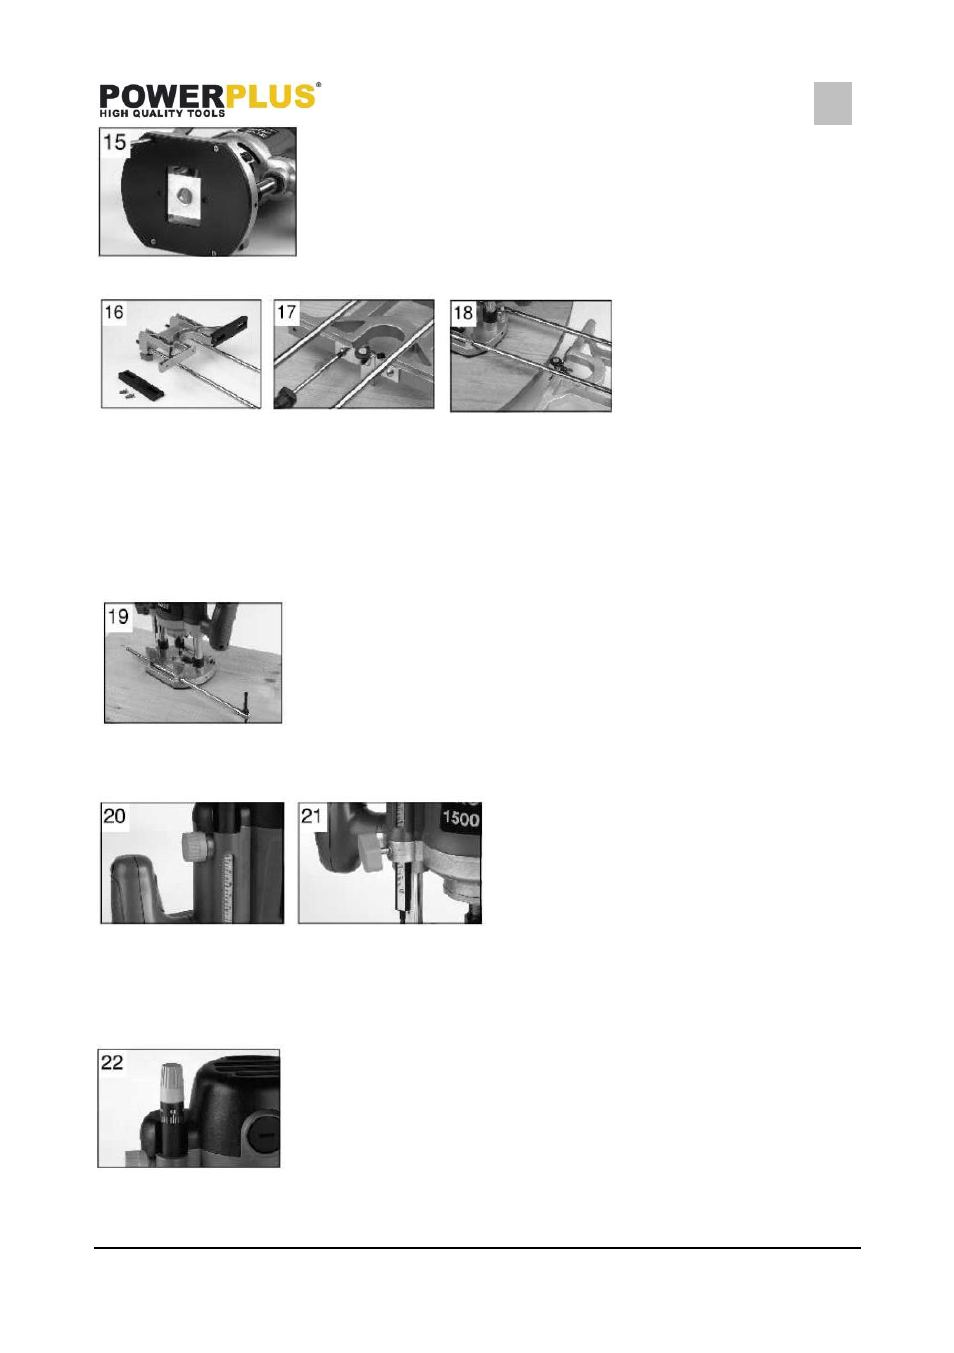
place it in the recess (14). Align the holes in the plastic base
with the threaded holes in the casting and tighten the four
cross-head screws (15). Re-install the dust-extraction
components and secure it with bolts and nuts.
6.7
Profile accessories
The accessories can be used for work on profiled workpieces such as the head of a bed and if
you wish to repeat the outside profile further towards the inside. Take the parallel guide.
Loosen and remove the four cros>head screws attaching the plastic guides (16). Remove the
plastic guides and keep them in a safe place for further use. Locate the profile accessories
and position this casting (17). Secure it with two cross-head screws. Push the parallel guide
into the machine base. Select the right cutter head for this job. Position the workpiece carefully
and begin cutting (18).
6.8
Circle cutting accessories
Accessories for cutting
circles are also supplied. These allow you to cut perfect circles in
workpieces. Attach one of the parallel guide rods in the machine
base (19). Mount the circle-cutting accessory at the other end. You
can attach this accessory to any position on the guide rod. Position
the tip of the circle-cutting accessory at the centre of your circle.
Press it slightly so that the tip is firmly in the wood. You can now
cut the circle.
6.9
Setting the working depth
To set the cutting depth, release the plunger locking lever and press the cutter downwards
until the desired depth is reached. Then re-lock the lever (Locking lever for cutting machine
body). To set the cutter to a fixed depth, set the depth stop (20) and secure it with the knob
(21).
6.10
Fine adjustment
When the approximate depth is set, you can make fine adjustments
by means of the fine-adjustment knob {22). To adjust, turn it in
clockwise or anticlockwise direction.