Chapter 1: getting ready, Out-of-range samples – Casio EA-100 Getting Ready User Manual
Page 9
9
Chapter 1: Getting Ready
Area 3 (Sampling Status Area)
The indicators in this area shows the current data sampling status. READY
means the data analyzer is ready and standing by for data sampling, SAM-
PLING indicates that a sampling operation is in progress, and DONE means
that the sampling operation is finished. All three of these indicators flash in
the Setup Mode.
Area 4 (Mode Area)
These indicators show the current operating mode of the data analyzer. The
DATA-LOG, INTERNAL, or MULTIMETER indicator appears when the corre-
sponding mode is entered. No indicator is shown when the data analyzer is
in the Communications Mode.
Area 5 (Data/Output Unit Area)
This area shows the sampled data values and error codes. The indicators on
the right include unit (meters,
Ω
, seconds, etc.) indicators and a low battery
indicator.
• Keep in mind that Area 1 shows the unit used by the probe for sampling,
while Area 5 shows the unit used for displayed or output values, so the
two areas may indicate two different units. When the temperature probe
is used, for example, Area 1 will indicate Ohms (
Ω
) as the unit because
the probe uses a thermistor to measure temperature as a change in
resistance. Area 5, on the other hand, will indicate
°
F or
°
C, because this
is the unit used to represent the displayed value.
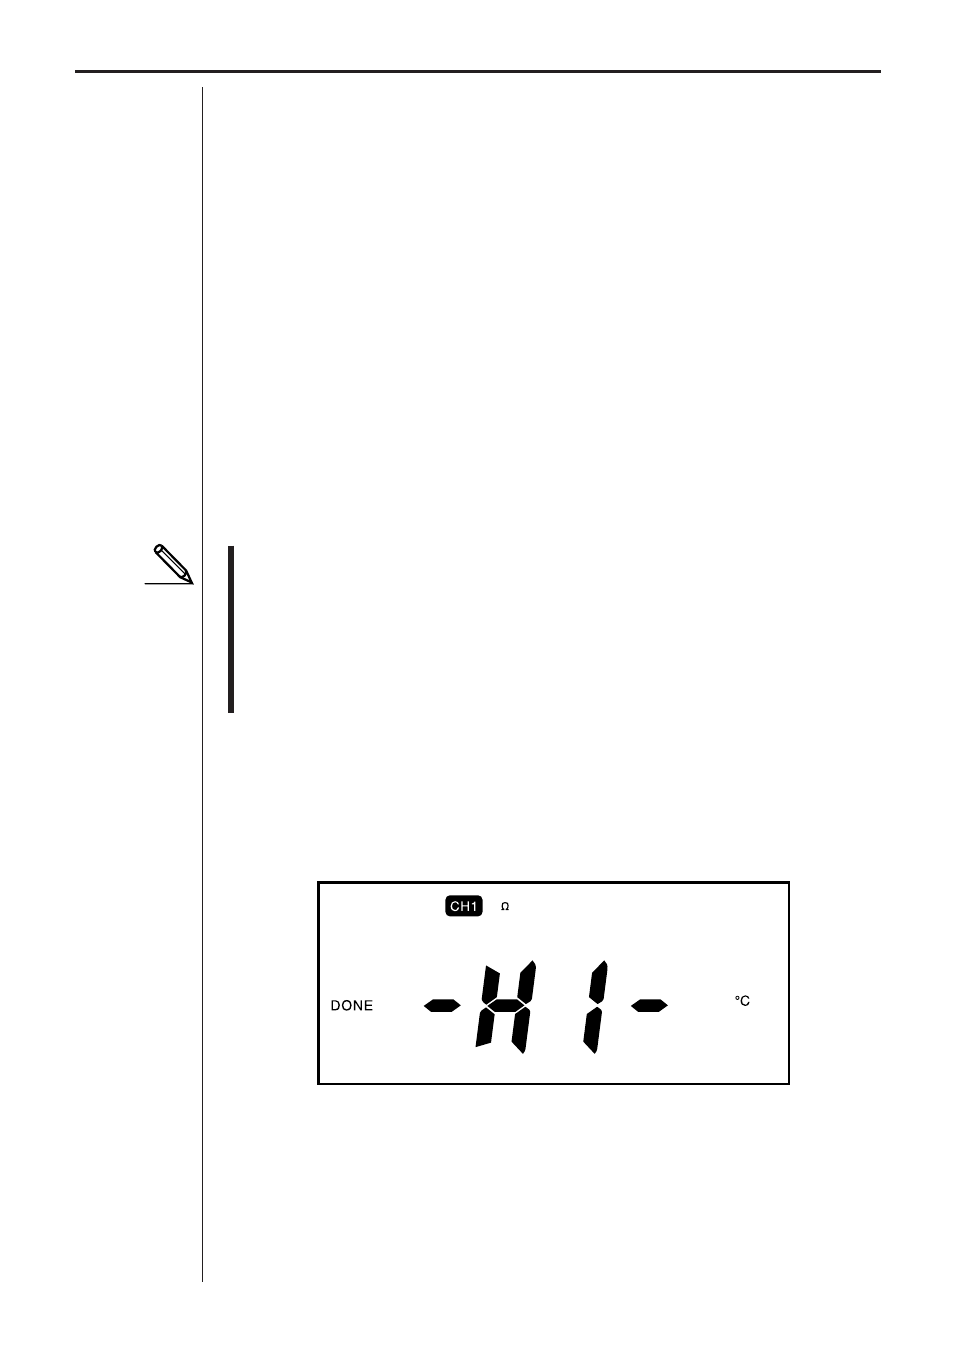
Out-of-Range Samples
Samples that exceed the allowable range for a particular probe are indicated
on the display as shown below. This sample display shows the out-of-range
message for temperature measurements.
•
Voltage: Greater than 10V
•
Temperature: Greater than 130
°
C
•
Light: Greater than 999