Using the stand, Using the two slots for wall mounting, Ac power supply – Curtis SRCD159PL User Manual
Page 6: Installing the remote control battery, Precautions when using batteries, Sourc e
Using the stand
The stand is already fixed to the unit
Using the two slots for wall mounting
Remove the stand from the unit by pressing the two clips downwards and sliding the stand
back. Use screws (not supplied) and the two slots at the back of the unit to mount the unit
on a wall.
AC power supply
Insert the AC adapter into a 120V AC ~ 60Hz mains outlet and the other end of the cord into
the DC jack on the back of the unit.
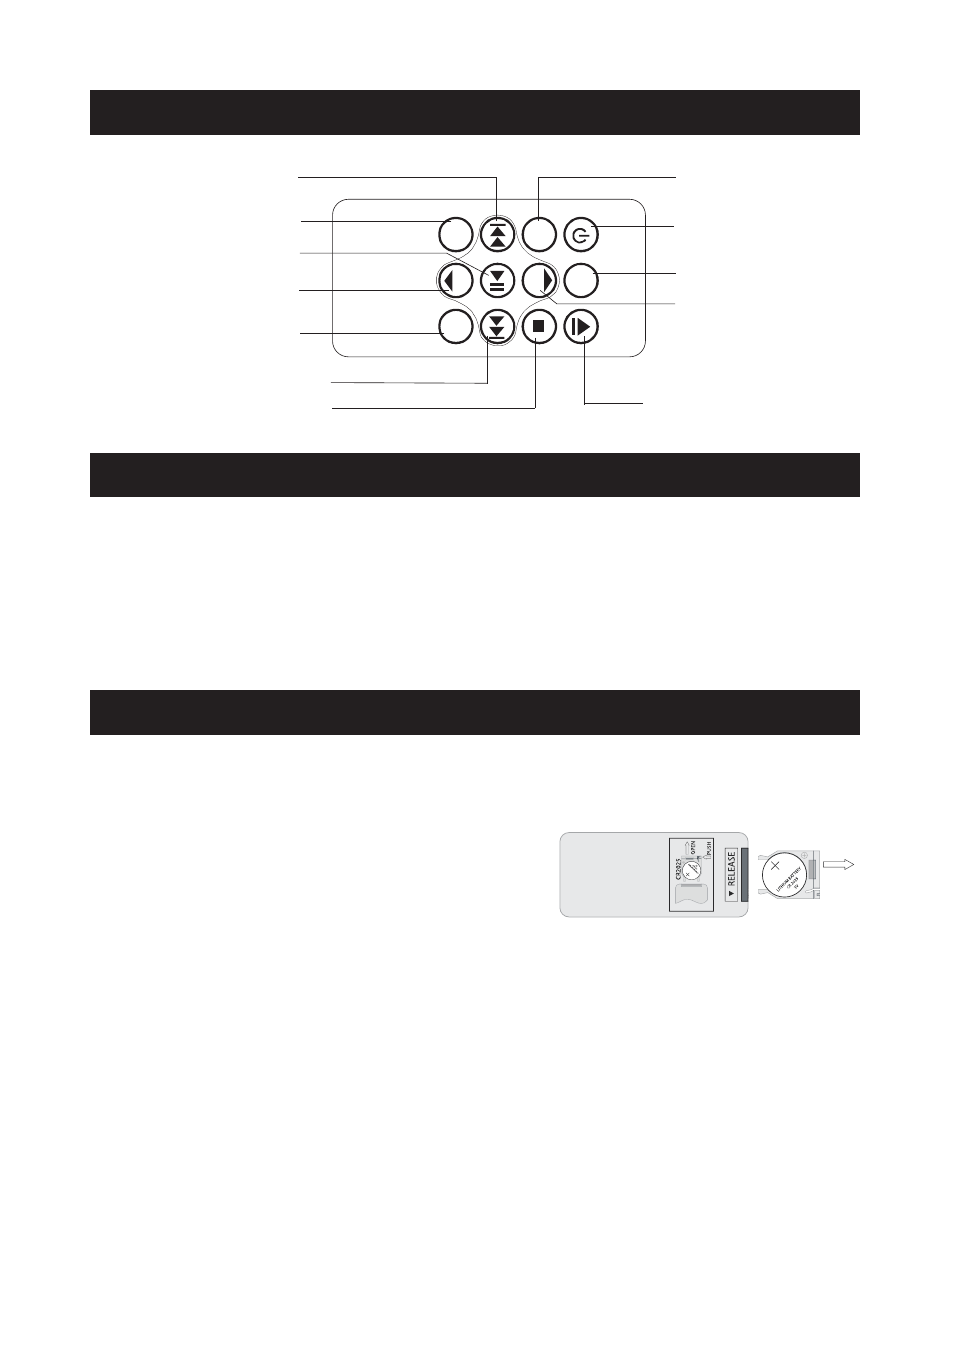
Installing the remote control battery
1. Remove the battery compartment cover on the
back of the remote control, by pushing the tab to
the right while removing the cover.
2. Insert a 3V lithium battery (CR2025 or equivalent)
following the polarity (+) as shown on the diagram inside the compartment.
3. Replace the battery compartment cover.
Note: The remote control battery normally lasts for about one year, although it
depends on how often the remote control is used.
If the remote control is not working properly, replace the battery.
Precautions when using batteries
1. CAUTION: Danger of explosion if battery is not inserted correctly. Replace only with the
same or equivalent type.
2. Do not mix different types of battery together (e.g. alkaline, rechargeable and standard
(carbon zinc) or old batteries with fresh ones.
3. Exhausted batteries must be removed to prevent possible leakage.
4. Dispose of batteries properly in accordance with the environmental regulations in force.
DESCRIPTION OF THE REMOTE
INSTALLATION
POWER SUPPLY
SOURC
E
BAN
D
VOL
PRO
G/
REPEA
T
M
EM
VOL
SOURCE BUTTON
ON/STANDBY BUTTON
BAND SELECT BUTTON
SKIP / TUNE BUTTONS
SKIP / TUNE BUTTON
SKIP DOWN / TUNE DOWN
SKIP UP / TUNE UP
REPEAT BUTTON
PLAY / PAUSE BUTTON
STOP BUTTON
VOLUME BUTTON
VOLUME DOWN
VOLUME BUTTON
VOLUME UP
DOOR OPEN /CLOSE BUTTON
MEM+ (M+) BUTTON
MEM- (M-) BUTTON
M
+
M
-
PROG. (PROGRAM) BUTTON
MEM. (MEMORY) BUTTON
STA
ND
BY
OP
EN
/CL
OS
E
CR2025
OPEN
5