ShoreLand'r TA1066 User Manual
Page 2
Midwest Industries, Inc.
Ida Grove, IA 51445
800.859.3028
www.shorelandr.com
0003600
Page 2
11/17/05
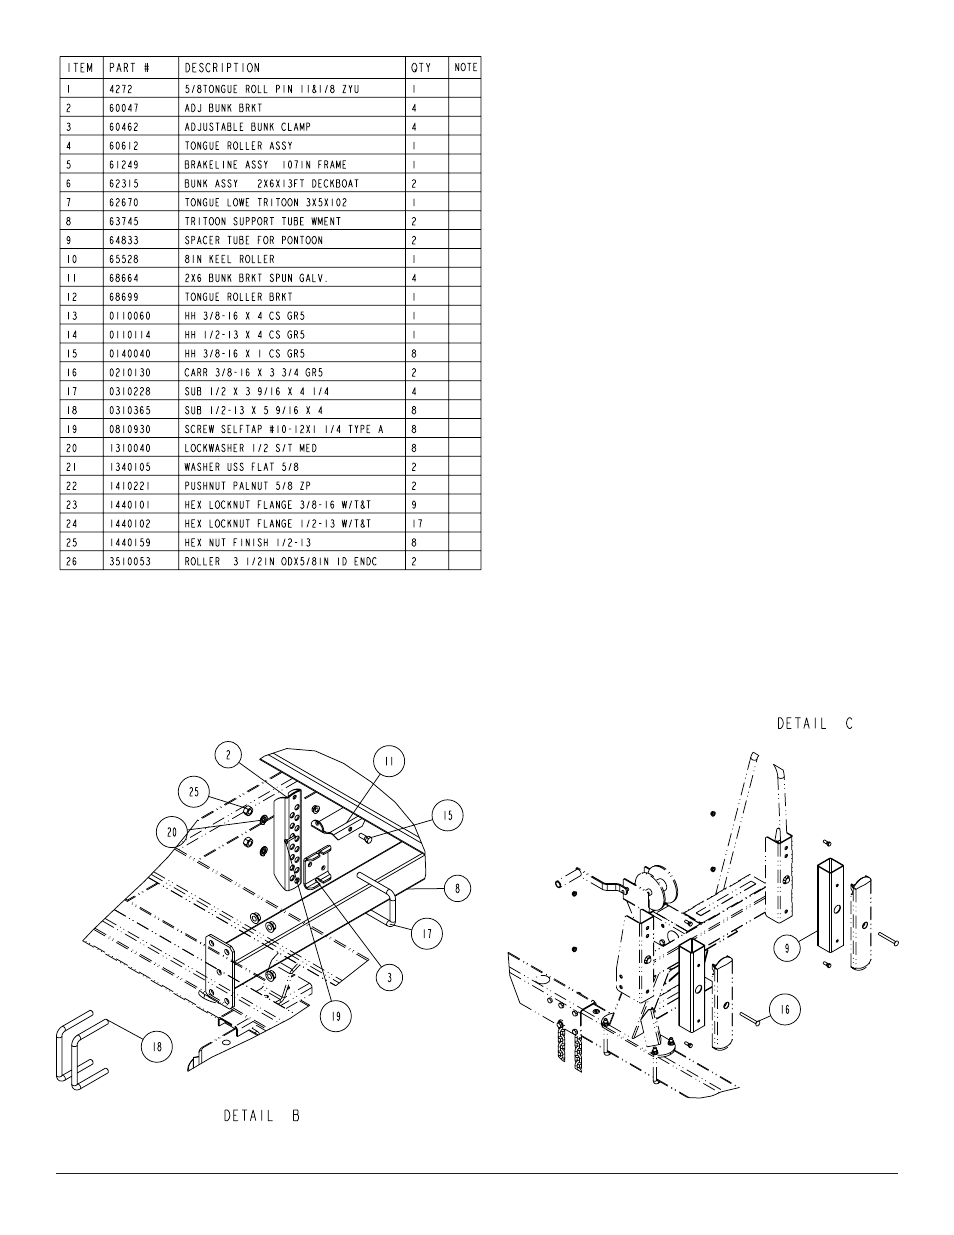
INSTALLING THE NEW TRITOON TONGUE
Insert the new Tritoon tongue into the frame where the tongue was
just removed. Note that this tongue is cut at the opposite angle
and will extend out the rear of the tongue channel when properly
installed. Align the holes in the tongue with the holes in the tongue
channel.
Secure it in place by using the ½” x 4” cross bolt and ½” x 1-½” hex
bolt removed while disassembling the old tongue. Secure with ½”
flange lock nuts. Tighten.
Uncoil the 107” brake line supplied in the kit, and then insert it into
the front of the tongue until it comes out the rear of the tongue.
Locate the longer wire harness supplied in the kit. Insert the end
with the mating plugs to the frame harnesses into the hole in the top
of the tongue, and then route it backwards through and out the rear
of the tongue. Mate the plugs with the side frame harnesses and
plug together. Insert the rubber grommet around the wire harness
where it comes out of the top of the tongue. Attach the white ground
wires to the frame using the screw removed when disassembling
the old tongue.
Locate the actuator removed earlier. Thread the brake line inserted
into the tongue in step 3 into the port in the rear of the actuator.
Tighten.
Position the actuator on the tongue. Secure it in place with the 1/2”
x 4” hex bolts removed from the other tongue. Secure in place with
½” flange lock nuts. Tighten.
Carefully form the rear of the brake line coming out the rear of the
tongue so it can mate to the coupling attached to the side frame
brake line. Thread the brake line into the coupler. Tighten.