ShoreLand'r SLB40TCBXLW User Manual
Page 13
Midwest Industries, Inc. Ida Grove, IA 51445 800-859-3028
www.shorelandr.com
0004263
Page
13
of
14
9/24/2010
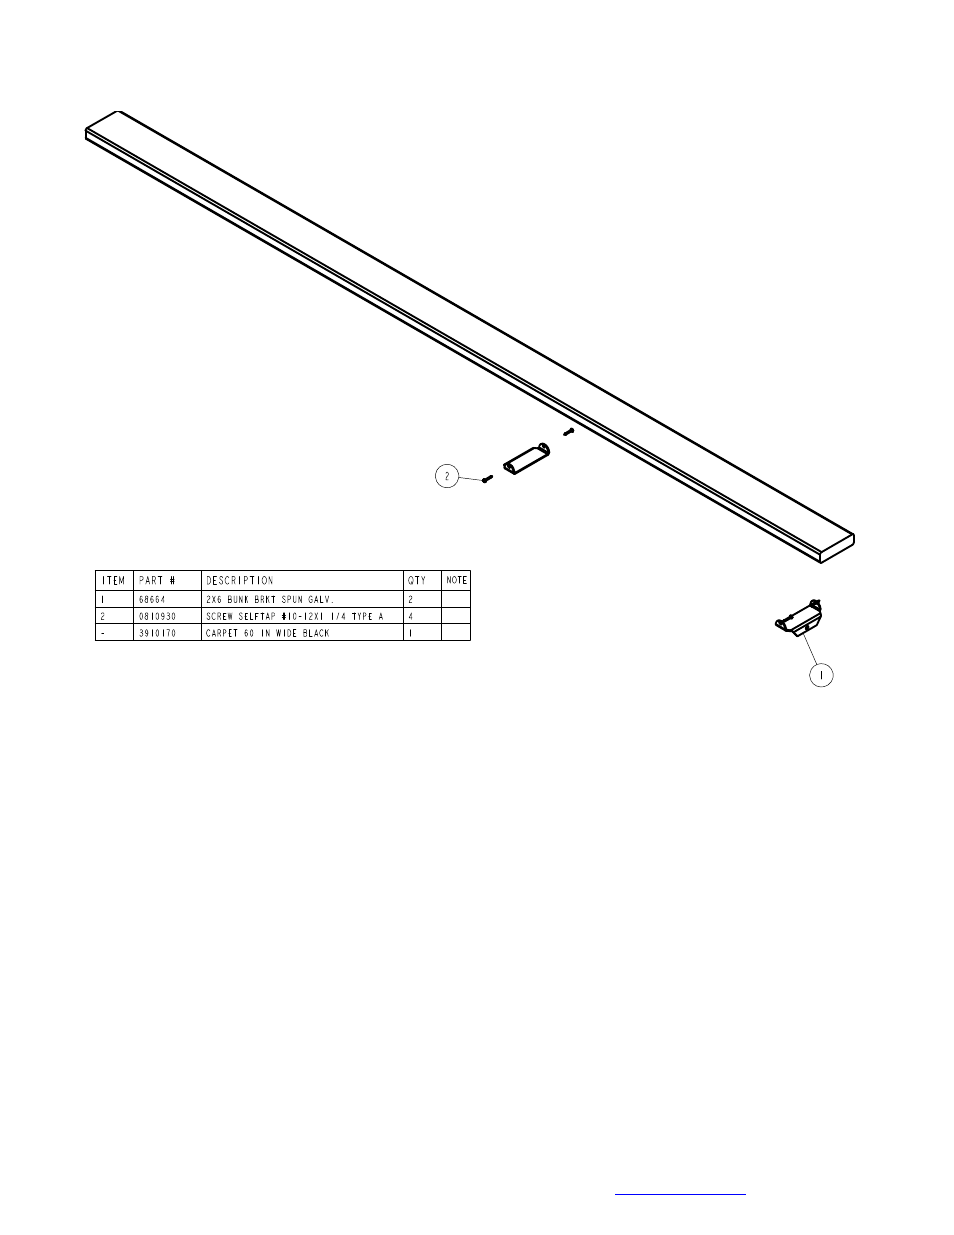
B-SERIES BUNK ASSEMBLY
Locate the two 2 x 6 bunk assemblies. Note that the
bunk mounting brackets are assembled to the bunks at
the factory. Place the end with the two brackets towards
the rear of the trailer. Place the assembly on the
equiload bunk arm and secure by placing a 3/8” x 1” hex
bolt through the bracket on the bunk and the ear on the
end of the equiload arm.
Secure in place using a 3/8” lock nut. Repeat on the
other end of the arm. (See Diagram A).
Place the other end of the bunk in the bracket installed
on the front cross member. Note that this bracket is not
attached to the bunk because the trailer can be adjusted
to two different lengths. Once the proper position for the
rear crossmember is determined, the front of the bunk
can now be attached to the bracket using two- No. 10 x
1-1/4” self tapping screws as shown in Detail B.
The 3/8” x 1” bolts attaching the bunks to the
equiload arms and front bunk bracket can be
tightened but not over tightened.
The bunks must be allowed to rotate slightly to
conform to the boat bottom once the boat is set on
the trailer.