ShoreLand'r SLB18LN V.1 User Manual
Page 4
Midwest Industries, Inc. Ida Grove, IA 51445 800-859-3028
www.shorelandr.com
0003693
Page
4
of
12
Rev
A
4/26/2011
WIRE HARNESS
Locate the wire harness. Push the two triangular plugs in the
hole on the top of the tongue, then out the rear of the tongue.
Place the wire harness through the hole in the tongue cover
plate. (See Detail A) Secure the tongue cover plate in position
with a 1/2” X 1-1/2” hex bolt and 1/2” lock nut. Tighten. Plug the
tongue wire harness ends into the frame harnesses by matching
colors and ends. Push the extra wire into the rear of the tongue
or remove the grommets in the side frame and place the extra
wire in the side frame. Replace grommets just removed.
TONGUE
The tongue comes shipped separate of the frame. Locate and
slide the tongue in the front tongue channel. Line the holes in
the tongue with the holes in the tongue channel. Secure with a
1/2” X 4” hex bolt and 1/2” lock nut in the front cross hole.
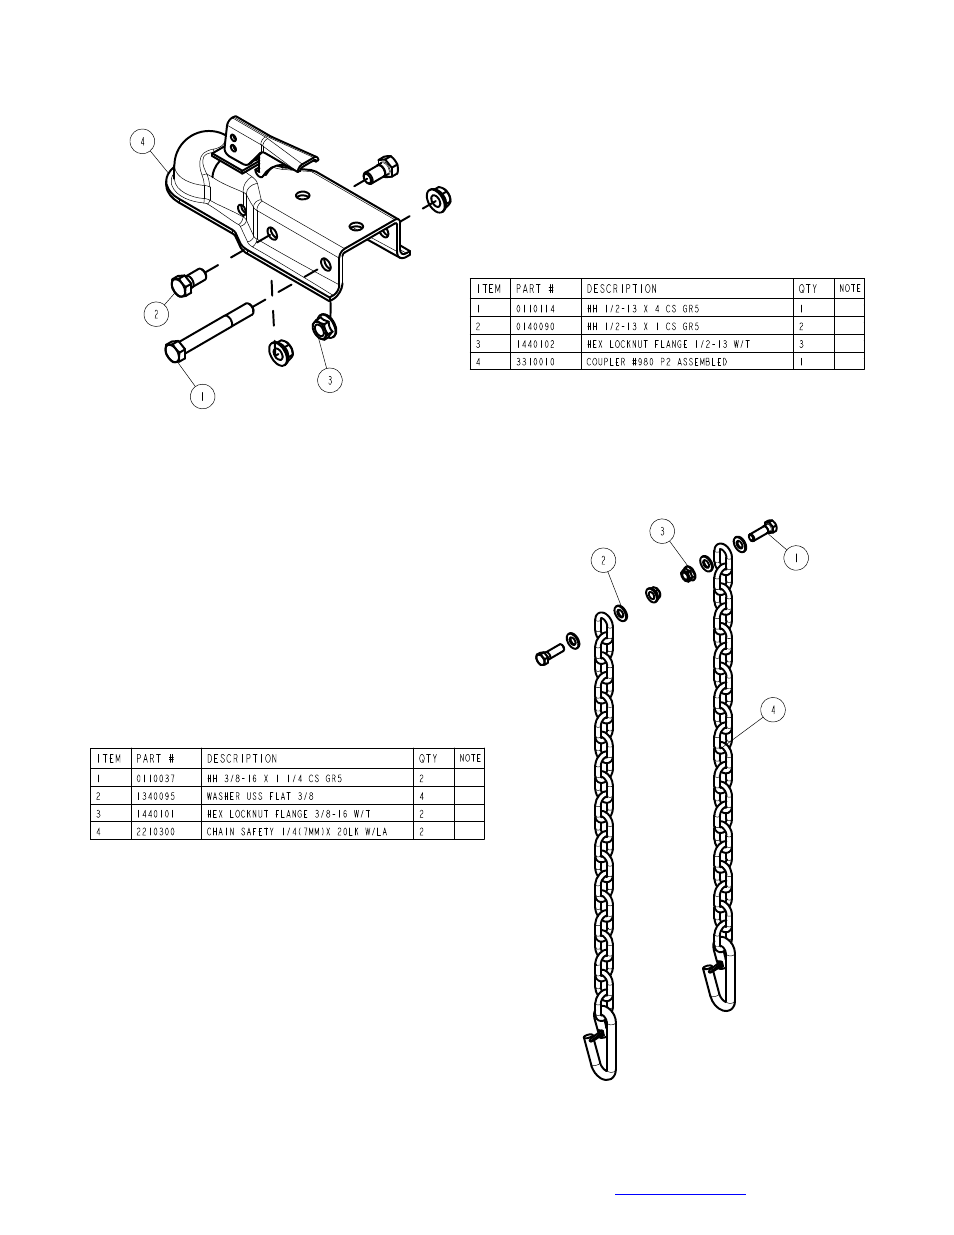
Locate the coupler bag. Place the coupler on the end of the
tongue, align holes and secure with one 1/2” X 4” hex bolts and
hex flange lock nuts in the rear coupler hole. Place two 1/2” X 1”
hex bolts into the front holes of the coupler and secure to the
each side of the tongue with 1/2” flange lock nuts. Tighten.
SAFETY CHAINS
Mount the safety chains to the front of the tongue by placing a
3/8” flat washer onto a 3/8” X 1-1/4” hex bolt, then insert the bolt
through the last link of the safety chain. Put the bolt through the
hole on one side of the tongue as shown. Place on another flat
washer and secure with a 3/8” hex flange nut. Tighten. Repeat
on the other chain on the other side of the tongue.