Epson 5000/5500 User Manual
Page 90
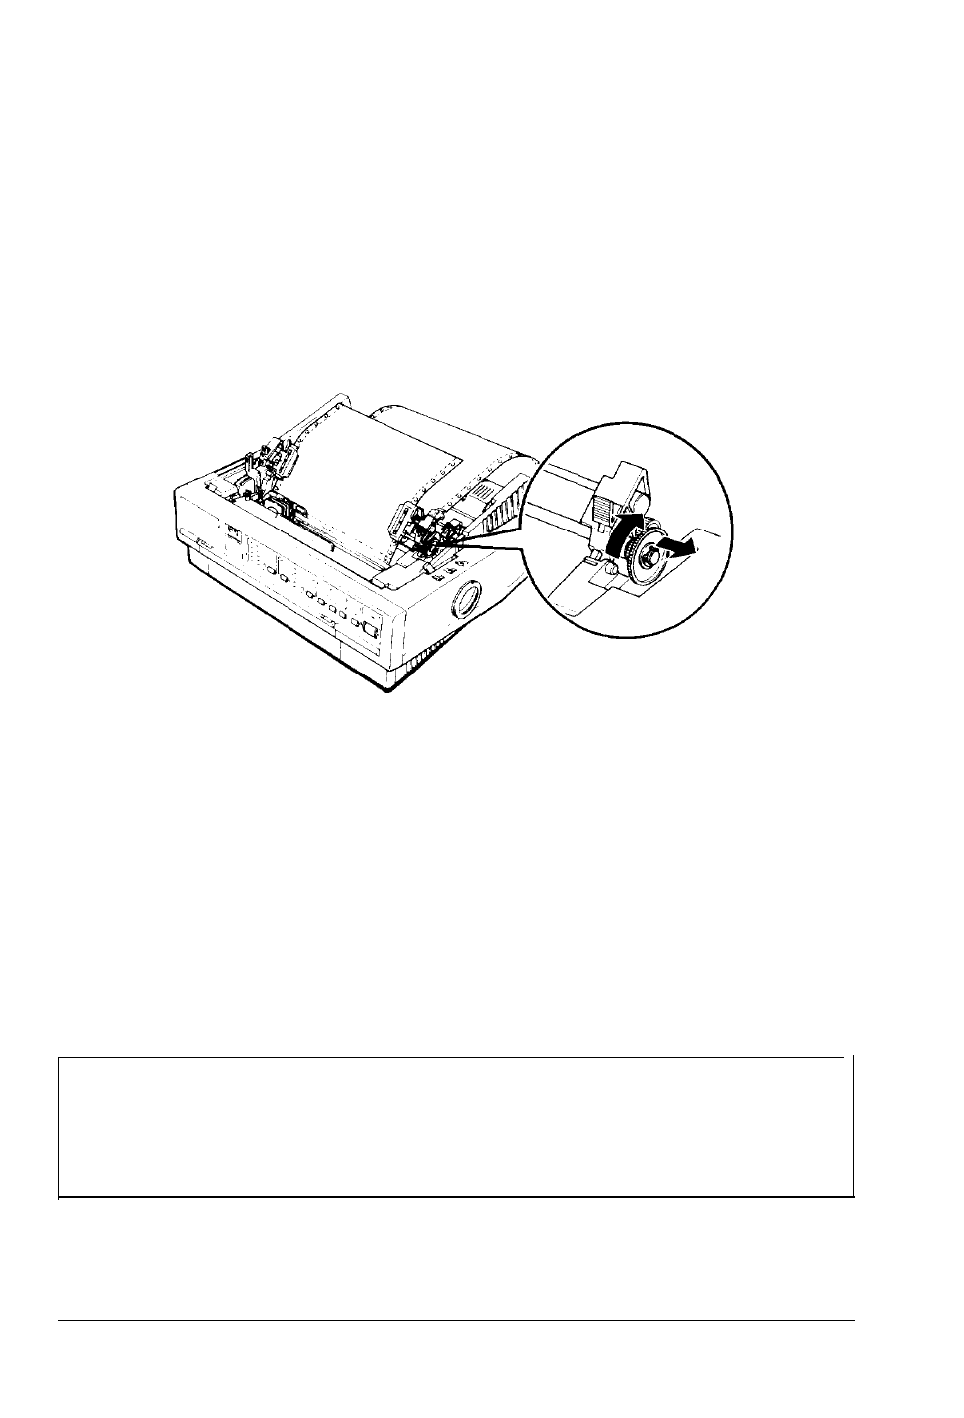
Pull Tractor
6. Move the paper-release lever to the pull-tractor position.
7. Attach the continuous paper to the pull tractor as described in
Chapter 2.
8. Pull out on the gear at the right side of the pull tractor and turn
it to remove any slack in the paper between the push and pull
tractors.
9. Place the notches on the paper guide straight down over the
mounting posts on the printer.
10. Slide both edge guides to the middle of the paper guide. Slightly
lift the paper guide and then lower it until it rests on the
printer.
11. Replace the printer cover by inserting the front tabs into the
slots on the printer and then lowering the cover into place.
Note: When you want to print several pages of continuous
paper, fold the first page forward at the perforation after the
perforation emerges from below the printer cover. This helps the
printer feed the printed pages properly and prevents paper jams.
Using Printer Options
4-13
- Stylus Pro 7800 (11 pages)
- Stylus Pro 4000 (49 pages)
- Stylus Photo R300 (2 pages)
- Stylus Pro 7000 (147 pages)
- AcuLaser C3000 (316 pages)
- Stylus Pro 7900 (24 pages)
- Stylus Pro 4450 (21 pages)
- 1000 (272 pages)
- T034120 (4 pages)
- T580300 (4 pages)
- 300 (91 pages)
- B 510DN (190 pages)
- B 510DN (218 pages)
- Stylus NX510 (8 pages)
- Stylus Photo RX580 (95 pages)
- T549300 (4 pages)
- B 500DN (168 pages)
- AculaserCX11NF (5 pages)
- 480SXU (24 pages)
- 4500 (317 pages)
- STYLUS RX500 (99 pages)
- 2100 (13 pages)
- Stylus NX215 (2 pages)
- T098320 (4 pages)
- T041020 (4 pages)
- R210 (8 pages)
- All-In-One Stylus Photo RX600 (164 pages)
- 777I (53 pages)
- T033120 (4 pages)
- Stylus CX7000F (8 pages)
- 60 (113 pages)
- T034220 (4 pages)
- WorkForce 40 Series (36 pages)
- T054220 (4 pages)
- Stylus CX3200 (11 pages)
- Stylus CX7800 (18 pages)
- T060220 (4 pages)
- 2500 (180 pages)
- AcuLaser CX11N (4 pages)
- AcuLaser CX11N (32 pages)
- 2000P (16 pages)
- T606600 (4 pages)
- Stylus CX6000 (18 pages)
- FS-4000DN (2 pages)
- MSDS T544700 (4 pages)