Teletronics EZMIMO Quick Start User Manual
Page 2
Re-using items (1) and (2) from the safety cap, assemble the
waterproof RJ-45 connector as shown below:
NEMA 4 Enclosure
Safety Cap
2
1
2
3
1
4
5
6
Waterproof RJ-45 Connector Assembly
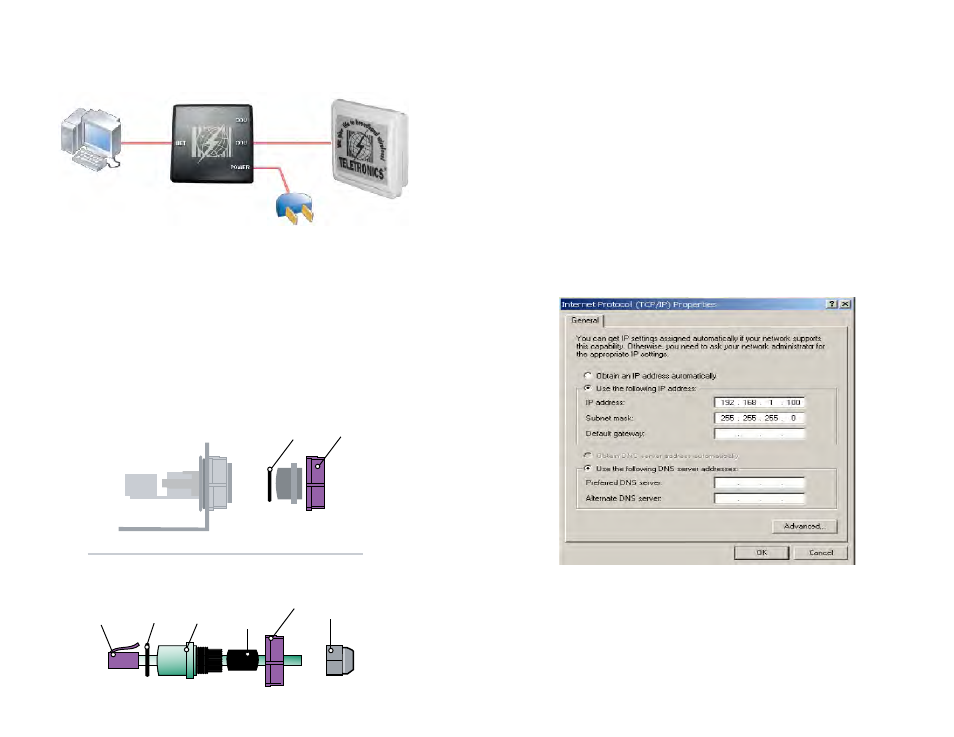
Logging in to the Web Configuration Interface
To access the EZMIMO you need to configure your computer to be in the same
subnetwork as the EZMIMO:
Power on EZMIMO and wait for the unit to finish booting
1.
(may take up to min).
Open the Control Panel (Start Control Panel).
2.
Open Network Connections.
3.
Open Local Area Connection
4.
(or the connection you will be using for the EZPlatform™)
5. Go to Properties Internet Protocol (TCP/IP) and select
5.
‘Use the following IP address’. Configure the IP settings as follows:
IP address: 192.168.1.100
Subnet mask: 255.255.255.0
Click on ‘OK’ in the Internet Protocol (TCP/IP) Properties dialog box.
6.
Click on ‘OK’ in the Local Area Connection Properties dialog box.
7.
To access the web configuration interface, do the following:
Open a web browser (e.g.: Internet Explorer, Netscape Navigator, Mozilla
1.
Firefox, Opera, etc.).
In the address bar of the web browser, type the following address:
2.
http://192.168.1.1
Default Login ID & Password: admin/admin
3.
Hardware and Connection Setup
If you are planning to install the EZMIMO outdoors, you need to assemble the
weatherproof the RJ-45 connector. To do so, follow these steps:
Remove the existing 8P8C connector from the Ethernet cable.
1.
Insert the elements in the Ethernet cable in the order shown below.
2.
Crimp on the provided metallic 8P8C connector to the Ethernet cable.
3.
Attach the resulting assembly to the Ethernet port of the EZMIMO and
4.
tighten the threads.
PoE Module
PC
Ethernet Cable
Ethernet Cable
To DC Power Connection
EZMIMO