Swim'n Play Slim Style Oval Pool User Manual
Page 25
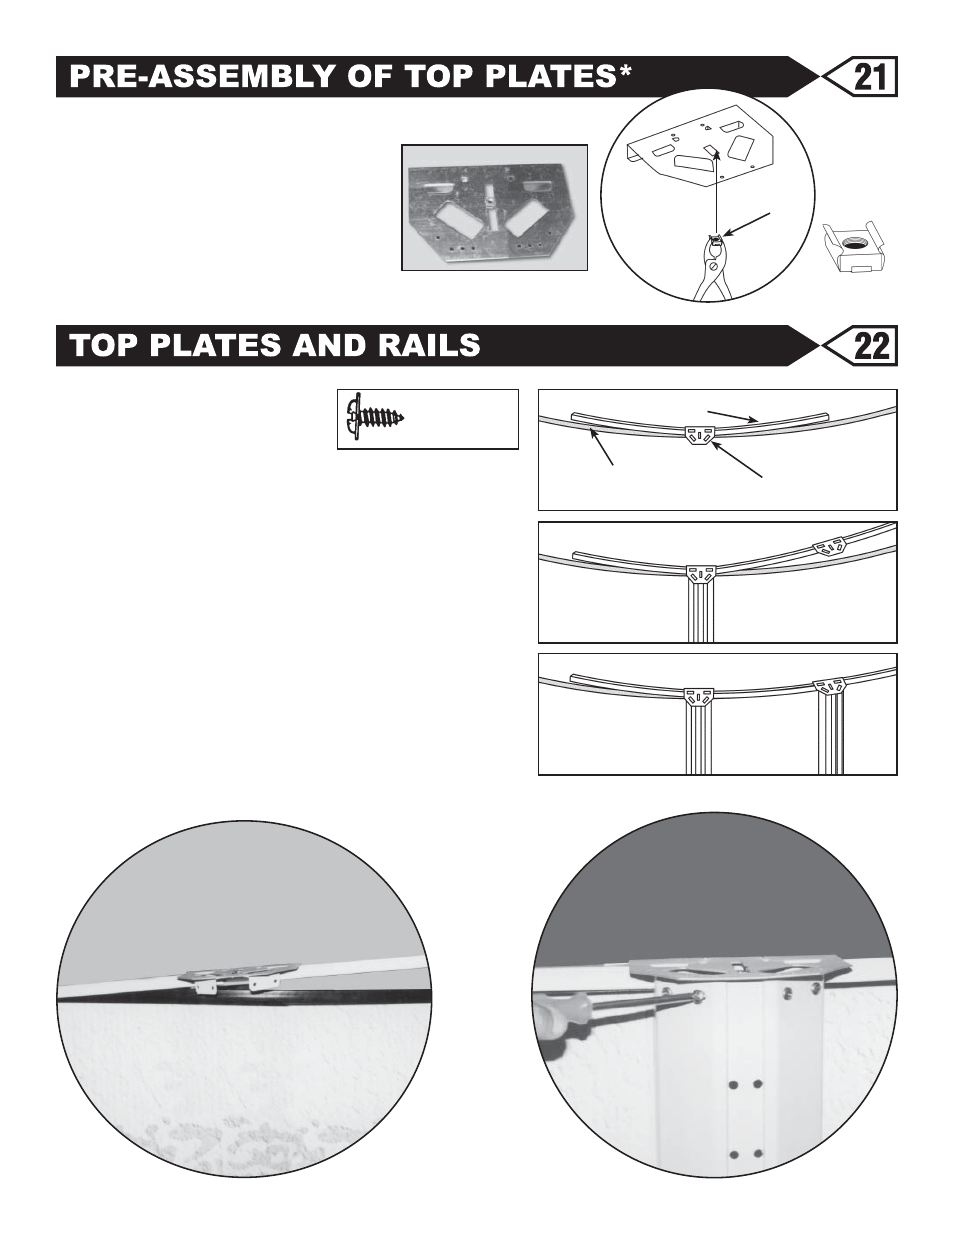
Insert two rails into a plate, in
the same manner and using the
same spacing as you have done
on the bottom rail and plate assembly. Push the rails
and plate assembly onto the plastic edging leaving the
far end in the air.
MAKE SURE THAT THE TOP PLATE IS CENTERED
DIRECTLY ON TOP OF THE BOTTOM PLATE.
Attach the vertical to the top and bottom plate using
the No.12x1/2" Sheet Metal Screws.
Insert the exposed end of a top rail into another
top plate with a top rail inserted into the opposite side.
Push the top plate with rails onto the edging again
leaving the far end of the rail in the air. Continue in
this manner all the way around the pool.
25
No. 12 x 1/2”
Sheet Metal
Screw
PLASTIC
EDGING
RAIL
TOP PLATE
* NOTE: CAGE NUTS NOT NEEDED ON ALL POOLS
- CHECK YOUR PACKING LIST
Before the top plates are installed it
is necessary to attach the cage nuts*
in their appropriate locations as shown
in the figures at right. Using a pliers,
squeeze together the spring sides of the
cage nuts and insert them into the top plate from underneath.
PLIERS
TOP PLATE
CAGE NUT
TOP PLATE WITH CAGE NUT
1/4” CAGE NUT
Note: Use the 42 1/4" Rails on the top straight side of the pool.