Software installation & operation, Continued) – Smart Avi DVR 4X4 User Manual
Page 6
10
11
www.smartavi.com
www.smartavi.com
Macros: This section of the window is used to save and playback macros. Macros are used to store a set
sequence of routes.
To record a macro:
1. Click on the Record button (last button shown above). A blinking “recording” message below this button
will be displayed to indicate that all routes are being recorded.
2. Select the desired cross points. (See Matrix Routing for details on making these routes.) There is no limit on
the number of routes you may record.
3. If you click a macro button while in the record mode, the macro will be executed, and these routes will be
added to the recording. This makes it possible to combine the routes of two or more macros into one bigger
macro.
4. When finished, click the “Save Macro” button. You will be instructed to then click on one of the macro buttons.
Doing this will save the recorded routes to that button.
To cancel saving the macro, click the “Cancel Save” button.
5. To play back a macro, simply click on one of the 50 macro buttons. Use the scrollbar to bring any of these
into view.
6. The macros are automatically saved in the current configuration file. They are also saved when you select
the File/Save Configuration... menu.
To save macros in a separate file for a special purpose, select the File/Save, Macros, menu.
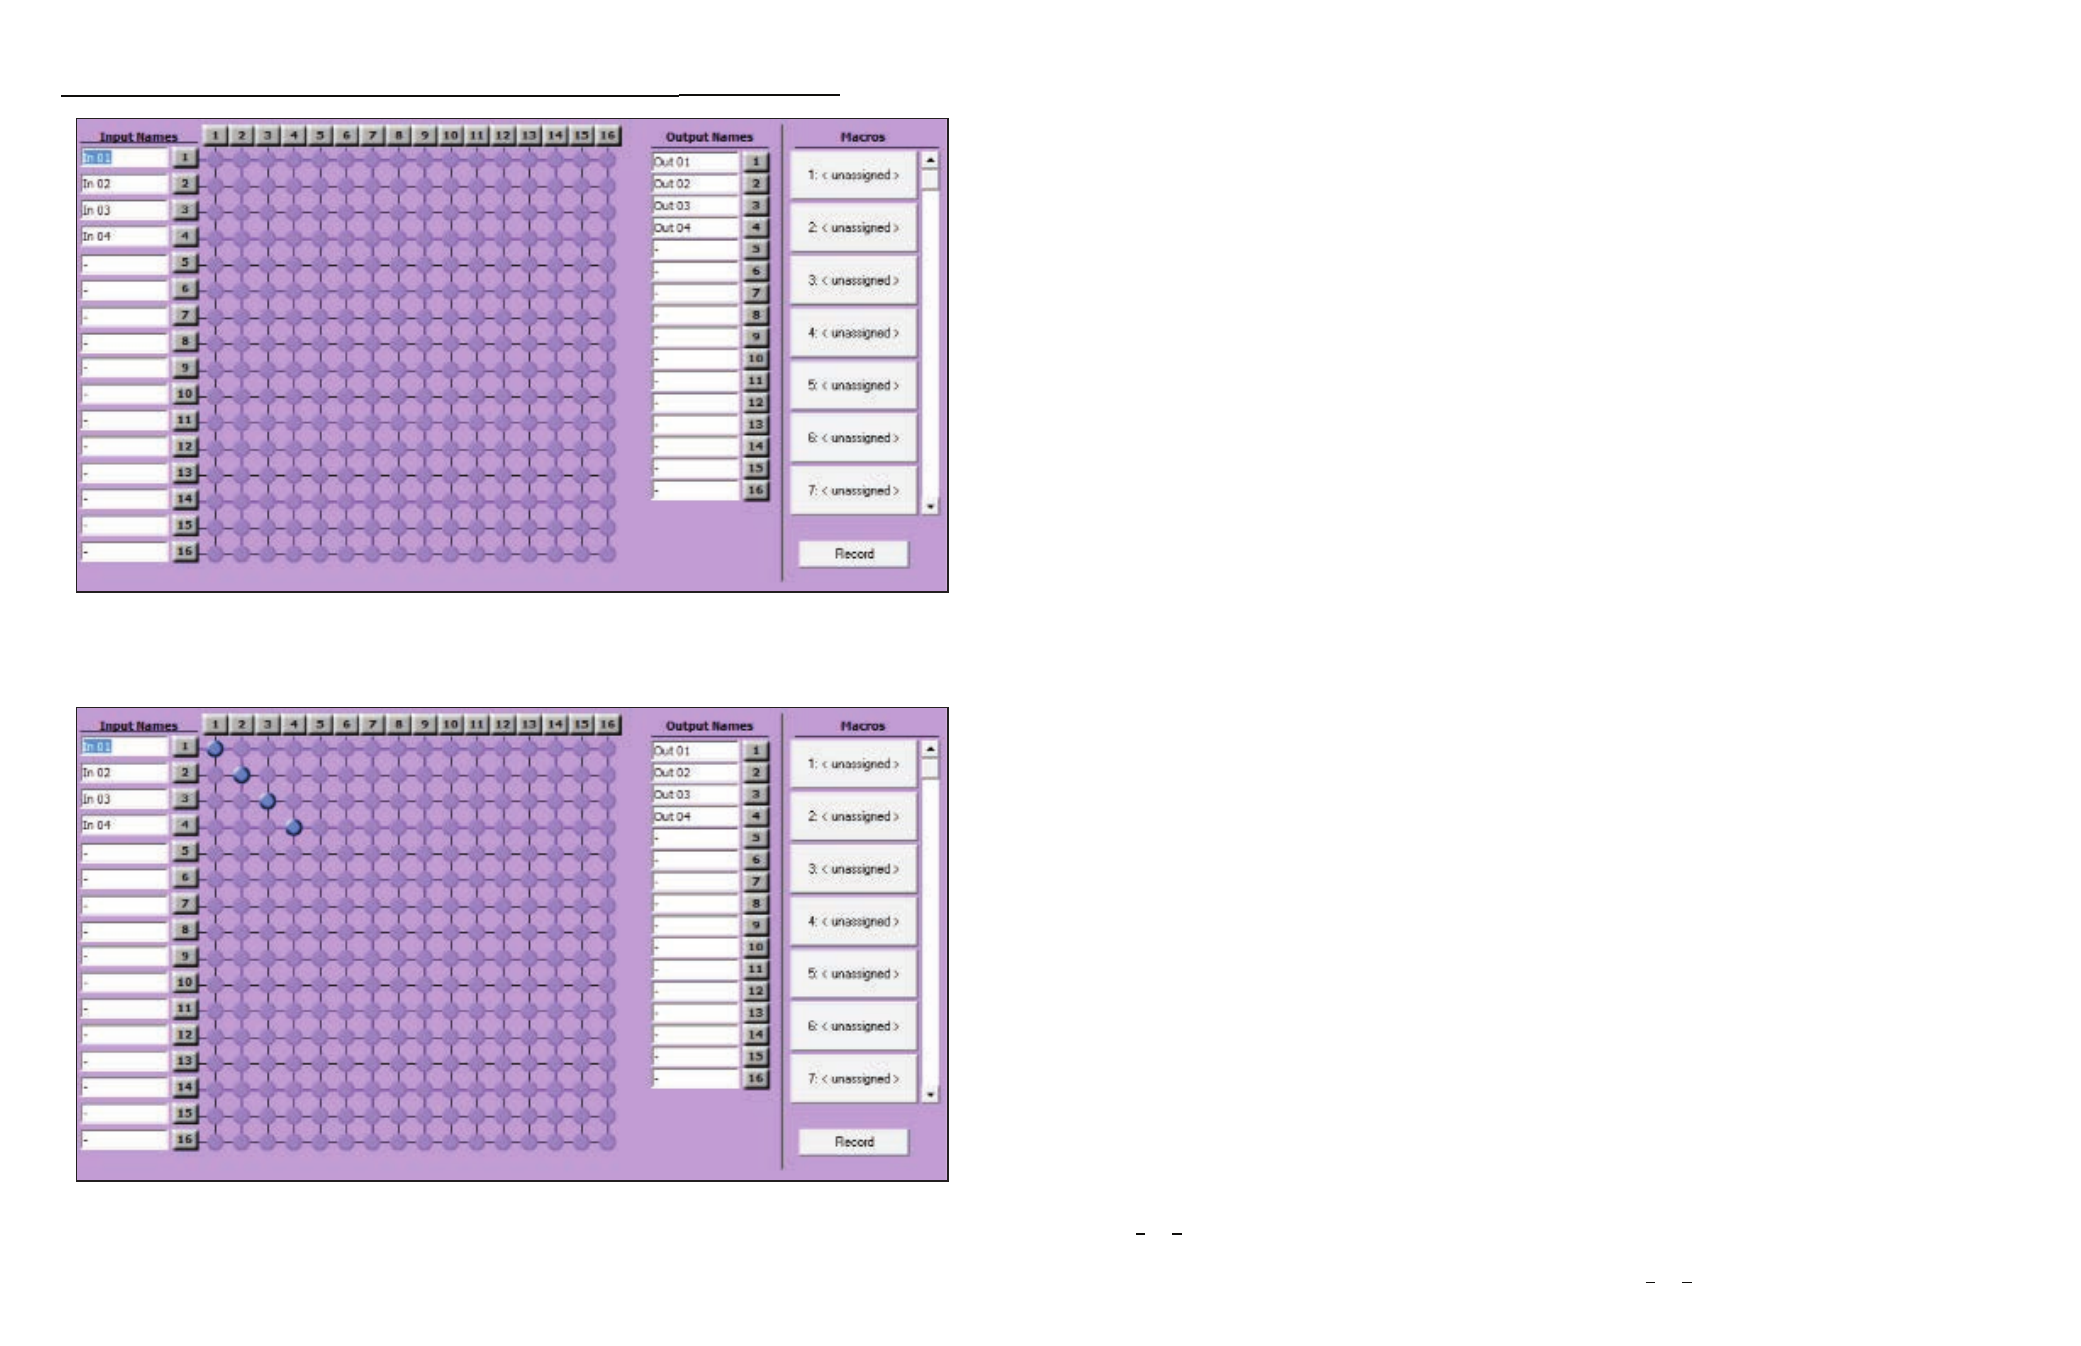
The Main Routing Window enables you to control the router(s) connections by means of the matrix panel,
the button panel, or with pre-recorded routes called macros.
Matrix Panel: This is probably the simplest way to route the connections. Simply click on the cross point
itself. The input on the left will then be routed to the output above.
Note: Inputs can be routed to several different outputs, but each output can only have a single input at any one
time. So you can have several connections horizontally but not vertically.
The Button Panel: These are the numbered buttons across the top and left sides. Click an output button on
the top, and then click an input button on the left.
Output Options:
To select multiple outputs next to each other, click on one output, then hold the shift key down and click the
last output. When the input is clicked, it is routed to all selected outputs.
To select multiple outputs individually, hold the control key down and click on any number of outputs. When
the input is clicked, it is routed to all selected outputs.
Input Options:
To route an input to all the outputs at once, hold the control key down and click on an input.
To leave the outputs selected after the route is made, hold the shift key down and click on an input.
Software Installation & Operation
(Continued)
On this screen you will notice the input buttons running down the left side while the output buttons
run across the top. They are each labeled 1 through 4.
To route video from an input to an output, simply click on the crosspoint to link them together. In this
example In 01 is routed to Out 01, In 02 to Out 02 and so on.