4 switching on and off the projector – Sim2 HT200 DMF User Manual
Page 8
8
Fig. 14
For rear projection the screen must be translucent.
For front projection, we recommend the use of screens with low
gain specifications (i.e. 1.3 to 2). The use of high gain screens
should be avoided due to their limited viewing angle, which is
undesirable for a large audience.
Preferably, use a screen with black, non-reflecting borders, which
will perfectly frame the projected image.
Avoid light shining directly on the screen during projection as
this will reduce contrast and black level detail on the projected
image. For the true cinema experience best results are achieved
with little or no ambient light.
Furniture and other objects with reflecting surfaces, as well as
light coloured walls should be avoided, as they are likely to
interfere with the screen’s characteristics.
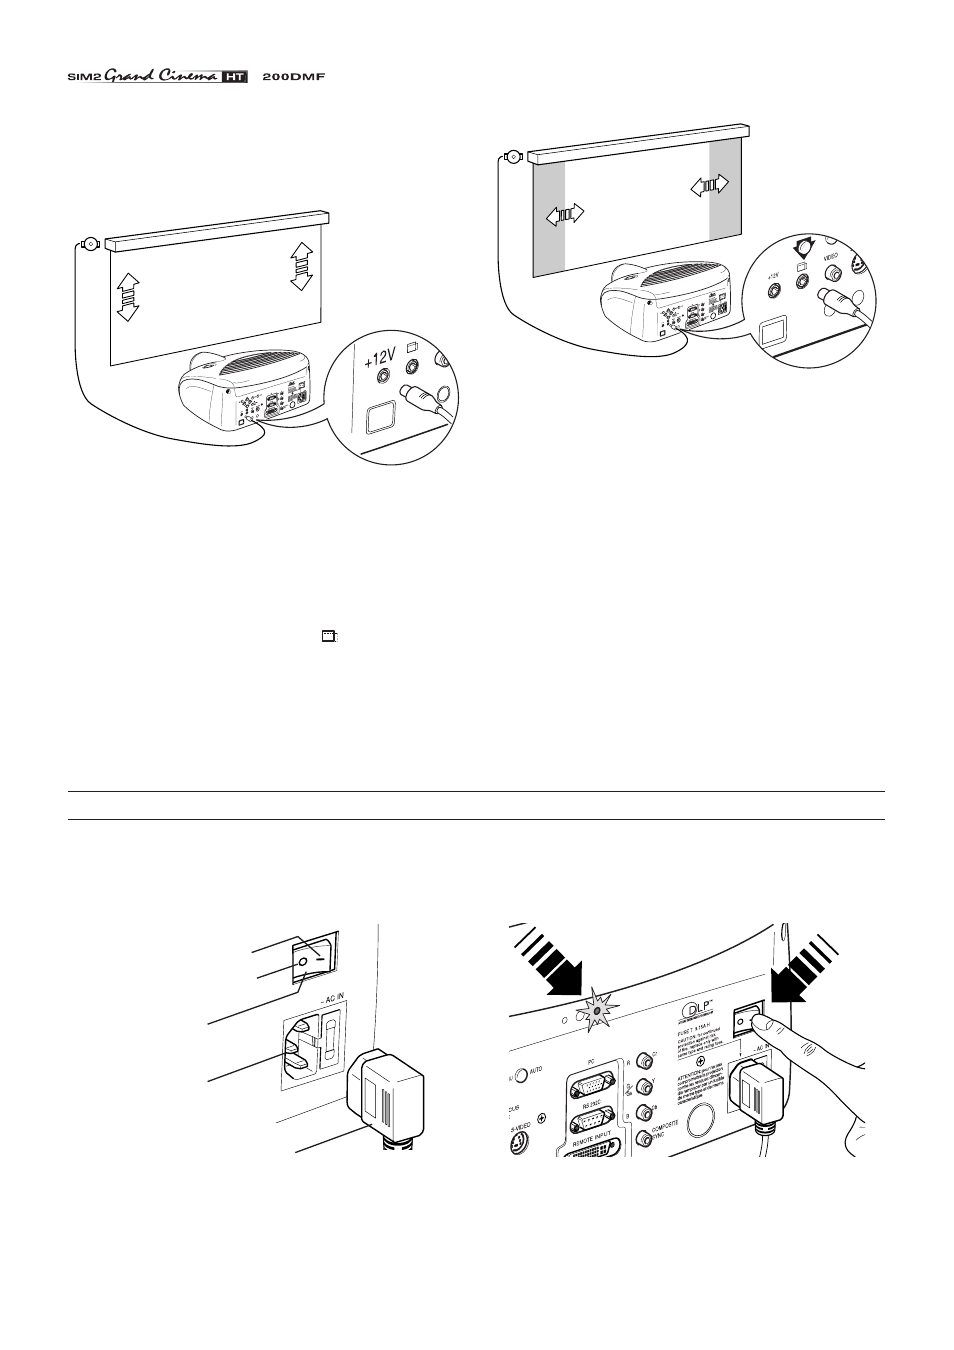
To activate an electric motorised screen a 12 Volt output is
provided at the rear of the projector or with the optional Remote
Input Interface. This can be connected to a screen interface
unit, which can be supplied by screen manufacturers
(Fig. 13)
.
Fig. 13
The output is activated (Voltage: 12 Vdc) when the projector is
switched on and is de-activated (no Voltage output) when the
projector is in stand-by mode.
Some manufacturers offer screen-masking systems to help fra-
me the projected image and improve picture contrast. These
systems can be connected to output
, at the rear of the
projector
(Fig. 14)
, or on the optional Remote Input Interface.
4 SWITCHING ON AND OFF THE PROJECTOR
CAUTION: Connect the projector to a power supply with a
nominal voltage within the following values: 100-240 Vac,
50/60 Hz. It must be earthed (Fig. 15).
Position I : ON
Position O : OFF
Power switch
Fused power socket
Power plug
Fig. 15
Upon switch on (in position I) the projector will initialise (red and
green LEDs on). Followed by stand-by mode (red LED on)
(Fig.
16).
Fig. 16