6 keyboard pad, 7 remote control – Sim2 HT200 DMF User Manual
Page 12
12
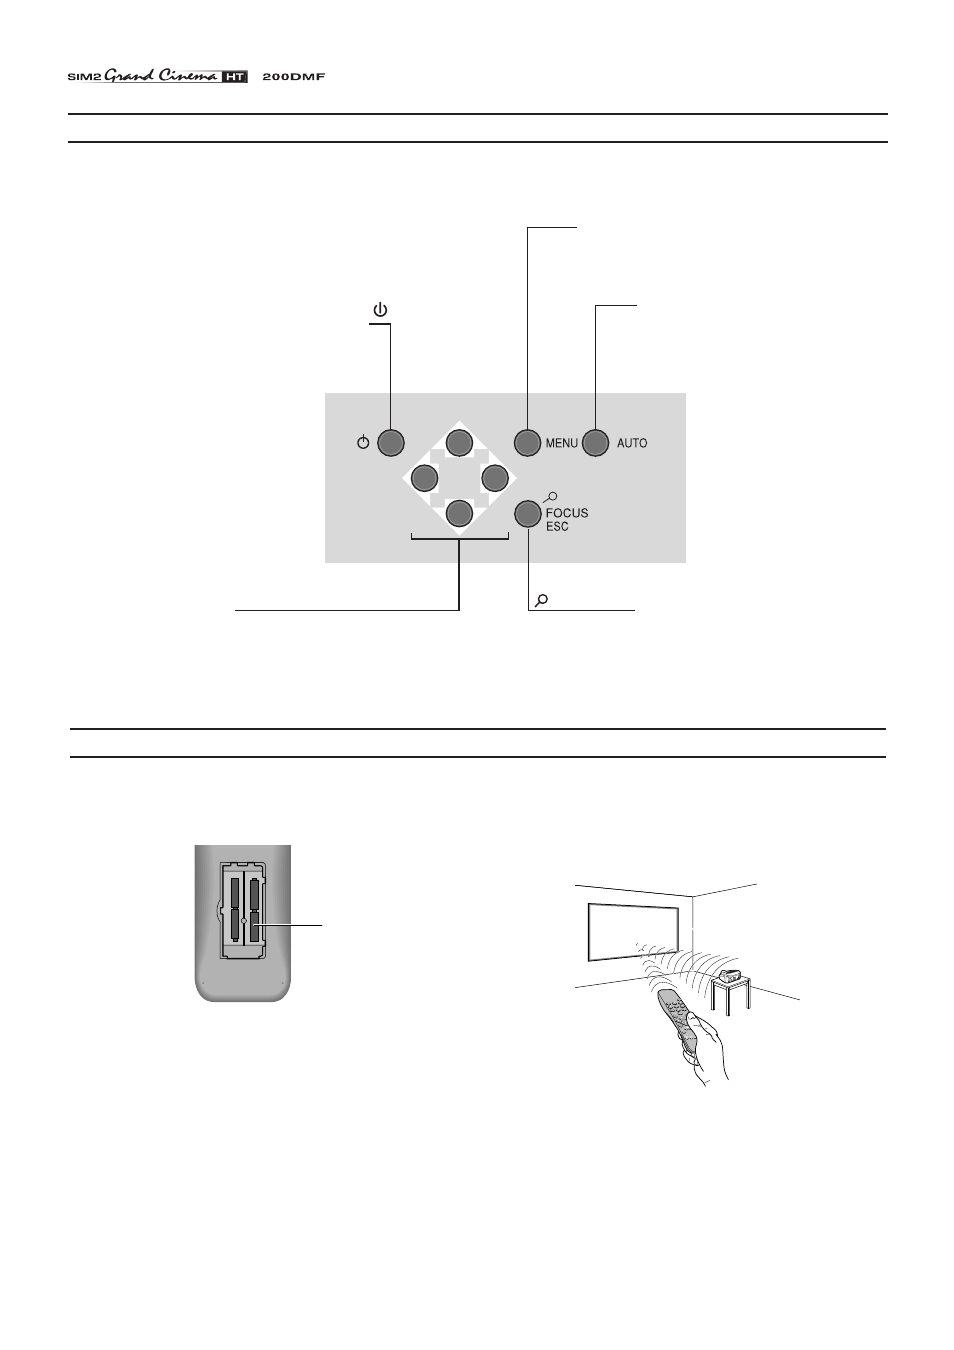
6 KEYBOARD PAD
Up/Down/Left/Right arrow keys
Navigate through and make adjustments
to the On Screen menus.
Arrow Up/Down switch on from stand-by
and recall Source Selection menu.
Switches off to stand-by.
Menu
Activates the On Screen Display menus.
Navigates Menu pages.
-Focus-Esc
De-activates the On Screen
Display and gives access to the
lens Zoom/Focus adjustment
functions.
Auto
Selects Auto Adjust
(automatic optimisation of the
displayed image).
7 REMOTE CONTROL
The remote control sends commands to the projector via infrared
signals.
It is possible to control the projector by pointing the remote control
at the screen; the sensor at the front of the projector will pick up
the reflected infrared commands.
(Fig. 27)
.
Fig. 27
Avoid placing obstructions between the remote control and the
infrared sensor at the front of the projector; this will impair the
remote control performance.
The remote control requires four 1.5V, AAA alkaline batteries.
Insert the batteries, taking care to match the polarity, as indicated
in the battery recess of the remote
(Fig. 26)
.
+
-
+
-
+
-
+
-
four 1.5V
AAA alkaline
batteries
Fig. 26
Change the batteries in the remote control if experiencing
difficulty in sending commands to the projector.
If the remote control is not to be used for a long period of time
remove the batteries. Replace all batteries at the same time; do
not replace one new battery with a used battery. If the batteries
have leaked, carefully wipe the case clean and replace with new
batteries.
Eight push buttons, at the rear of the projector, will allow com-
plete operation without the use of the remote control.