Deflation & storage, Troubleshooting – Sea Eagle Sport Kayak (SE 330, SE 370) User Manual
Page 9
Deflation & Storage
Although PVC material can become brittle in extremely cold
temperatures, you can still safely store your Sea Eagle in
them so long as you avoid dropping it and do not subject it
to any sudden impacts.
If you’re planning to leave your Sea Eagle outside, be sure
to keep it raised up off of the ground. Its also a good idea to
keep it covered so that it is not directly exposed to berries,
leaves, rain, sunlight and other elements. Sea Eagles that
are left in water will most likely have to be emptied from
time to time.
Make sure that your boat is dry before storing your kayak
for more than a few days, to remove any excess moisture
that could cause unsightly mildew. Choose a cool, dry spot
when storing in an enclosed area like basement, closet or
garage.
Begin by deflating your
kayak. To deflate, un-
screw the valves from
the base. Most of the air
is immediately released.
Excess air can be
pushed out as you
rollup the kayak.
Allow about a minute or
two so that more air can
be released and then
from the stern, begin by
rolling one side of the
kayak toward the center
and the other side of the
kayak over the first.
Starting from the bow,
roll the kayak up. It is
important to roll the boat
tight from the beginning
to ensure you get the
most compact storage
possible. When you
reach the end, tuck the
bow into the hull and
place the skeg protec-
tors on the skegs.
Troubleshooting
If your boat is losing air it doesn’t necessarily mean that
its leaking. For instance a boat that is inflated late in the
day with 90° air may cool 20° overnight.
The cooler air will exert less pressure on the hull and the
boat will appear softer the next morning. When there has
been no variation in temperature and your boat is losing air
then it is time to start looking for the leak.
The first thing you should do when looking for a leak is to
actually look at the boat. Visually inspect the boat from a
few feet away and if necessary, flip it over and closely
check the outside. Any large leaks when your boat looses a
considerable amount of air should be clearly visible.
Be sure to check the tightness of the one-way recessed
valves as well and if necessary, tighten them with the valve
wrench included in the orange repair kit canister.
If you have a rough idea of where your leak is but can’t see
it, you may want to try listening for it as you may be able to
hear the air escaping and pinpoint the leak.
Other troubleshooting techniques you can try to locate the
leak is to dowse/spray a mix of dishwashing liquid over
suspicious areas. The leak may produce bubbles that will
pinpoint the location of the leak.
Crossed Threads
Make sure that both the
inner valve and the
outer cap are firmly
screwed together. If
threads are crossed on
either item a slow leak
could result. A good way
to avoid this is to first
turn the outer cap back
1/4 turn.
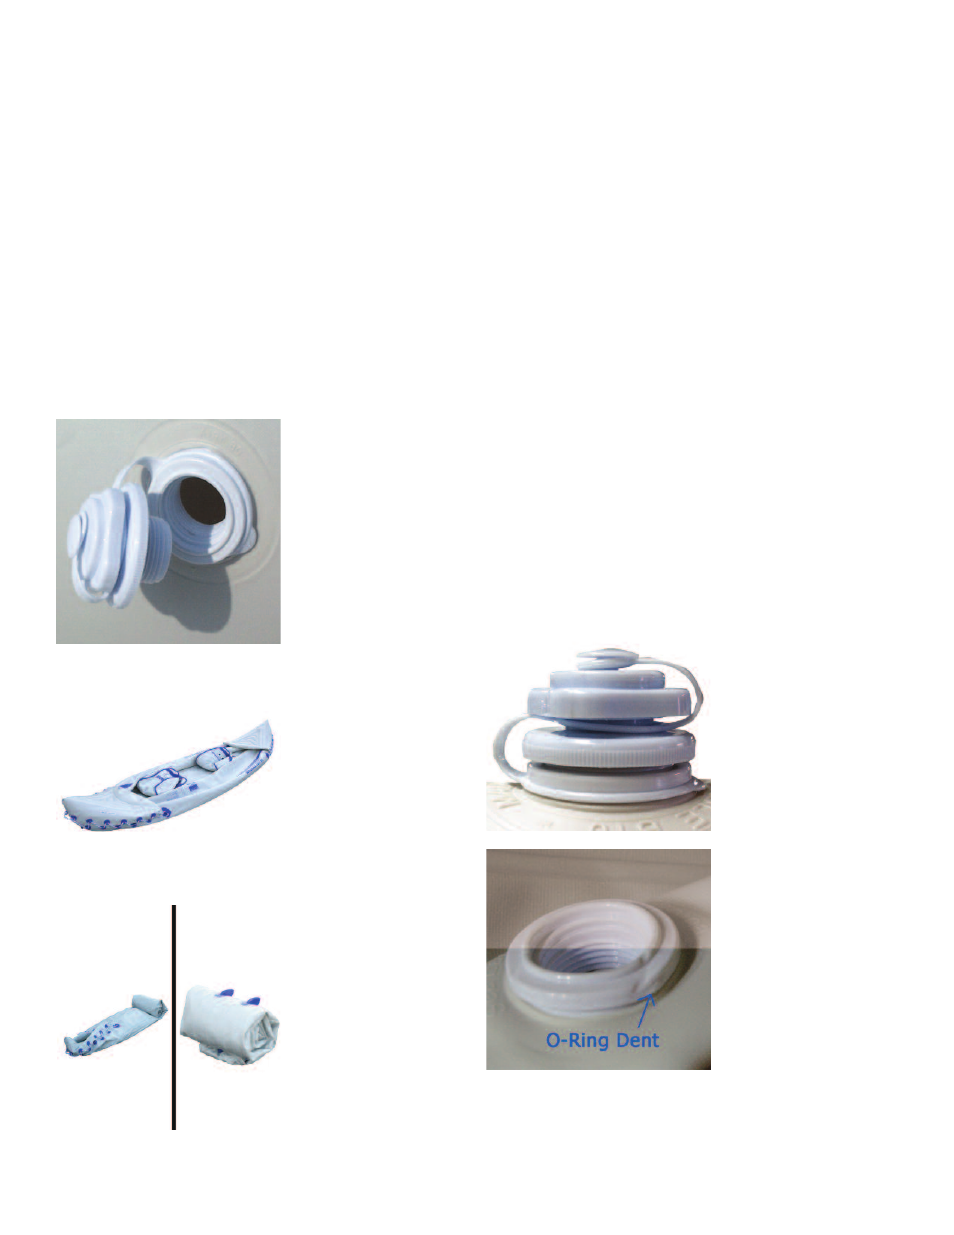
Denting
Check the O-Ring base
for dents. Denting can
occur when the valve
body lies across the
O-Ring during storage.
Heat the O-Ring with a
hairdryer for about a
minute or so until the
dent eases itself out.
8