Water seal and auger bearings – Scotsman HID312 Service Manual User Manual
Page 36
HID312, HID525, HID540
Service Manual
April 2015
Page 36
Water Seal and Auger Bearings
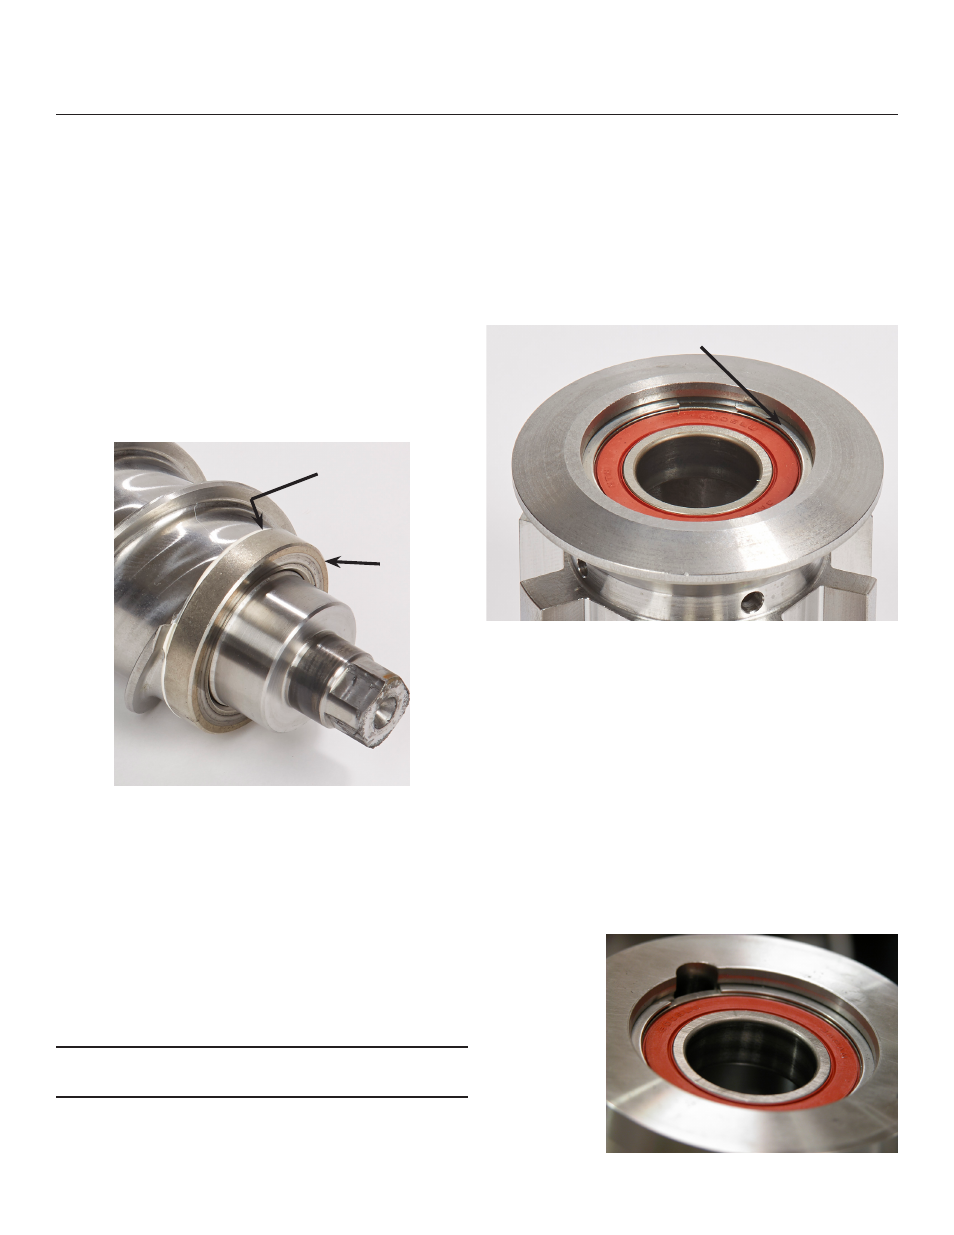
Water Seal
1. Go thru all steps to remove the auger.
2. Remove the 4 allen head screws at the bottom of
the evaporator.
3. Lift the evaporator up and off the bottom bearing
retainer.
4. Push the water seal up on one side until it twists,
grab it and pull it out.
5. Remove the rotating half from the bottom of the
auger.
6. Clean the auger shoulder and add a very thin
bead of food grade sealant to the bottom of the
auger.
7. Carefully push the new rotating half of the water
seal up against the sealant as far as possible. It
should seat tightly and straightly against the auger
shoulder. Do not put fingerprints on the sealing
surface.
8. Wet the outside edge of the stationary half of
the water seal and insert it into the bottom of the
evaporator.
9. Slip the evaporator onto the bottom bearing
retainer, the bearing retainer will push the water
seal up into the correct position.
Note: The bottom bearing should have been replaced
at this time.
10. Secure the evaporator to the bearing retainer with
the original socket head screws. Be sure they are
tight.
Top Bearing:
1. Go thru the process of removing the extruder
breaker.
2. Remove the clip holding the bearing.
3. Tap out the old bearing.
4. Use the old bearing as something to tap on and
drive the new bearing into the extruder.
5. Reinstall the clip.
Bottom Bearing:
1. Go thru the process of removing the auger.
2. Remove the 4 allen head screws at the bottom of
the evaporator.
3. Remove the bolts holding the bearing retainer to
the gear reducer.
4. Separate the gear reducer, evaporator and
bearing retainer.
5. Remove the clip.
6. Tap out the old bearing.
7. Use the old bearing as something to tap on and
drive the new bearing into the extruder.
Sealant
Rotating
Part of
Water Seal
Clip