Fig. 23 fig. 22, Fig. 24 fig. 25 – Royal Cozyfires Slimline Standard MK2 - LPG User Manual
Page 14
MM79 010710
2.5
LAYING THE COAL/PEBBLE BED
Slimline Standard Mk2
Page 13
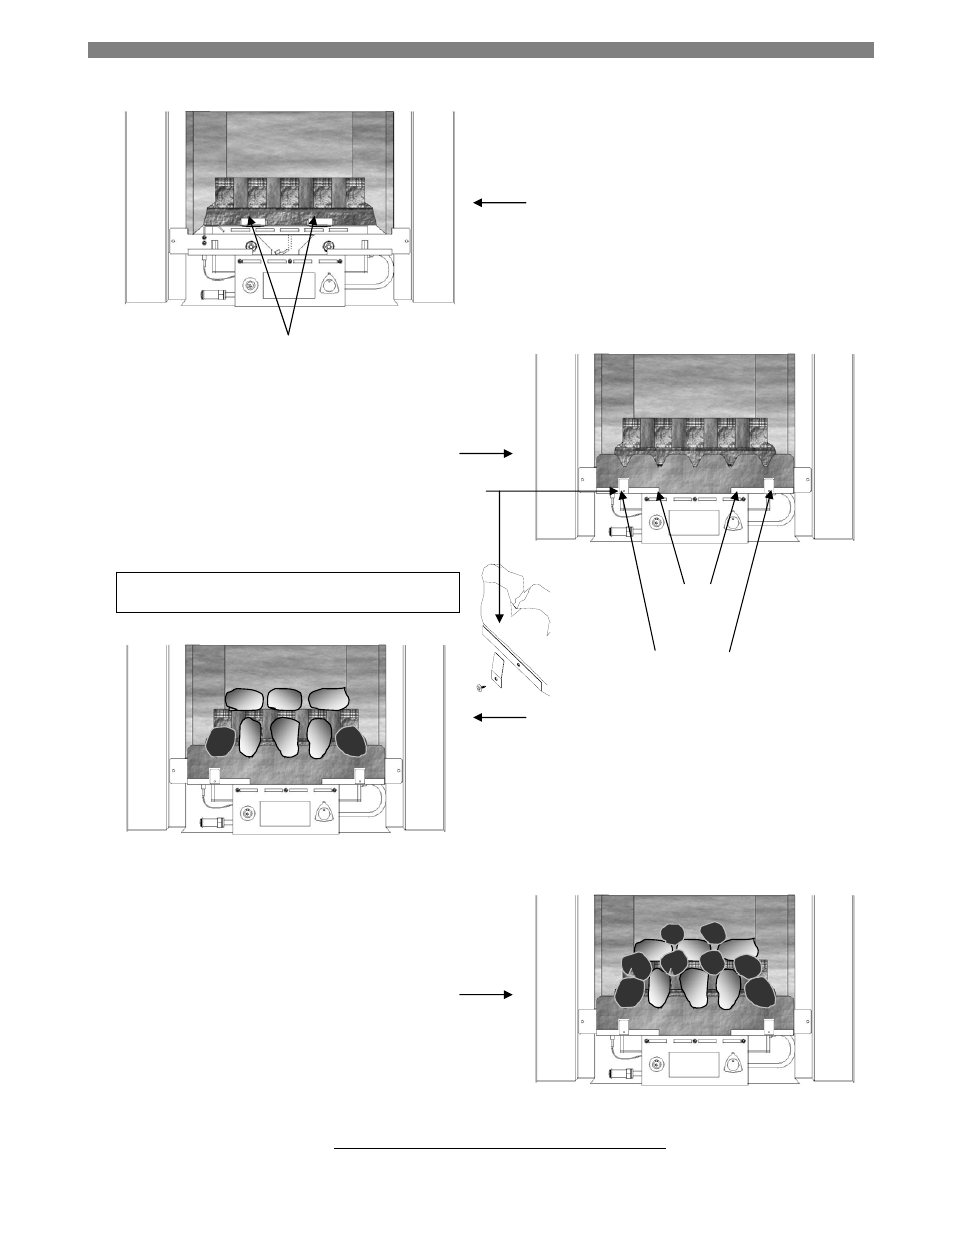
Metal `stops’
The simulated front is positioned on the shelf directly
in front of the support shelf. Two metal `stops’ locate the
simulated front in position.
Fit the two front retaining brackets and the two No 8x3/8 screws
supplied in the fixing pack to secure the front into position (Fig. 23).
The support shelf is positioned on the fibre
support metalwork. There are two metal `stops’ that
prevent the support shelf from sitting on the main
burner outlet (Fig. 22).
Metal `stops’
Fig. 23
Fig. 22
Note: Large coals/pebbles (grey) and small coals/pebbles
(black) are coloured for illustration purposes only!
Place 3 large and 2 small coals/pebbles on top of the simulated
front (one in each groove). Allow the coals/pebbles to rest on
the support shelf. Place 3 large coals/pebbles on the upper tier
of the support shelf (Fig. 24).
Place 4 small coals/pebbles between the 5 coals/pebbles located
on top of the simulated front. Allow the coals/pebbles to rest on the
3 large coals/pebbles located on the top tier of the support shelf.
Place 2 small coals/pebbles between the 3 large coals/pebbles
located on the top tier of the support shelf (Fig. 25).
Fig. 24
Fig. 25
To obtain the best visual appearance, it may be necessary to `
slightly
’ adjust the position of the coals.
If any of the coals or coal bed become damaged or lost, replacements MUST be obtained before further use.
ADDITIONAL COALS/PEBBLES MUST NOT BE USED
Front Retaining Bracket