Mounting the control unit, Mounting the sensors – REMKO ATR-3 User Manual
Page 12
12
The temperature control must be mounted outside of heavily trafficked
areas in a place that is easily accessible for making settings. If it is gen-
erally accessible, it must be protected against unauthorised use.
The supplied drilling stencil makes the
temperature control easier to install. The
attachment points can also be found in
the drawing to the left. Mounting materi-
als must be supplied by the customer.
After the unit has been mounted, the in-
stalled lines are inserted from below into
the housing through the supplied screw
attachments once the lead-throughs
have been removed.
Mounting the Control Unit
Mounting the Sensors
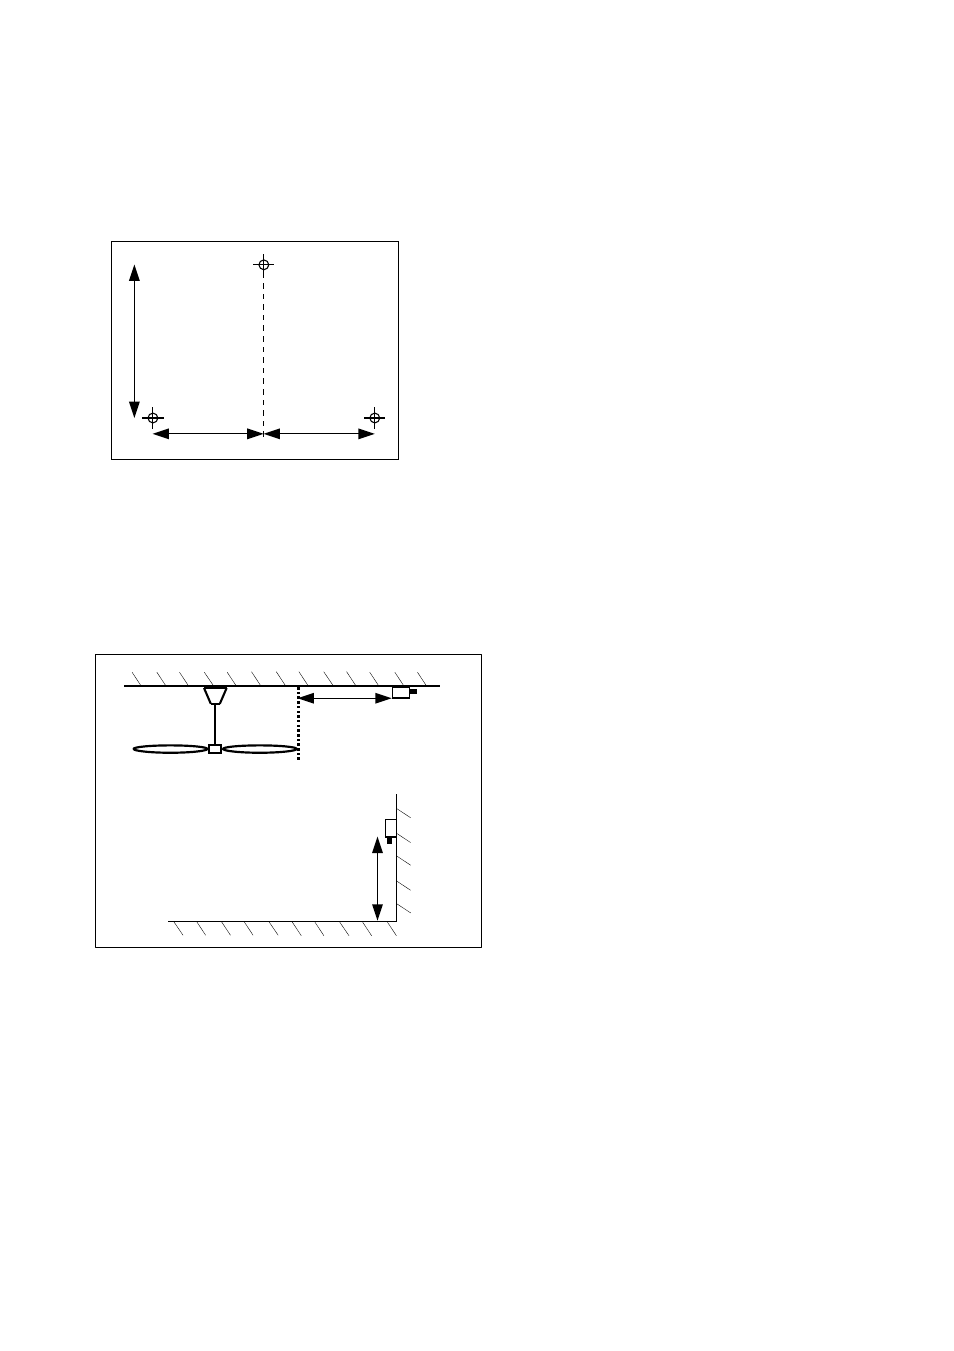
2 KTY temperature sensors are required to measure the differential tem-
perature.
The upper temperature sensor
is installed in the ceiling area
and should have a minimum dis-
tance of 3 m to the ceiling fan.
Do not mount the sensor close
to air intake and outlet ducts.
The lower temperature sensor is
attached at a height of approx.
1.5 m and should not be in the
direct vicinity of the air current
from the ceiling fan.
If the temperature sensor is mounted on a cold, outside wall, an insula-
tion panel must be installed between the wall and the sensor by the cus-
tomer.
The temperature sensors are connected to the temperature control with
2-wire lines. The connections are polarised. Make sure that the terminals
are assigned correctly: “LOWER” temperature sensor terminals 5 + 6;
“UPPER” temperature sensor terminals 6 + 7.
Specifications for checking proper operation of the KTY temperature
sensor:
Þ
at 20°C: resistance value approx. 1879 Ω
Þ
at 30°C: resistance value approx. 2035 Ω
min. 3 m
Fan
1,5...2,0 m
Temperature
sensor, lower
Temperature
sensor, upper
99
99
145
Figures in mm