Posiflex CR-6000 Series User Manual
Page 6
Part 6
3).
Connect the DB-9 connector to the computer's serial port of COM1 (or
COM2). Connect the 4P phone plug connector to the added I/O bracket.
See below illustration.
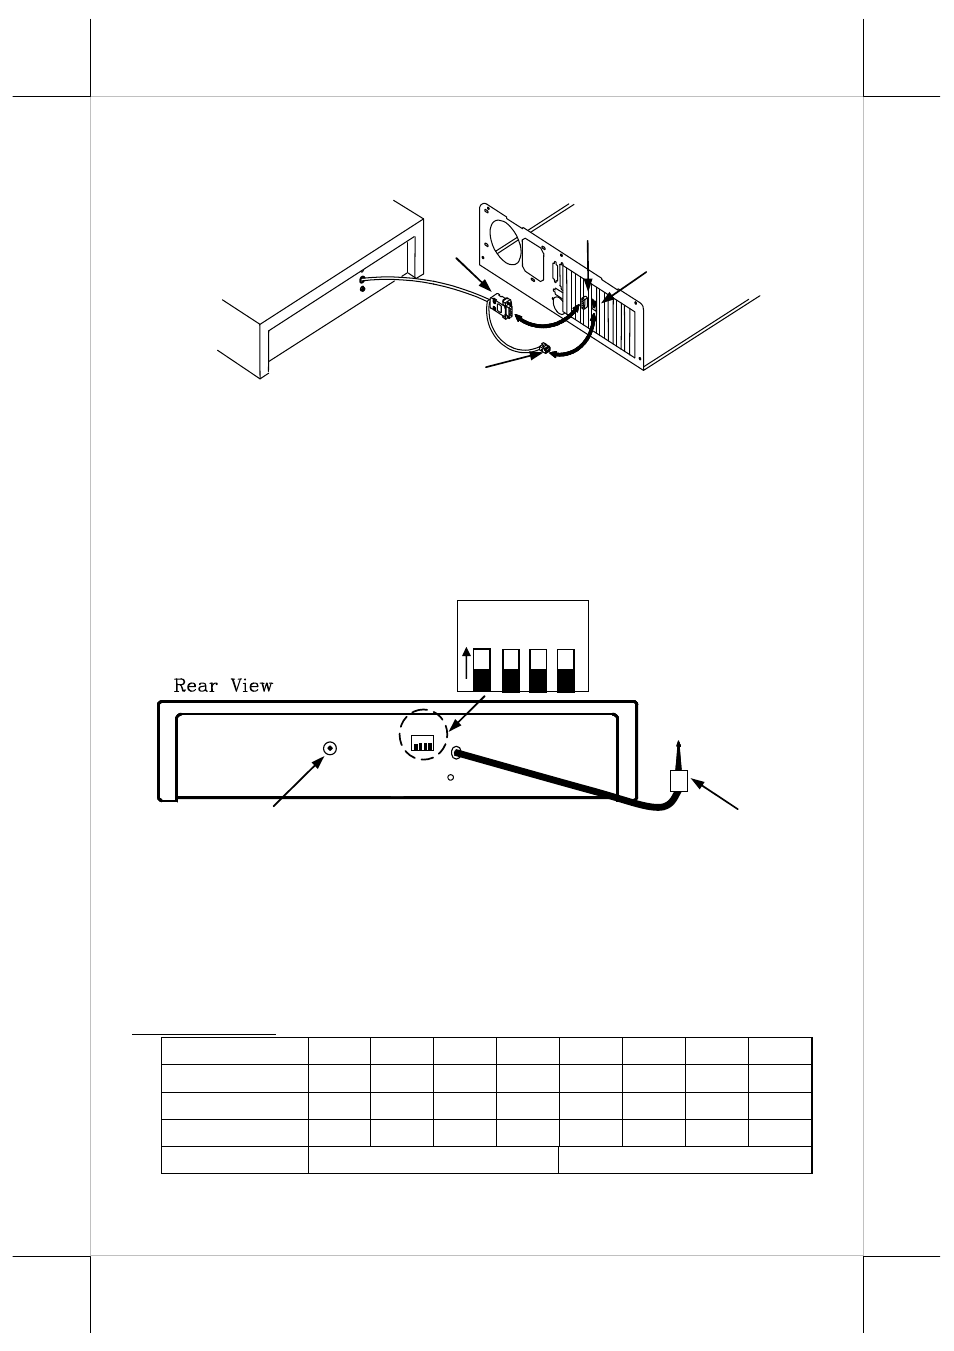
CR4015/ 4005-II / 4115/ 4105-II / 4225/ 4215-II / 6015/ 6215
1).
Define a drawer number for the cash drawer so that this cash drawer is
going to respond accordingly in USB communication. Follow the table
below for “Switch settings” to adjust the switch S1 according to this
drawer number if it is not 7. Please note that within each system there
should never be any 2 USB interface cash drawers carrying the same
drawer number.
For CR-4015/ 4115/ 4225/ CR-6015 there is no AC power input in
back panel.
Switch settings:
Drawer
0
1
2
3
4
5
6
7
SW1
ON OFF ON
OFF ON OFF ON OFF
SW2
ON
ON OFF OFF ON
ON OFF OFF
SW3
ON
ON
ON
ON OFF OFF OFF OFF
SW4
ON: Vendor Class
OFF : HID Class
Default setting: Drawer 7 (SW1: OFF; SW2: OFF; SW3: OFF; SW4: OFF)
COM1
616P PHONE JACK
4PIN PHONE JACK
DB9
Connect to USB
Port of Main PC
Ground
Power Jack of CR4005-II/ 4105-II/
4215-II/6215
USB Connector from CR4015/4005-II/
4115/ 4105-II/ 4225/4215-II/ 6015/ 6215
1
2
3
4
O
N
AC 12V I/P
S1
Rear View of Model CR4015/ 4005-II/ 4115/4105-II/
4225/ 4215-II/ 6015/ 6215 Cash Drawer with USB
Interface