Mounting the pos onto a table – Posiflex HS-2510W User Manual
Page 8
8
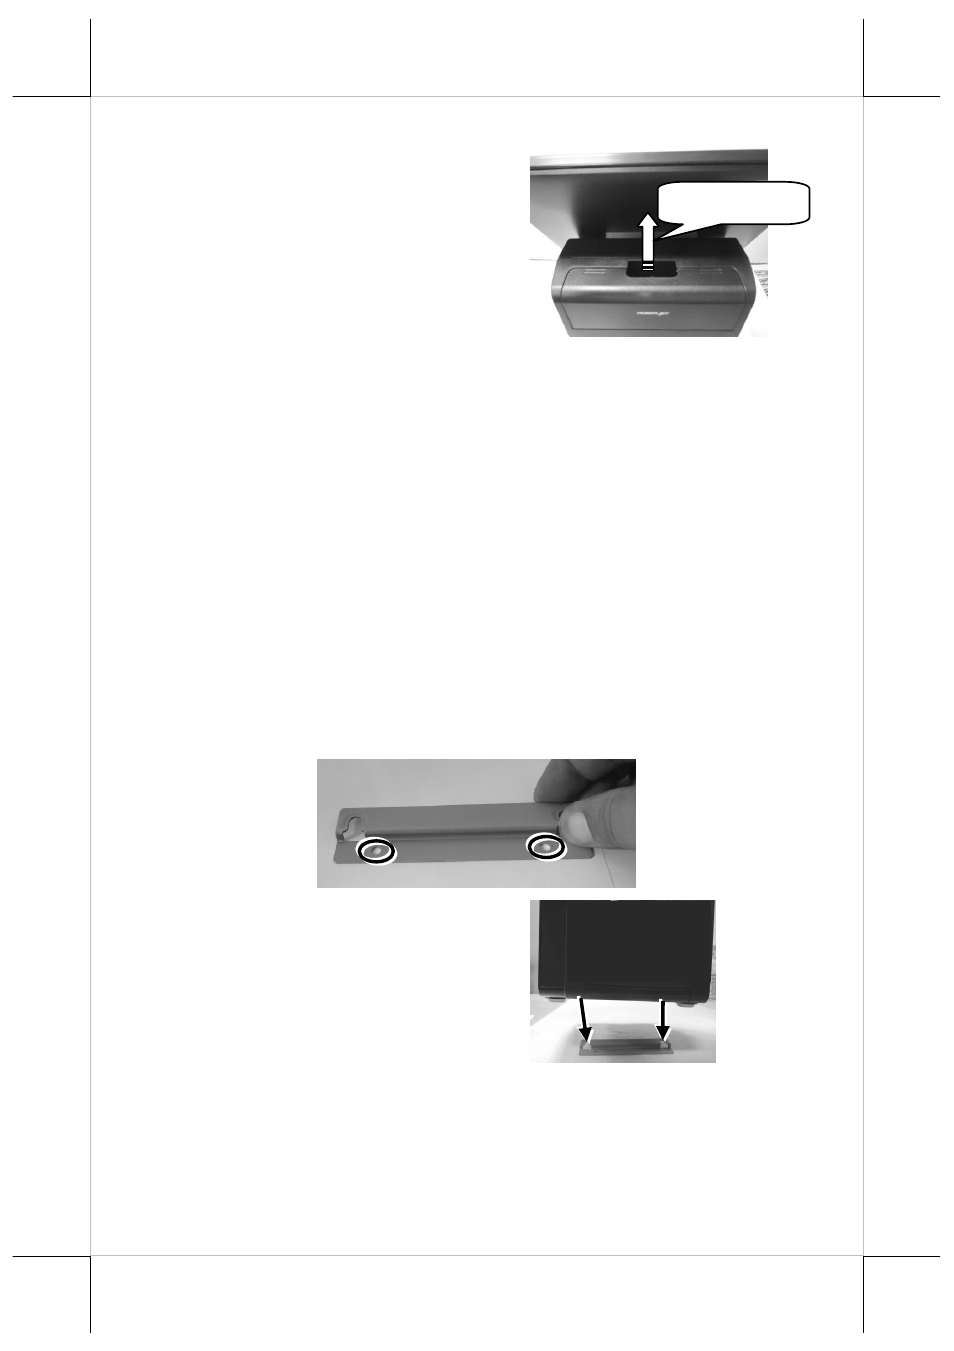
9.
Determine that the I/O
interface is covered and the
cable passes through the cable
exit.
Mounting the POS onto a Table
To avoid the POS from backward tilting and wagging when a
user touches the LCD panel, use the desktop mounting kit
shipped with the POS to hold and secure the POS firmly on a
table. Please follow the steps below to mount the POS.
1.
Determine a position of a table onto which the POS is
mounted. Then, take the desktop mounting bracket out of the
desktop mounting kit pack. Through the 2 holes formed on
the bracket, drill 2 holes on the table and plug 2 plastic
anchors into the 2 holes. Then, hold the bracket and then
apply the 2 self-tapping screws into the 2 holes to secure the
bracket.
2.
Align the 2 screw bolts on the
bottom of the POS with the 2
tracks of the bracket.
Cable out
- FT-7715 (18 pages)
- PB-4600E (15 pages)
- PB-4700 (12 pages)
- DT-308 (16 pages)
- JIVA XT-4015 (19 pages)
- JIVA KS-7212X (16 pages)
- JIVA XT-4015 (20 pages)
- JIVA XT-4015 (15 pages)
- JIVA XT-2614E (5 pages)
- JIVA XT-3215IR (18 pages)
- JIVA XT-3915IR (8 pages)
- JIVA KS-7310HS (15 pages)
- IVA XT-3815 (20 pages)
- JIVA HS-2510W (20 pages)
- JIVA HS-2312H (19 pages)
- HS-2512W-TS (16 pages)
- PG-200/1D (20 pages)
- JIVA XT-4215IR (16 pages)
- PG-200/2D (20 pages)
- MT-4008W (20 pages)
- TX-2000 (9 pages)
- DS-200 (20 pages)
- JIVA XP-3312E (20 pages)
- TX-3100E (10 pages)
- TX-4200R (12 pages)
- TX-4600 (9 pages)
- TX-4200 (12 pages)
- TX-5000E (10 pages)
- PD-330UE (11 pages)
- PD-201R (6 pages)
- PD-2300 (19 pages)
- PD-6207U (20 pages)
- PD-2609UE (16 pages)
- PD-320UE (7 pages)
- PD-2600 (11 pages)
- CR-2020 Series (10 pages)
- PD-76X0R (6 pages)
- PD-300R (10 pages)
- CR-2210 Series (9 pages)
- CR-2200 Series (10 pages)
- PD–73X1 (10 pages)
- CR-6000 Series (10 pages)
- CR-3015 (4 pages)
- CR-3204 (4 pages)