Oregon LW301 User Manual
Page 9
E
N
9
OR
b. Insert 4 type A screws into the
holes of the sensor connector.
Screw firmly into place, i.e. fence.
Align the wind vane flat against the
small end of the sensor connector,
and then slide it until it clicks into
place to lock the cover.
.IMPORTANT. Ensure that the wind
sensor is pointing north to enable it to
record accurate readings.
TEMPERATURE.&.HUMIDITy.SENSOR
LW301/302
.TIP. Ideal placements for the sensor
would be in any location on the
exterior of the home at a height of not
more than .5 m (5 ft) and which can
shield it from direct sunlight or wet
conditions for an accurate reading.
Secure the sensor in the desired
location using the wall mount bracket
or table stand.
RAIN.GAUGE
LW301
The rain gauge should be mounted horizontally about
meter (3 feet) from the ground in an open area away from
trees or other obstructions to allow rain to fall naturally for an
accurate reading.
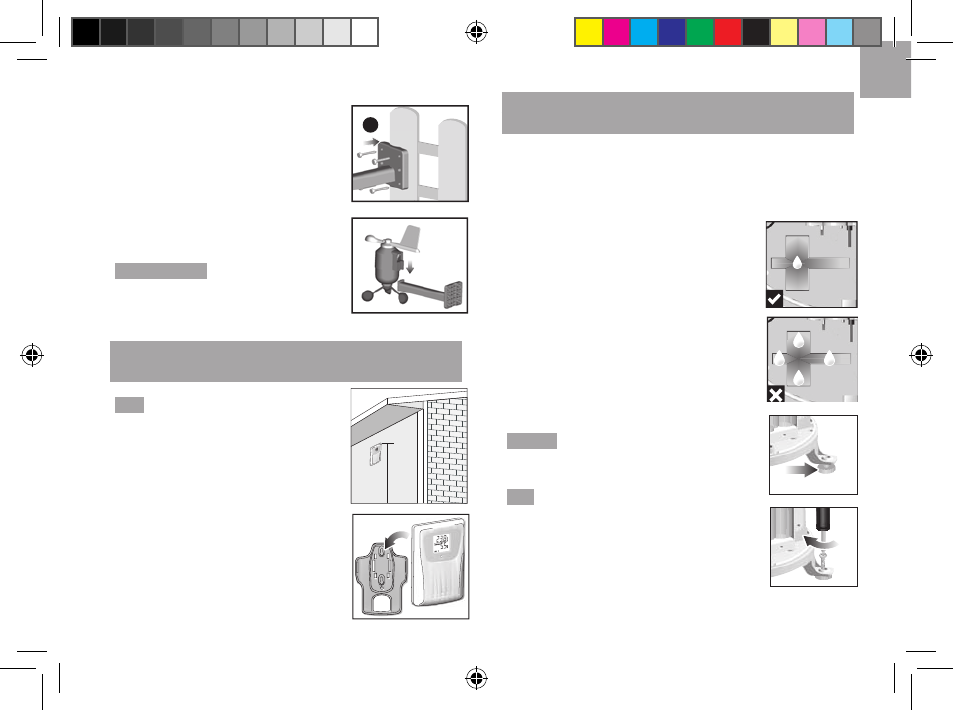
To.ensure.a.level.plane:
Put a few drops of water on the cross
at the base of the funnel to check the
horizontal level.
Water will pool to the centre of the cross
when the rain gauge is level.
If water remains on -4, the gauge is
not horizontal.
If necessary, adjust the level using
the screw.
..NOTE.. For best results, ensure the base
is horizontal to allow maximum drainage
of any collected rain.
.TIP. Erase all testing data from application
before formal use.
a
b
150cm(5ft)
1
2
3
4
1
2
3
4
LW301_UM_EN_R8.indd 9
2012/8/14 3:06:42 PM