2 connector panel, 7 image adjustment, Adjusting the brightness – MEGAPOWER MVP-732 User Manual
Page 4: Adjusting the focus, Image rotate
3
4
5
6
3. Adjust by rotating the two Upper Lamps to a suitable position.
4. Push the Arm Lock Button and slide the arm upward to the preset position.
5. Rotate the CCD camera head and adjust its angle to a suitable position.
6. Remove the Lens Cover (anticlockwise) and attach other accessories if required.
2.2 Connector Panel
This illustration shows the connector panel on your Digital Presenter. Refer to this figure
when connecting the Digital Presenter.
RS-232C
RGB OUT-1
Power Inlet Socket
(DC 12V)
RS-232C Socket
RGB In
(connect to PC
VGA output port)
RGB Out
(connect to Presenter
or PC Monitor)
1
2
S-Video In
Composite
Video In
S-VIDEO
Audio In (L & R)
5
L
R
AUDIO
VIDEO
IN
S-VIDEO AUDIO
VIDEO
L
R
1
2
S-VIDEO
L
R
AUDIO
VIDEO
OUT
S-VIDEO AUDIO
VIDEO
L
R
12V DC IN
RGB OUT-2
RGB IN
USB
Composite Video Out
Audio Out (L & R)
S-Video Out
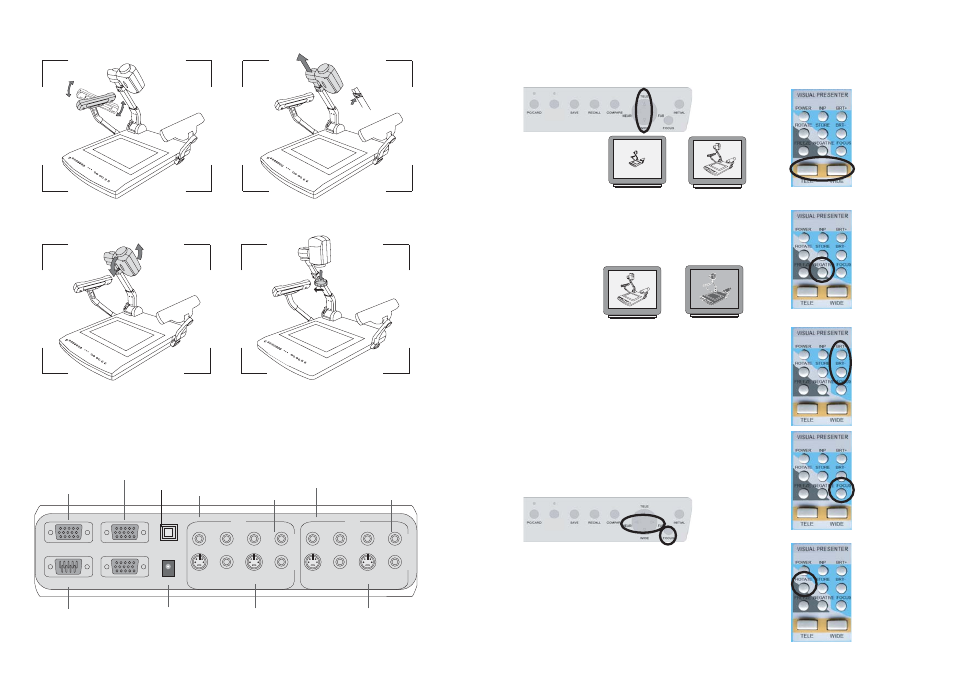
3.7 Image Adjustment
Negative/Positive Film Selection
Adjusting the Size
WIDE
TELE
Positive Film Negative Film
Press the "WIDE" or "TELE" button to change the size of the displayed object.
If you are viewing negative film, press "NEGATIVE" button
to get the right color. Press this button once more to return
to the normal state.
Adjusting the Brightness
Press "BRIT+/-" to change the brightness of the image.
Adjusting the Focus
Press "FOCUS" to automatically adjust the focus.
Press "FAR" or "NEAR" to adjust the focus.
10
USB Socket
LIGHT
LIGHT
Image Rotate
Press "ROTATE" button to rotate the image vertically.