Configuring the cio-das16/jr – Measurement Computing CIO-DAS16/Jr User Manual
Page 9
CIO-DAS16/Jr User's Guide
Installing the CIO-DAS16/Jr
Configuring the CIO-DAS16/Jr
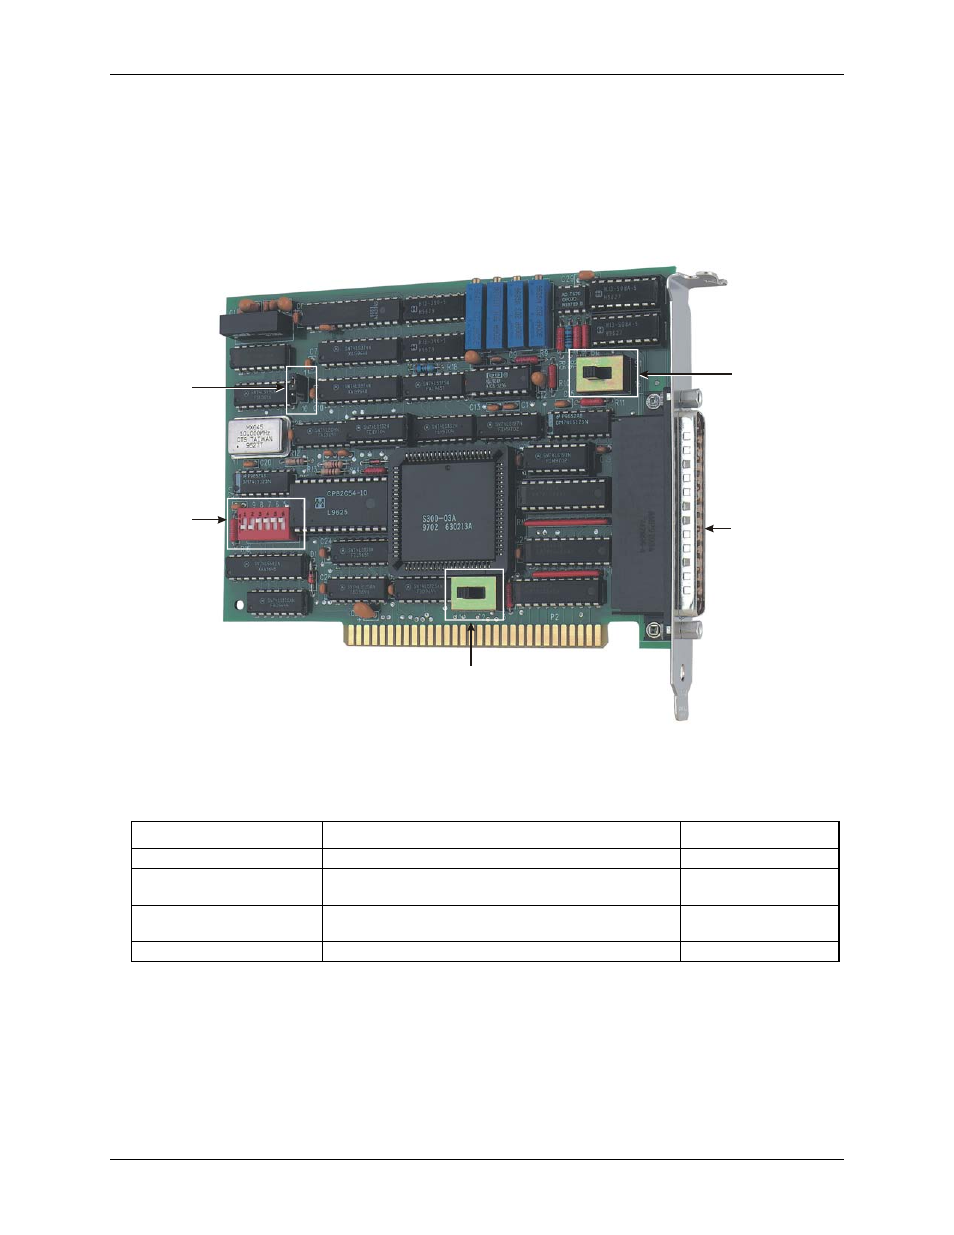
The CIO-DAS16/Jr has one bank of base address-select switches, a DMA level select switch, an 8/16 analog
channel select switch, and one XTAL jumper which you must set before installing the board in your computer.
The InstaCal calibration and test program included with the CIO-DAS16/Jr will show you how to set the
switches. Run InstaCal before you open your computer and install the board.
The location of each switch and jumper on the CIO-DAS16/Jr is shown in
Figure 1. Switch and jumper locations
Frequency
select
jumper
(1/10 MHz)
Analog channel
number select
switch
(8 diff./16 SE)
DMA level select switch (1/3)
Base
Address
switches
I/O
connector
P1
The CIO-DAS16/Jr is shipped with the factory-default settings listed in the table below.
Factory-configured default settings
Switch/jumper Description
Default
setting
Base address switches
DIP switch for setting the base address
300h (768 decimal)
Frequency select jumper
Selects the frequency of the source applied to the on-board
pacer to be 1 MHz or 10 MHz
1 MHz
Analog channel number select
switch
Configures the analog inputs for 8 differential or 16 single-
ended channels
8 (differential)
DMA level-select switch
Selects the DMA level to be 1 or 3
Level 1
Before installing the CIO-DAS16/Jr in the computer, verify that the board is configured with the settings that
you want. Review the following information to change the default configuration of a jumper or switch.
9