Wavebook/512 and wavebook/512h users – Measurement Computing IEEE-1284 ECP User Manual
Page 2
Instructions for IEEE-1284 ECP Compatibility
August 2000
481-0903, rev 1.0
2
5. Using the PLCC extraction tool (included), carefully remove the ECP FPGA chip by placing the tool’s
hooks down into the access holes on opposite corners of the socket.
Place your index finger on the center of the chip (pushing slightly downward) as you squeeze the
extraction tool. Use your finger to balance the chip while removing it from the socket, as the extraction
tool may not properly balance the chip.
6. After removing the old chip, replace it with part number 262-0301 B. This is done as follows:
(a) Verify correct orientation, i.e., pin 1 to the right and the chip’s chamfer in alignment with the
chamfer on the board’s socket.
(b) Squarely center the rev B chip over the socket.
(c) Gently push the chip into the socket. The chip should snap into position.
7. Place the option card back into the unit. To avoid pin damage, use care when aligning the option card
with the two connectors (J10 and J11).
8. Place the top cover back on the unit and fasten it with the four screws.
This completes the upgrade procedure.
WaveBook/512 and WaveBook/512H Users
For upgrading WaveBook/512 series units, the procedure is identical as that presented for the
WaveBook/516 except:
• the top cover plate is held in place by a single top screw
• the ECP FPGA chip is located at U103 (see following figure)
• you will not need to check the printed circuit board part number/revision level (step 2) since the
upgrade can be made to any WaveBook/512 or WaveBook/512H
WaveBook/512 series users should refer to the illustration below for chip location reference, then follow the
same steps as provided for WaveBook/516, with exceptions as noted in the above bulleted list.
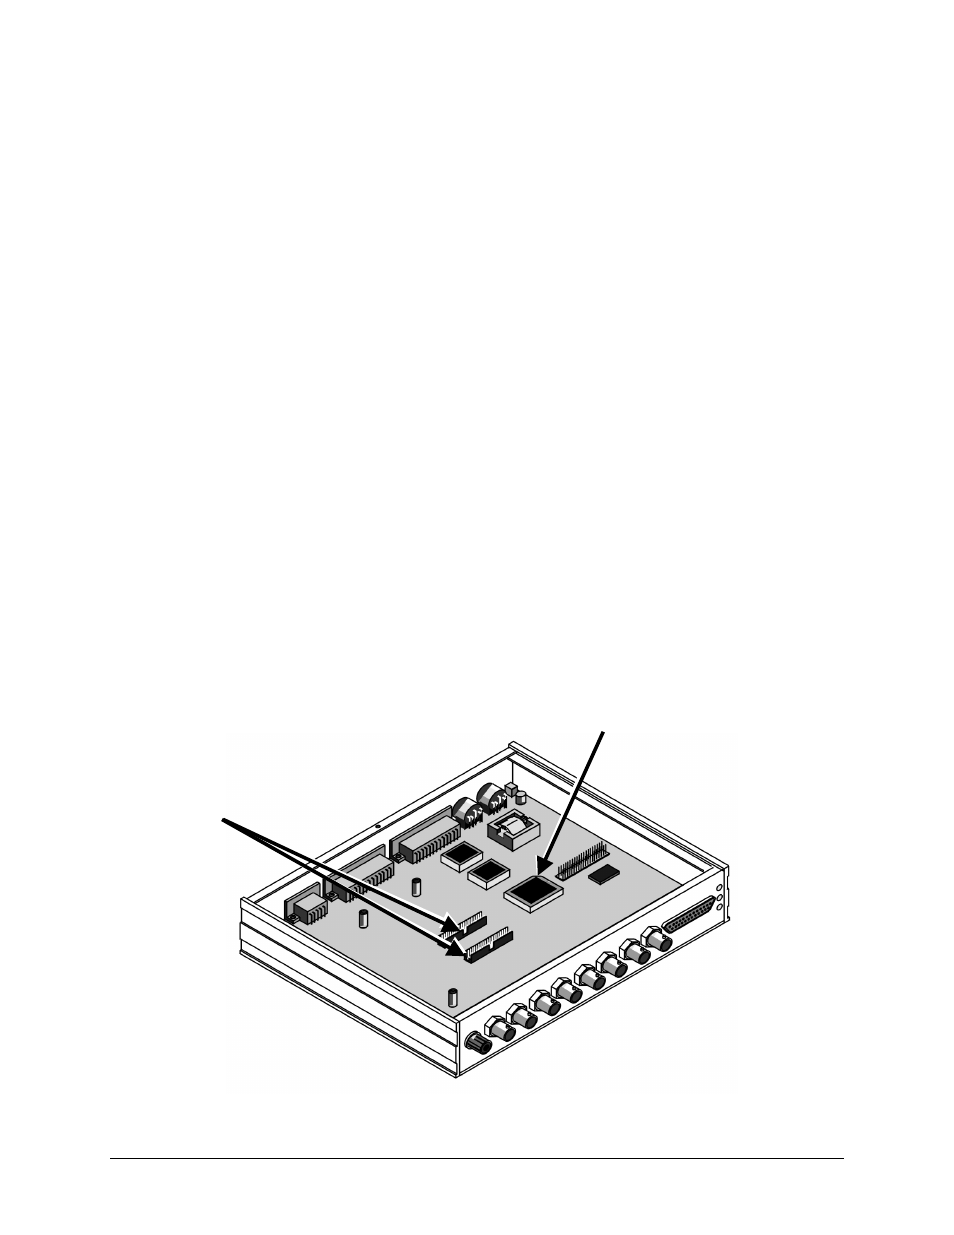
WaveBook/512 Series – Location Reference for Replacing Chip at U103
In step 3: Remove the option
card from J10 and J11.
In step 5: Remove ECP FPGA at U103.
In step 6: Replace the chip with part number
262-0301 B.