Quick start, Daqscan/2000 series, Ethernet-based data acquisition components – Measurement Computing DaqScan 2000 Series User Manual
Page 9: Before you get started, Step 1 - install software, Step 2 - connect the daqscan to the ethernet, Step 3 - connect the daqscan to power
1126-0940, rev 1.0
324633A-01 Printed in Hungary
DaqScan/2000 Series
Quick Start
Ethernet-Based Data Acquisition Components
Before you get started
Verify that you have the following items.
•
•
•
•
•
•
•
DaqScan/2000 Series Device
AC Power Cord
Ethernet Patch Cable
Ethernet jack
[on PC or on a hub connected to the Ethernet]
Data Acquisition CD
Monitor: SVGA, 1024 x 768 screen resolution
Windows 2000 and Windows XP users:
PC with
I
ntel
™
Pentium, 1 GHz or equivalent;
512 MB memory; 10 GB disk space
•
Windows Vista users:
PC must be Wi
ndows Vista Premium Ready
Step 1 - Install Software
1. Close all running applications on the host PC.
2. Insert the Data Acquisition CD into your CD-ROM drive and wait for the CD to auto-run. An Opening
Screen will appear. As an alternative, you can download software from
3. Click the <ENTER SETUP> button.
Note: If you are downloading software from our website, follow instructions provided there.
4. From the hardware selection screen [which follows a licensing agreement], select the
device from the drop-down list and follow the on-screen instructions.
DaqScan/2001
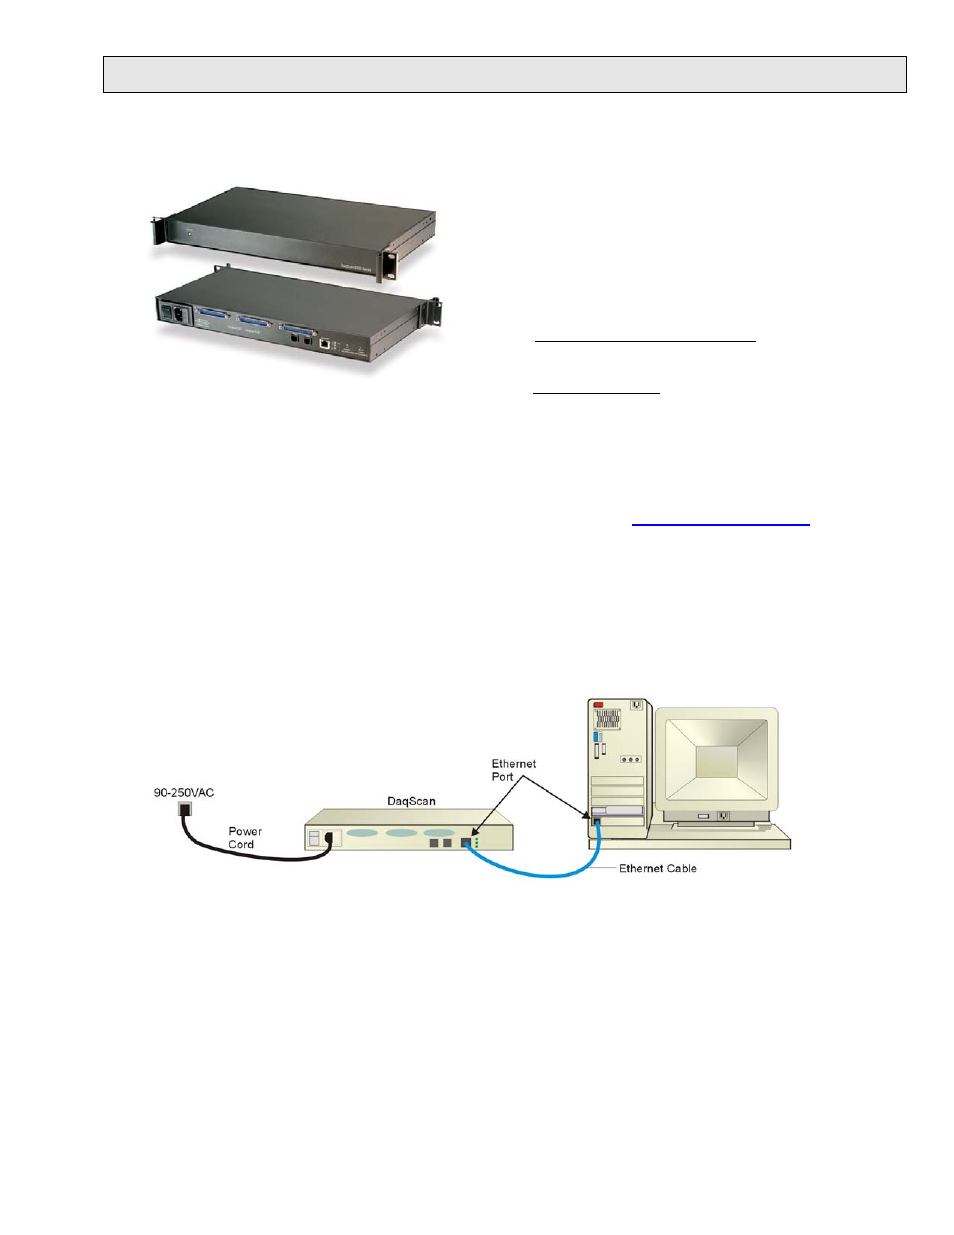
Step 2 - Connect the DaqScan to the Ethernet
In the figure, the DaqScan is connected directly to an Ethernet port on a host computer. Please consult your user’s
manual (located in PDF format on the CD) should you need information regarding network types other than this simple
direct connection.
1. Connect the Ethernet cable to the Ethernet jack on the DaqScan rear panel.
2. Connect the other end of the Ethernet cable to the Ethernet jack on the host computer or
network hub.
Step 3 - Connect the DaqScan to Power
1. With the DaqScan’s power switch “OFF,” connect the power cord to the unit.
2. Connect the cord’s plug to a standard AC outlet; then turn the DaqScan Power switch to “ON.”