Build the ni labview program, Create an analog input voltage channel, Add a sample clock – Measurement Computing ULx for NI LabVIEW Quick Start User Manual
Page 4: Specify when to start the acquisition, Acquire data
Quick Start: MCC ULx for NI LabVIEW
Build the NI LabVIEW program
4
Build the NI LabVIEW program
The following exercise shows you how to create a program that acquires data from an MCC device, displays the
data in a waveform, and saves the data to a file. The MCC USB-1608GX-2AO device was used for this
exercise.
To create the source code for the program, complete the following steps:
1. Start LabVIEW and open a blank VI or empty project.
2. Display the block diagram window if it is not already open.
3. Select
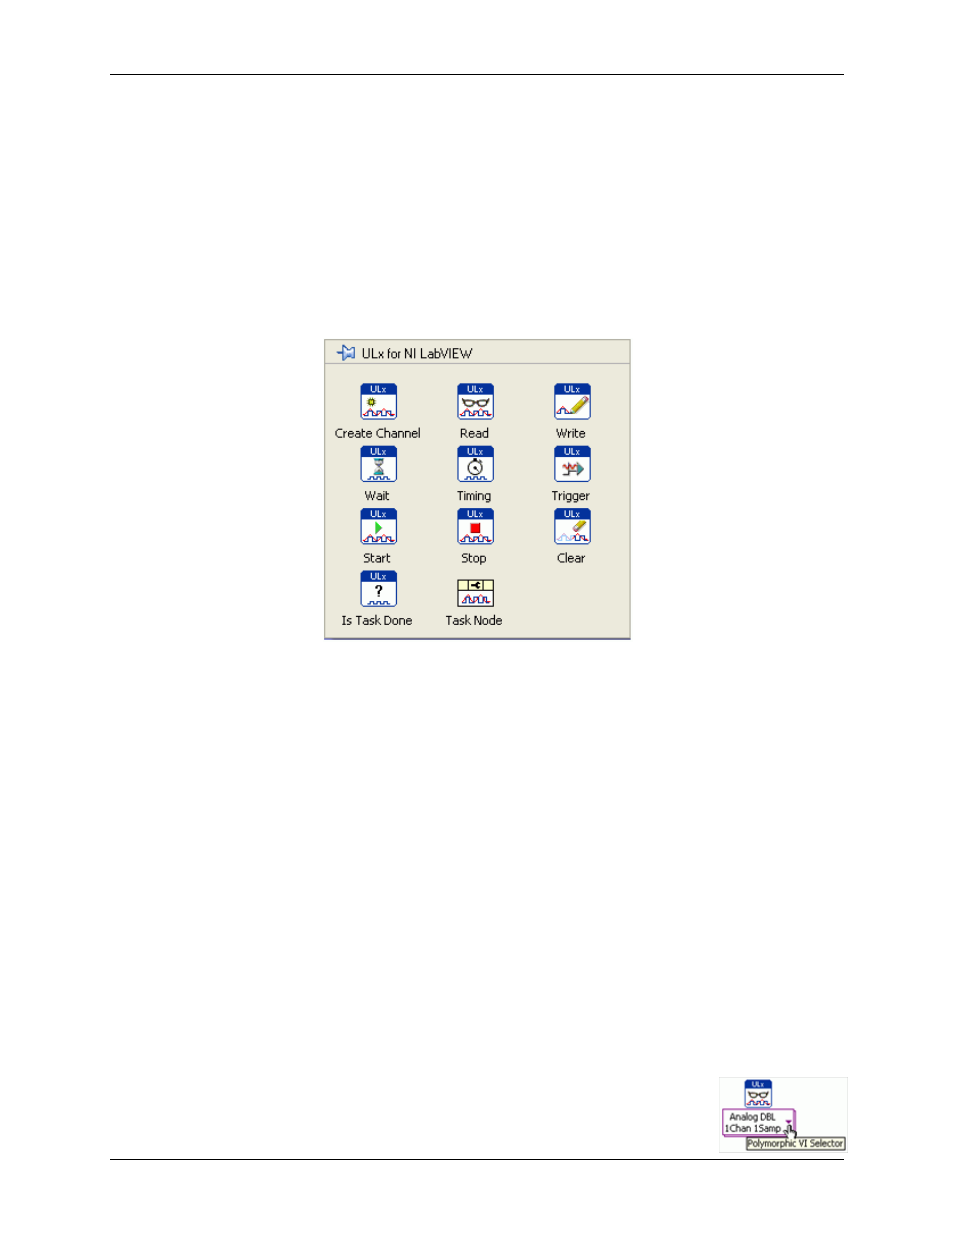
View»Functions Palette
to display the Functions palette.
4. Select
User Libraries»ULx for NI LabVIEW
to display the MCC ULx VIs.
Create an analog input voltage channel
1. Select
ULx for NI LabVIEW»Create Channel
and place the
ULx Create Virtual Channel VI
on the block
diagram.
Tip
: To show a text label on the block diagram, right-click on the VI and select
Visible Items»Label
from
the shortcut menu.
2. Right-click the
physical channels
terminal and select
Create»Control
.
3. Add a control to the
minimal value
terminal.
4. Add a control to the
maximum value
terminal.
Add a sample clock
1. Select
ULx for NI LabVIEW»Timing
and place the
ULx Timing VI
on the block diagram.
2. Add a control to the
sample mode
terminal.
3. Add a control to the
samples per channel
terminal.
4. Add a control to the
rate
terminal.
Specify when to start the acquisition
Select
ULx for NI LabVIEW»Start
and place the
ULx Start VI
on the block diagram.
Acquire data
Select
ULx for NI LabVIEW»Read
and place the
ULx Read VI
on the block diagram. Use
the polymorphic VI selector to select the
Analog Wfm 1Chan NSamp
instance.