Operating instructions – MBM Corporation FMM3 User Manual
Page 10
Operating Instructions
Page 09
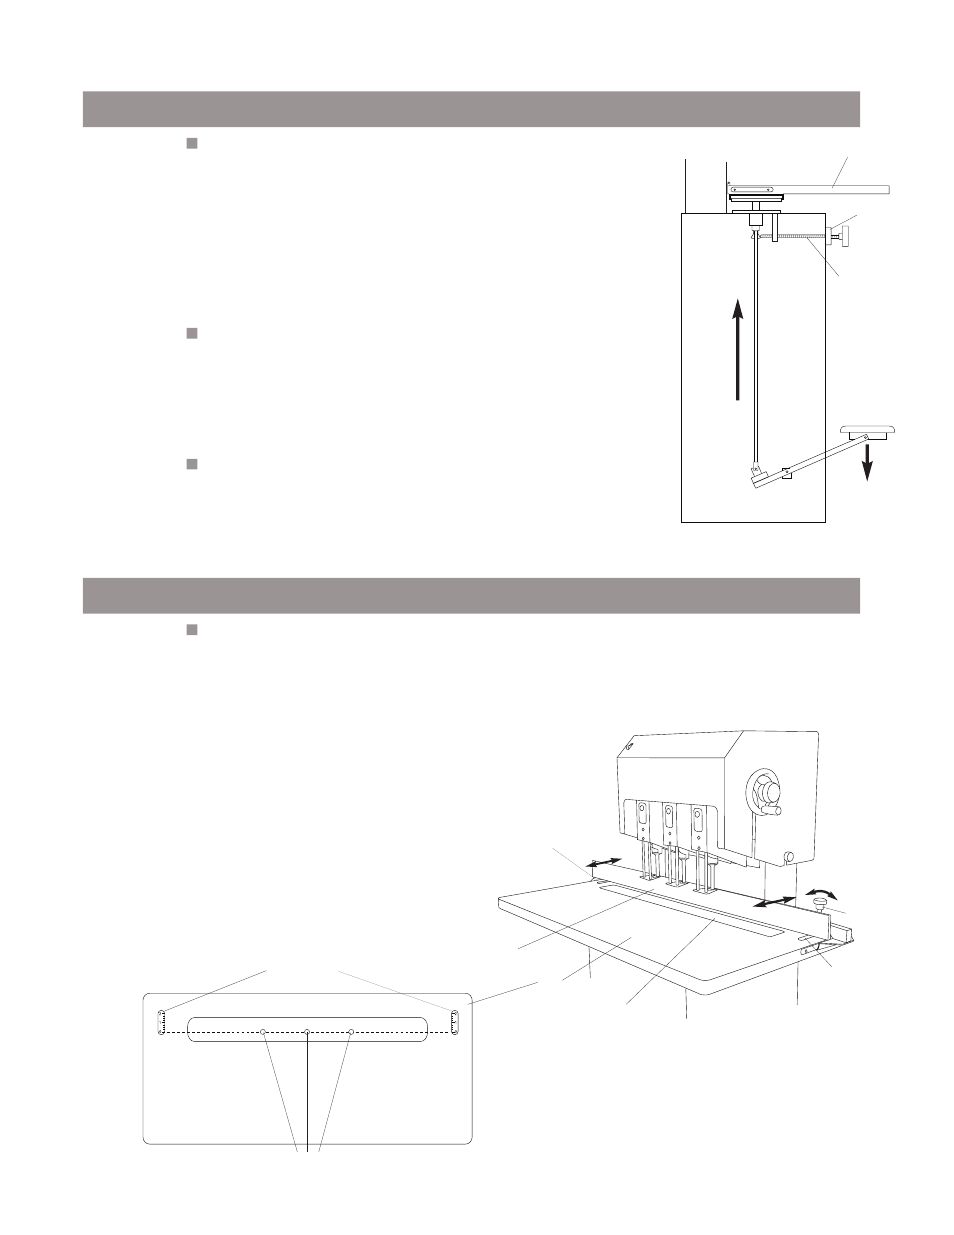
Adjusting the Table Height
Back Gauge Adjustment
After you level the drill bits you may need to adjust your table
height. Test drill through a stack of scrap approximately the
same height as that you will be drilling. If the drill bits drill into
the Drill Strip or if the drill bits fail to penetrate through the
bottom sheet of scrap you will need to adjust the table height.
If you are using the card stock under your scrap
(recommended) then you should just be lightly scoring the
card stock when the table is in its full upright position. If your
bits are drilling correctly move onto Step #7.
Step #6
Step #7
If your drill bits fail to penetrate through the scrap:
Loosen the Lock Knob of the Vertical Stop Adjustment
Assembly and rotate the large knob counterclockwise allowing
the table to travel higher. Tighten down the Lock Knob when
it is positioned correctly.
If you are drilling into the Drill Strip:
Loosen the Lock Knob of the Vertical Stop Adjustment
Assembly and rotate the large knob clockwise allowing the
table to travel lower. Tighten down the Lock Knob when it is
positioned correctly.
Note:
Zero (0) on these scales align with the center of the
hollow drill bits.
Adjust the Back Gauge so that it is the correct
distance from the edge of the product to the center of
the hole to be drilled by performing the following:
Loosen the Clamp Knob on the right side of the Back
Gauge.
Using the two Scales embedded in the rear corners
of the table, align the front edge of the Back Gauge
with the desired distance.
Tighten down the Clamp Knob when
the Back Gauge is positioned
as desired.
1.
2.
3.
Table
Internal Side View
Vertical Stop
Adjustment
Foot Treadle
Lock Knob
Clamp Knob
Back Gauge
Table
Back Gauge Scale
Back Gauge Scale
Back Gauge Scale
Drill Strip
Drill Strip
Hollow Drill Bits