Venting installation instructions, Continued – Desa CHDV47NR User Manual
Page 14
108861
For more information, visit www.desatech.com
For more information, visit www.desatech.com
14
VENTING INSTALLATION
INSTRUCTIONS
Continued
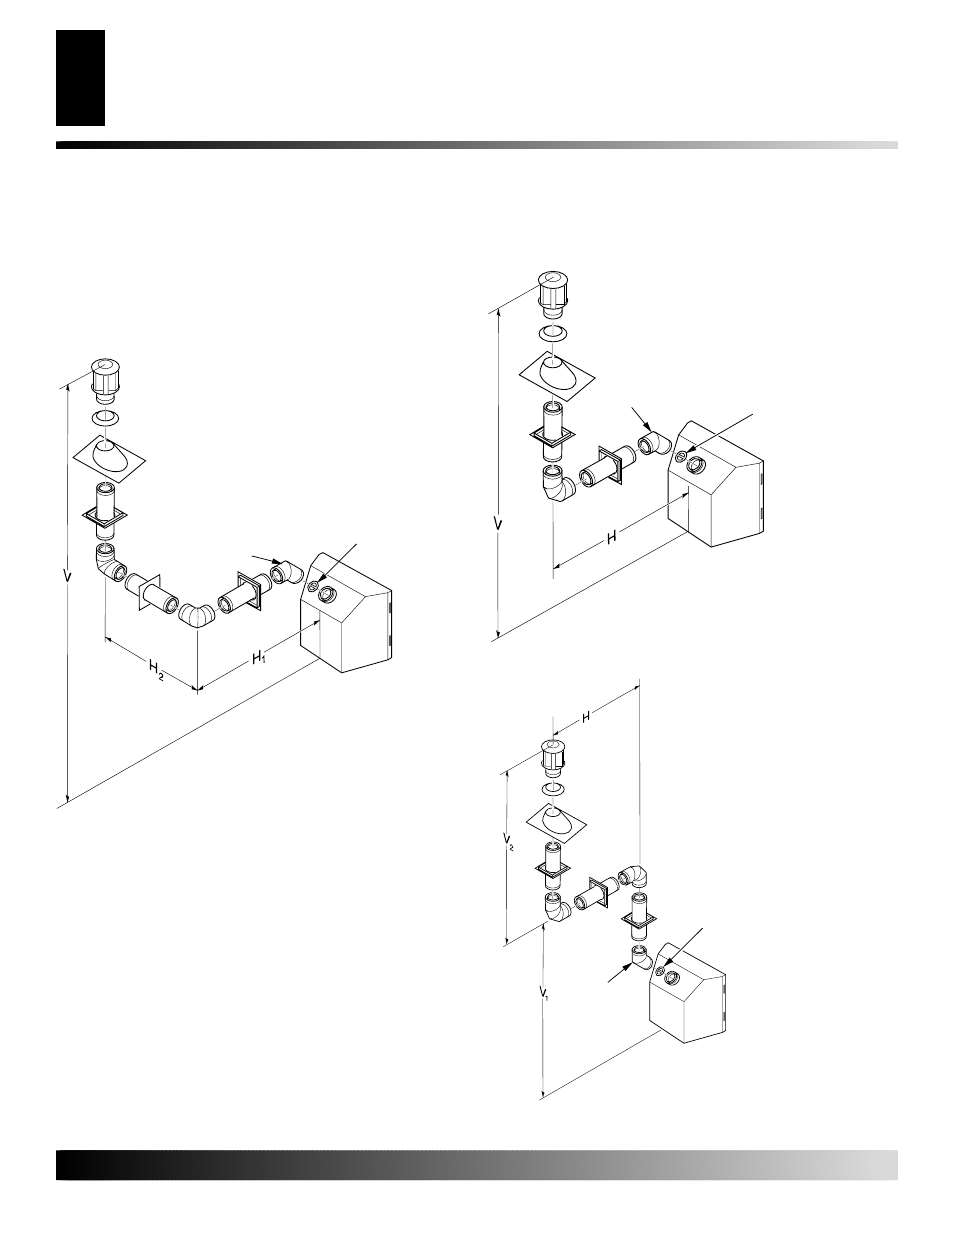
Vertical Termination Configurations
Figures 21 through 24 show four different configurations for verti-
cal termination.
Venting with Two 90
°
Elbows
Vertical (V)
Horizontal (H
1
) +
Horizontal (H
2
)
5' min.
2' max.
6' min.
4' max.
7' min.
6' max.
8' min.
8' max.
20' max.
8' max.
Figure 21 - Vertical Venting Configuration Using Two 90
°
Elbows
with Two Horizontal Runs (Vertical Round High Wind Termination
Shown)
Venting with One 90
°
Elbow
Vertical (V)
Horizontal (H)
5' min.
2' max.
6' min.
4' max.
7' min.
6' max.
8' min.
8' max.
20' max.
8' max.
Figure 22 - Vertical Venting Configuration Using One 90
°
Elbow
(Vertical Round High Wind Termination Shown)
Note: Install restrictor
into inner collar of
fireplace as shown.
Venting with Two 90
°
Elbows
Vertical (V
1
)
Horizontal (H)
5' min.
6' max.
6' min.
12' max.
7' min.
18' max.
8' min.
20' max.
Note: Vertical (V
1
) + Vertical (V
2
) = 40' max.
Figure 23 - Vertical Venting Configuration Using Two 90
°
Elbows
(Vertical Round High Wind Termination Shown)
VENTING INSTALLATION INSTRUCTIONS
Installation for Vertical Termination (Cont.)
Note: Install
restrictor into
inner collar of
fireplace as
shown.
45
°
Elbow
Note: Install restrictor
into inner collar of
fireplace as shown.
45
°
Elbow
45
°
Elbow