Installation instructions, Step 15 install toekick, Step 14 start icemaker – Kleenmaid ZSGS420IBS User Manual
Page 18: Step 13 check power, secure grille panel, Inspect final installation
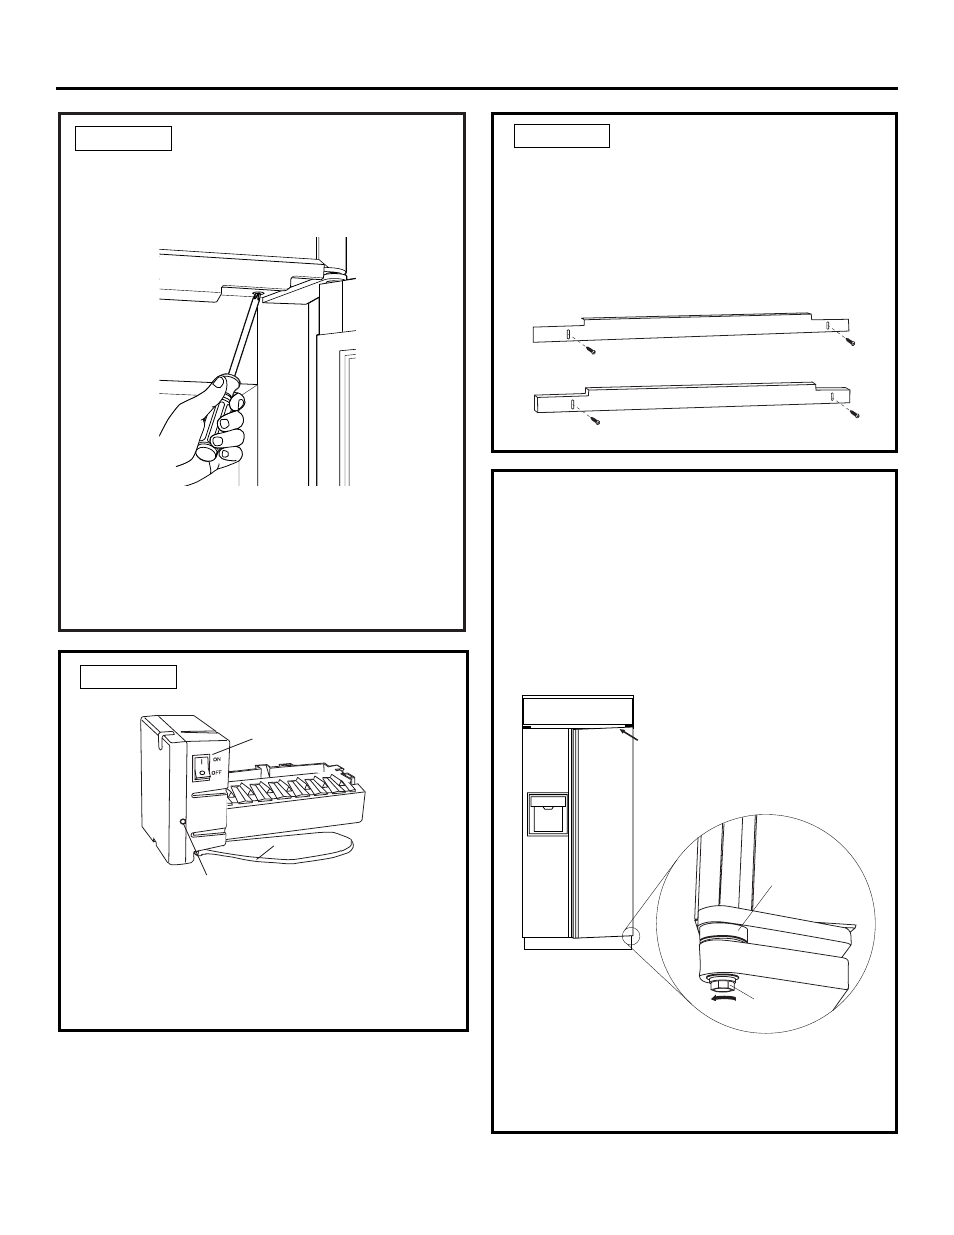
Power Switch
Green Power Light
Feeler Arm
Supplied Toekick
6 mm or Thicker Toekick
Bushing
Door Hinge
Case Hinge
5/16" Wrench
Raise
Door Out of
Alignment
STEP 15 INSTALL TOEKICK
• Locate the supplied toekick (shipped taped to
the side of the refrigerator). Install with 2 screws
provided, adjust to desired height and tighten
screws.
• A custom toekick can be installed to match or
complement the surrounding cabinetry. Use the
supplied toekick as a template to cut the shape.
STEP 14 START ICEMAKER
• Flip the switch to I (ON). The icemaker will begin
operation automatically.
• Be sure nothing interferes with the sweep of the
feeler arm.
• Discard the first full bucket of ice cubes.
• To turn the icemaker off, set the switch to O (OFF).
STEP 13 CHECK POWER, SECURE
GRILLE PANEL
• Check to be sure the power cord is plugged into
the receptacle.
• Check to make sure power to refrigerator is on by
opening refrigerator door to see if interior lights
are on.
• Close grille panel. The grille panel must be secured
to prevent access. Reinstall grille panel security
screws on each side of the refrigerator.
Installation Instructions
18
INSPECT FINAL INSTALLATION
Check door alignment
Stand back away from the refrigerator to inspect the
final installation.
• Check to be sure handles are evenly aligned with
each other at the top. To adjust, loosen handle
screws and slide up or down. Tighten screws.
• During shipping or the addition of heavy door
panels may have caused the doors to move slightly
out of alignment.
• If necessary, the fresh food door may be adjusted
up or down to align with the freezer door.
• Use a 5/16" wrench to adjust the hinge pin as
shown.