Kleenmaid OMFFS9010 User Manual
Page 7
2nd SECTION FOR THE USER
WARNING:
Children should be kept away while the oven or grill is in use since
accessible parts become hot.
- Do not use oven base panel as a shelf, make use of the oven
shelves.
- To avoid splattering and smoke, position collecting tray under
the grill with some water in it.
- Always turn pan handles to the side or to the back of the hob.
If they are left out into the room they can easily be hit or reached
by children, this knocking the pan off the hob.
- Dont let children sit down or play with the oven door. Do not
use the drop down door as a stool to reach above cabinets.
- Once your cooking is over make sure to close the main gas
supply.
7
Setting the time
Press the manual button (4) at the same time 5 or 6 button to set
the desired time. This deletes any previously set programme. The
contacts are switched off .
Manual use
By pressing the manual button the relay contacts switch on, the
AUTO symbol switches off and the saucepan symbol lights up.
Manual operation can only be enabled after the automatic
programme is over or it has been cancelled.
Automatic use
Press the cooking time (2) or end time button (3) to switch
automatically from the manual to the automatic function.
Semi-automatic use with cooking time setting
Press the cooking time button (2) and set the desired time with -
or +. The AUTO and cooking time symbols light up continuously.
The relay switches on immediately. When the cooking end time
corresponds to the time of day, the relay and cooking time symbol
switch off, the sound signal rings and the AUTO symbol flashes.
Semi-automatic use with end time setting
Press the end time button (3). The time of day appears on the
display. Set the cooking end time with 6 button. The AUTO and
cooking time symbols light up continuously. The relay contacts
switch on. When the cooking end time corresponds to the time of
day, the relay and the cooking time symbol switch off. When the
cooking time is up, the AUTO symbol flashes, the sound signal
rings and both the relay and the cooking time button switch off.
Setting
To set, press and release the desired function, and within 5 seconds
set the time with 5 and 6 buttons.
+ and - buttons (5 and 6).
The 5 and 6 buttons increase or decrease the time at a speed
depending on how long the button is pressed.
Automatic use with cooking time and end time setting
Press the cooking time button (2) and select the length of the
cooking time with 5 or 6 button. The AUTO and cooking time
symbols light up continuously. The relay switches on. By pressing
the cooking end time button (3) the next cooking end time appears
on the display. Set the cooking end time with 6 button. The relay
and the cooking time symbol switch off.
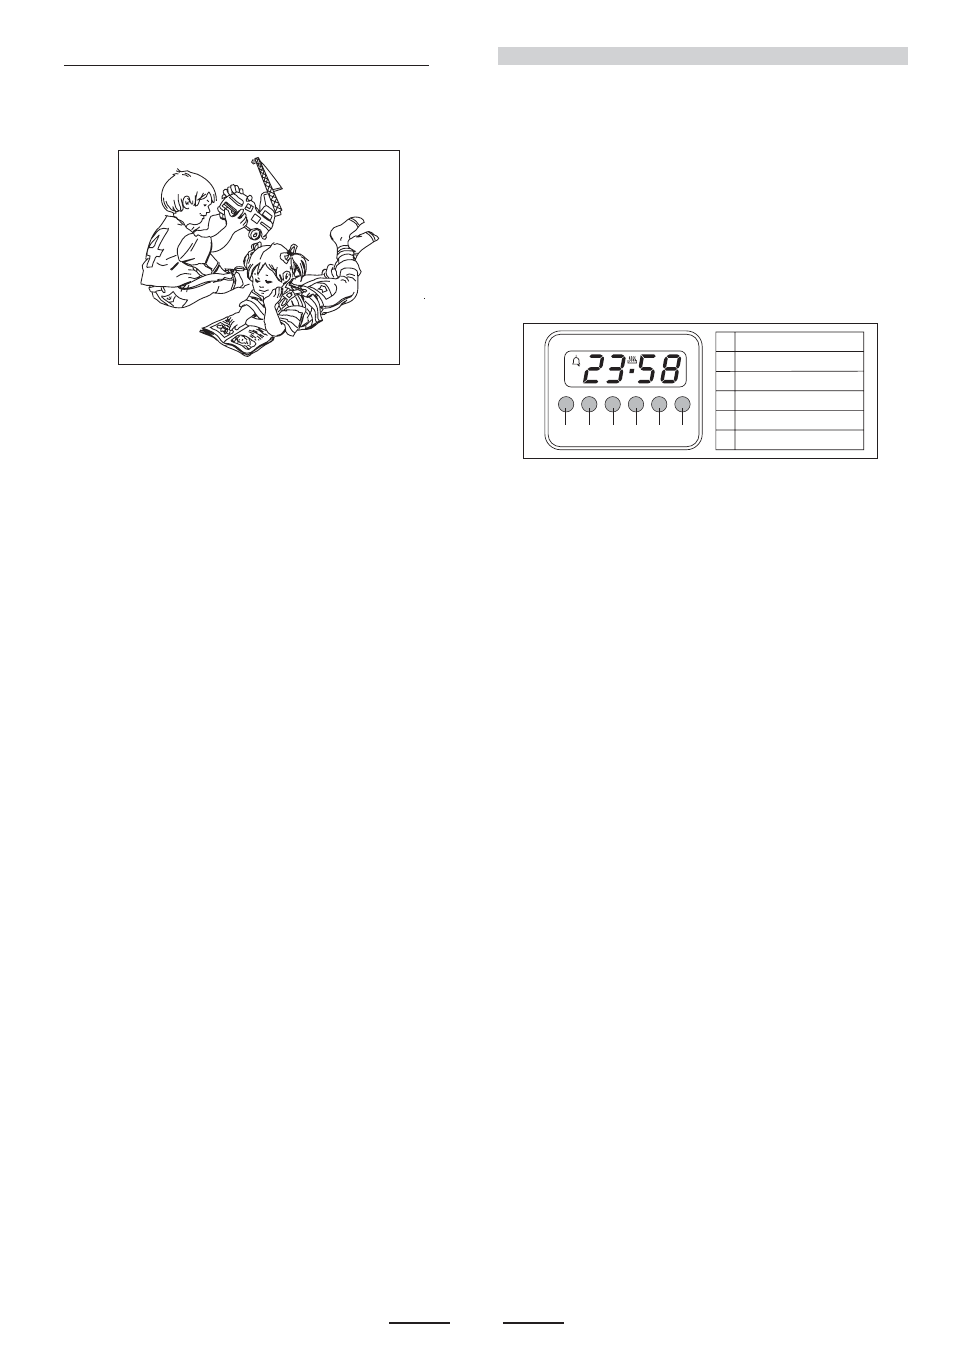
1
2
3
4
5
6
Minute timer
Cooking time
Cooking end
Manual
Subtract time
Add time
- WARNING -
During use, the appliance becomes hot.
Care should be taken to avoid touching heating elements inside
the oven.
A
U
T
O
1
2
3 4 5 6
Features
24 hours clock with automatic programme and minutes counter.
Functions
Cooking time, cooking end time, manual position, clock,
minutes counter, times to be set up to 23 hours 59 minutes.
Display
4-figures, 7-segments diplay for cooking times and time of day.
Cooking time and manual function
=
saucepan symbol
Automatic function
=
AUTO
Minutes counter
=
bell symbol
The symbols light up when the corresponding functions are selected.
LED PROGRAMMER