Kleenmaid OMFFS9010 User Manual
Page 11
Pan supports can be washed by hand or in a dishwasher.
Remember to remove rubber feet (if fitted) prior to washing.
Refit them afterwards.
Before cleaning the appliance, close the gas stopcock and unplug
appliance or disconnect power at the main circuit breaker of the
electrical system.
Do not clean the appliance surfaces when still hot.
Always clean off spillage as quickly as possible to prevent burning
on which will make removal more difficult. Wash with a clean cloth
soaked in hot soapy water, rinse and dry with a soft cloth.
DO NOT USE ABRASIVES. CAUSTIC PASTES OR SPRAYS.
COARSE CLEANING PADS OR POWDERS. DO NOT USE
EXCESSIVE WATER WHEN CLEANING YOUR OVEN IN ORDER
TO AVOID WATER PRESSING THROUGH CLEFTS INTO THE
BACK OF CONTROLS PANEL OR OF THE UNIT.
CLEANING
B
A
C
B
A
B
A
NOTE: A steam cleaner is not to be used for cleaning this
appliance .
Daily
Regular wiping down directly after use prevents dirt from burning
on. Clean the appliance with water and a detergent or all purpose
cleaner.
Avoid using too much water to prevent it entering the burner or
ventilation openings.
Warning:
Do not place fatty foods too close to the grill and never leave the
grill unattended. If fatty foods are grilled, or roasting has been
cooked in the oven at a high temperature the grill element may
smoke. This is not dangerous and the smoke is caused by the fat
burning off when the grill element is hot. Leave the grill element
on until the smoking has stopped t-hen use as normal. If a grease
fire should occur in a pan put out the flame by placing a lid on the
pan. Do not throw water on a grease fire.
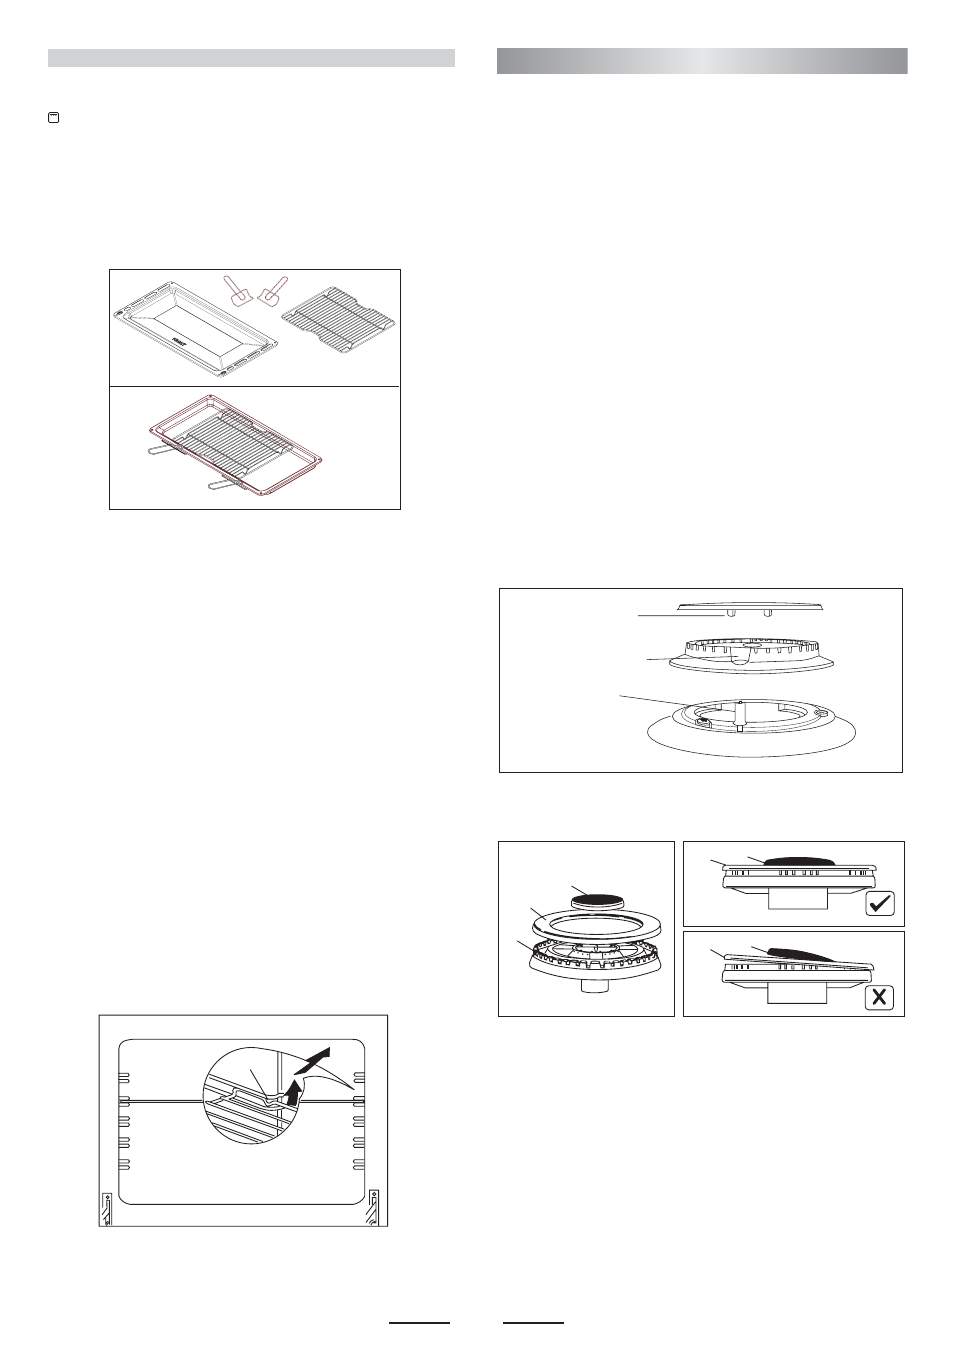
USE OF THE ELECTRIC GRILL
Bump
USlNG THE GRILL
Turn the oven knob to the right and place it on the grill position
.
The grill pan should be located on the top oven shelf position.
Some models are provided with two detachable grill pan handles
which are engaged over the front edge of the pan between the
indentations provided. A wire grid is supplied. The grill pan handles
should be removed from the grill pan during the grilling operation
and only fitted for removal or insertion of the grill pan particularly
when hot. Always preheat the grill on full for 3-5 minutes before
inserting the food.
Pan supports and burners
The burner heads can be removed for cleaning.
NB Do not drop hot burner caps in cold water.
Because of the rapid cooling they might get damaged.
Lift off and soak for about 10 minutes in hot water with a little
detergent. After having cleaned and washed them, dry them
carefully.
Make sure that no burner holes are clogged.
Clean the burners once a week or more frequently if necessary.
Make sure you have reassembled the burners correctly.
Oven accessories (shelves, trays etc) should be washed in mild
detergent solution and should not be treated with abrasives. The
oven interior panels should be cleaned with mild detergent solution,
mild cream cleaners or a moist soap pad.
11
For a triple crown burner, make sure head C and covers A
and B are properly placed on their seats as figure 4C and not
off-centered as in figure 5.
burner cap
locating pegs
notch for electrode
in burner head
electrode
Fig. 4C
Fig. 5
The user can change the shelves, depending on his personal
whishes and on the different food.
Geat the oven 5 minutes before introducing the food.
Oven Shelves
The shelves are designed with stop-locks so when placed correctly
on the shelf supports, they will stop before coming completely
out of the oven and will not tilt when you are removing food from
them or placing food on them.
When placing cookware on a shelf, pull the shelf out to the bump
on the shelf support. Place the cookware on the shelf, then slide
the shelf back into the oven. This will eliminate reaching into the
hot oven.
To remove the shelves from the oven, pull them forward you,
tilt front end upward and pull them out.
To replace, ct in the opposite manner as before.
Install shelves by locating them in the horizontal guide rails on
the oven walls. The raised portion of the shelf is to be facing the
rear wall of the oven.