Setting up your tv, Installing remote control batteries, Using the remote control – Dynex DX-LCD22-09 User Manual
Page 8: Connecting to ac power
8
Setting up your TV
Setting up your TV
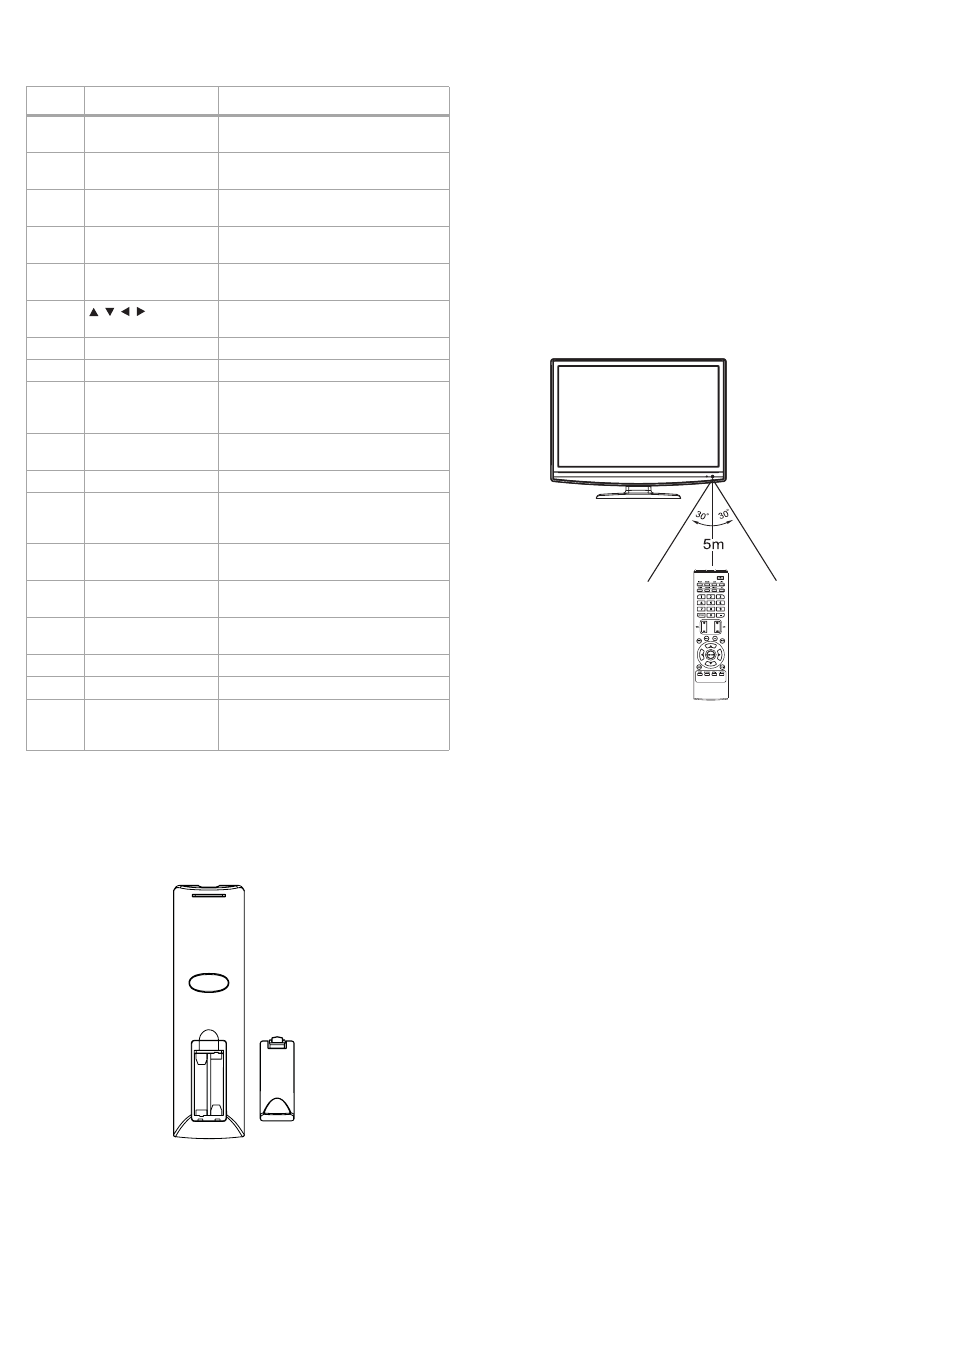
Installing remote control batteries
To install remote control batteries:
1 Remove the battery compartment cover.
2 Insert two AAA batteries into the battery compartment. Make
sure that the + and – symbols on the batteries match the + and
– symbols in the battery compartment.
3 Replace the battery compartment cover.
Notes:
Make sure that you match the + and – symbols on the batteries with the
symbols in the battery compartment.
Do not mix different types of batteries or old and new batteries.
If you do not intend to use the remote control for an extended period of
time, remove the batteries to prevent leakage.
Do not try to recharge non-rechargable batteries. They may overheat and
rupture.
Using the remote control
To use the remote control:
• Point the remote control directly at your TV, within a 60° angle
horizontally (30° to either side) and within 30° vertically of the
remote control sensor on the front of your TV, and within 16 feet
(about 5 m) of your TV.
Caution
Do not expose the remote control to liquids, direct sunlight, or shock.
Do not mix batteries of different types.
Notes
Objects between the remote control and the remote control sensor may
block the remote control signal.
The range of the remote control may be diminished if direct sunlight or
other strong light is shining on the remote control sensor. In this case,
change the angle of the lighting, move your TV, or operate the remote
control closer to the remote control sensor.
Connecting to AC power
Notes:
The AC power cord has a grounding-type AC line plug. If the supplied AC
cord does not match your AC power outlet, contact a qualified
electrician. Do not defeat the purpose of a grounded plug.
To connect to AC power:
1 Plug the AC cord into an AC power outlet.
Warnings:
Do not connect this TV to power using any device other than the supplied
AC power cord. This could cause fire, electrical shock, or damage.
Do not use with a voltage other than the power voltage indicated on the
marking label. This could cause fire, electrical shock, or damage.
Do not plug or unplug the plug when your hands are wet. This may cause
electrical shock.
Cautions:
When this TV is not used for a long time, (such as away on a trip) in the
interest of safety, be sure to unplug it from the AC power outlet.
If you need to replace the supplied AC power cord, contact customer
service.
6
RECALL
Press to return to the last TV channel
viewed.
7
VOL +/–
Press to increase (+) or decrease (-)
the volume.
8
MUTE
Press to mute the sound. Press again
to restore the sound.
9
GUIDE
Press to display information about a
DTV program (if available).
10
ENTER
Press to confirm option settings in
the on-screen menu.
11
Press to navigate in the on-screen
menu.
12
MENU
Press to open the on-screen menus.
13
SLEEP
Press to set the sleep timer.
14
MTS/SAP
Press to select Stereo, SAP, or Mono
sound in analog TV mode. In DTV
mode, press to select the audio track.
15
CCD
Press to turn closed captioning on or
off.
16
CH-LIST
Press to display the channel list.
17
•
Press to enter a program number for
multiple program channels. For
example 2•1 or 2•2.
18
CH +/–
Press to go to the next or previous
channel in the TV channel list.
19
FAVORITE
Press to display your favorite channel
list.
20
DISPLAY
Press to display the information
banner.
21
EXIT
Press to exit the menu.
22
PICTURE
Press to select the picture mode.
23
AUDIO
Press to select the preset sound
mode. Options include News, Music,
Movie, and Personal.
#
Button
Description