Hoefer PR150 User Manual
Page 6
•
p4
Gradually lower the rest of the gasket so that the
strips of the gasket material align themselves on the
sealing ridges between the chambers.
6
The membrane removed from the gel transfer should
be placed with the gel contact face down against the
sealing gasket. The membrane should remain wet
during the procedure. (A dry membrane will tend to
wick the incubation solution out of teh chambers.)
The direction of electrophoresis should be parallel
to the long direction of the slots. All edges of the
membrane must lie inside the edges of the sealing
gasket but they must also cover the edges of all slots.
7
If your samples have been separated in individual
lanes, adjust the alignment of the membrane so that
the lanes are above open slots. The pencil tracing
marking the lanes should be on the upper side of the
membrane at this point.
8
Place the solid pressure gasket over the transfer
membrane. Ensure that all edges are aligned with
the slotted gasket and that they are within the milled
indentation of the acrylic plate.
9
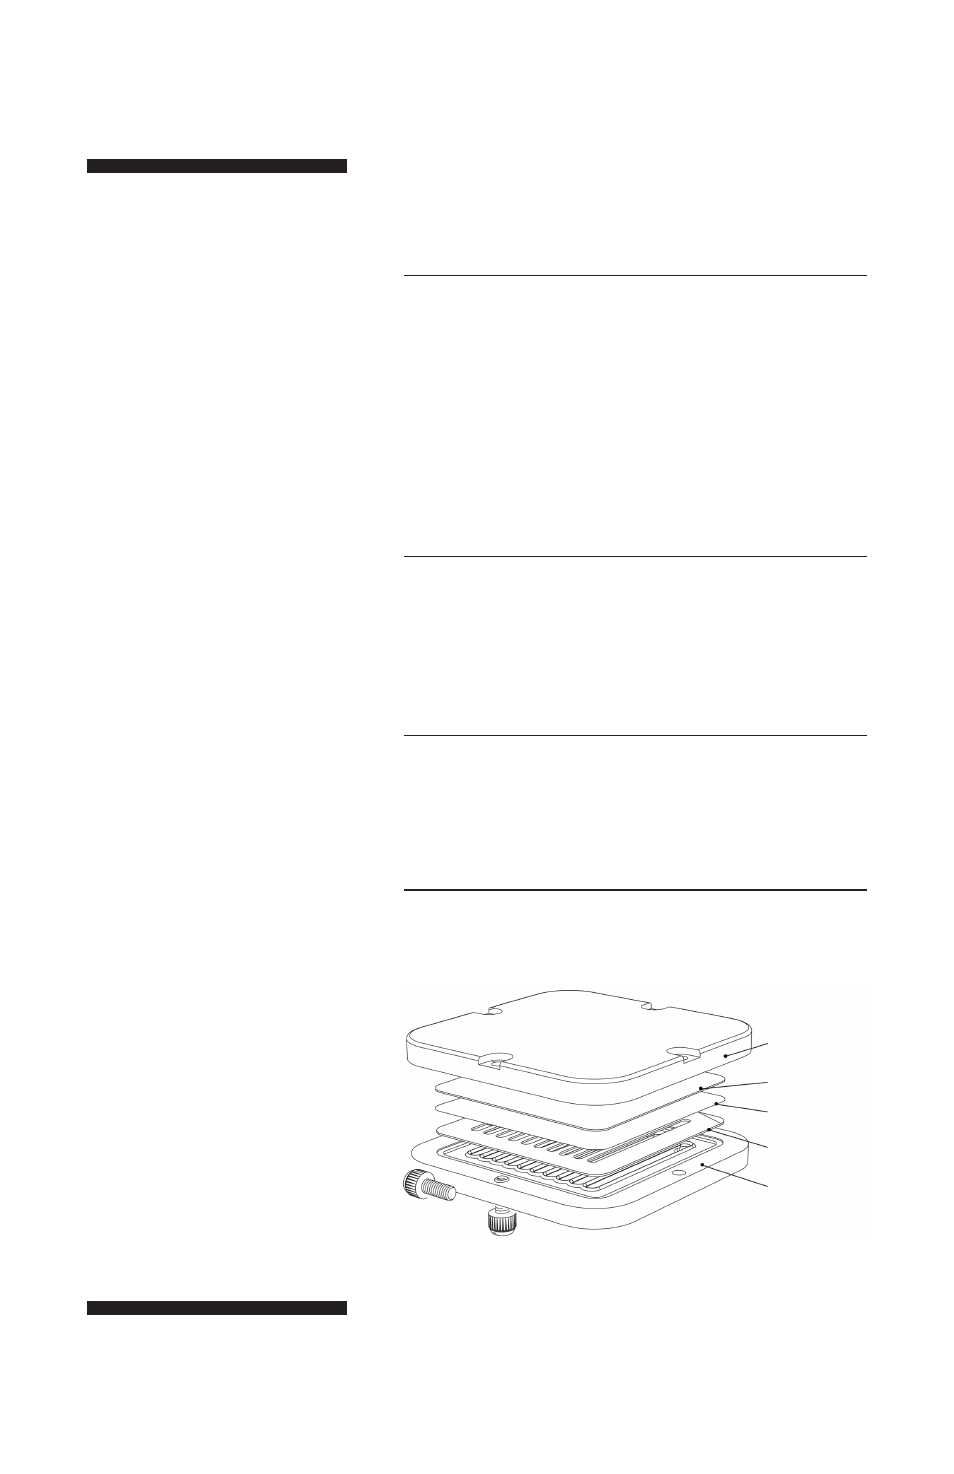
Cover the pressure gasket with the pressure plate (Fig 2).
Note: The size of the membrane
is important. It must lie
completely within the gasket
region of the PR150 — it must
not extend beyond the edges of
the slotted sample gasket and
it must cover all of the slots
beyond the sealing ridges to
assure that there are no leaks
when the membrane is clamped
in place.
Note: Mark the orientation of
the transfer membrane prior
to blotting by tracing the teeth
of the ten well comb with a
pencil near the very top of the
membrane. The marking should
be performed prior to wetting
the membrane. Place the
unmarked side of the membrane
on the top of the gel. Align the
pencil tracing carefully to match
the position of the sample wells
in the gel.
Fig 2. Assembling the components
of the PR150 incubation manifold.
pressure plate
pressure gasket
membrane
sample gasket
sample plate