Installation without fan package, Step 1 roof opening, Step 2 install roof curb – Greenheck KSF (457646) User Manual
Page 2: Step 3 install ductwork, Step 4 apply sealant
2
Square Curb
Footprint
C
L
A
A
Roof
Opening
C
L
Supply
Ductwork
by Others
Sealant
Ductwork with duct
adapter installed
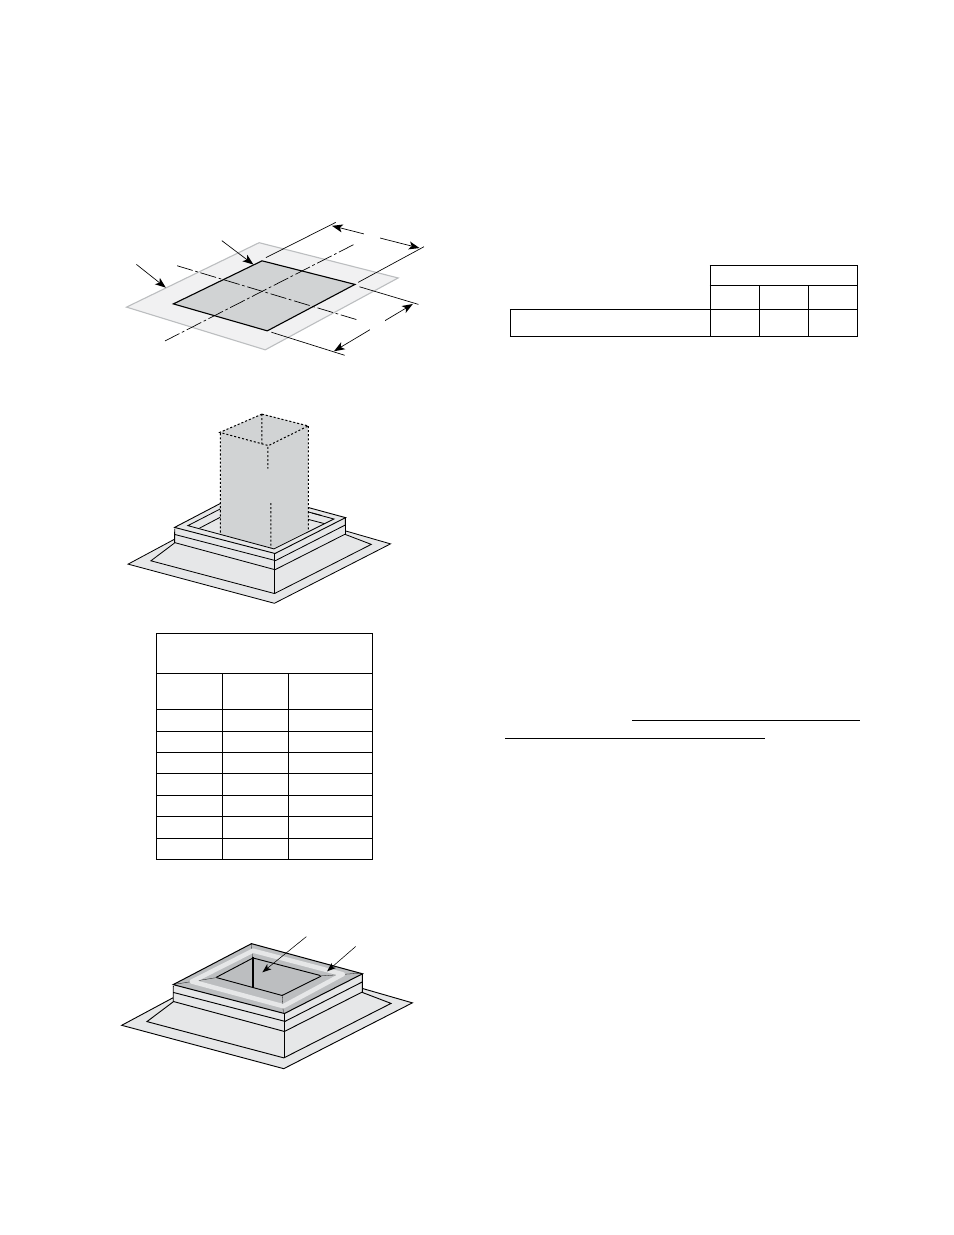
installation without Fan package:
step 1 roof Opening
For down discharge units, the chart below
shows the maximum recommended roof opening
dimensions. These sizes can be smaller based on
codes and ductwork sizes. See page 10 for curb
dimensions.
Before beginning this installation:
When locating this unit, make sure that there is room to
access the unit from all sides. The inlet must be located at
least 10 feet away from any exhaust vents.
step 2 install roof Curb
Center the curb over the roof opening as shown in
first installation diagram at left.
Level the curb and shim if necessary. Attach curb
to roof and flash in place.
step 3 install Ductwork
If this unit is a horizontal discharge, skip to Step 4.
The chart (left) shows the duct sizes and straight
lengths recommended for optimal performance
(AMCA Publication 201-90). Using duct sizes
and lengths less the recommended will affect
fan performance. Good duct practices should be
followed for the remaining ductwork. The use of
a duct adapter with the supply duct is strongly
recommended to properly align the ductwork with
the supply fan discharge. The duct adapter is only
a guide and is not intended to be used as support
for the ductwork.
step 4 apply sealant
Before installing fan, apply a sealant around the
perimeter of the supply duct adapter to isolate
the fan and minimize vibration.
Recommended Supply
Ductwork Dimensions
Blower
Size
Duct
Size
Straight
Duct Length
108
13 x 13
37 in.
109
13 x 13
37 in.
110
14 x 14
47 in.
112
16 x 16
54 in.
115
20 x 20
68 in.
118
24 x 24
81 in.
120
26 x 26
96 in.
Housing Size
#1
#2
#3
A - Max Roof Opening (Square)
25 in.
35 in.
47 in.