Installation – Greenheck Hinge Kit Sizes 075-203 (462866) User Manual
Page 2
2
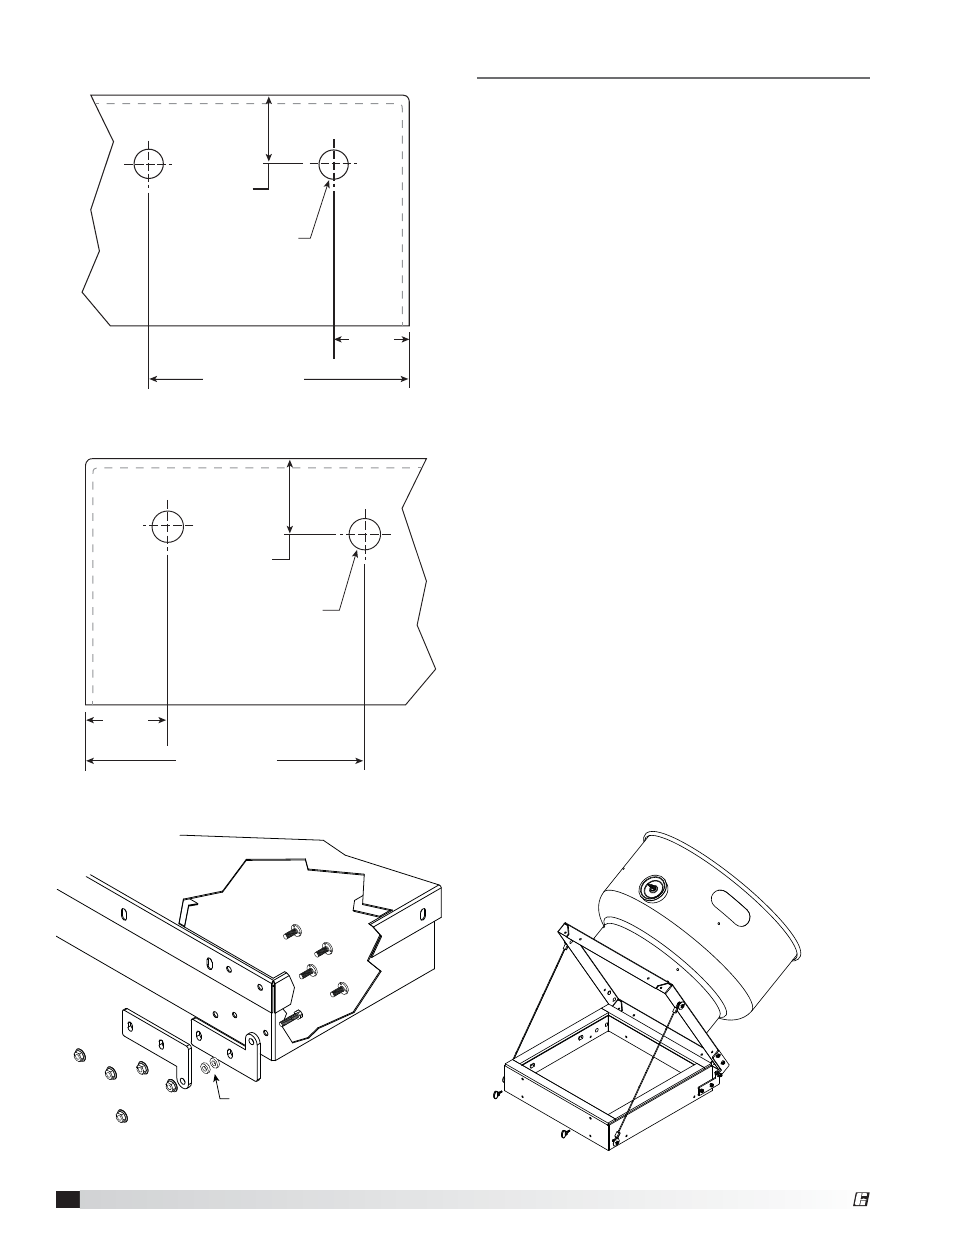
Hinge Kit
FIGURE 1
3/4 inch
2-13/16 inch
13/16
inch
5/16 inch diameter
(two holes)
FIGURE 2
3/4 inch
5/16 inch diameter
(two holes)
13/16
inch
2-13/16 inch
FIGURE 3
Spacers
FIGURE 4
Installation
1. Check curb cap for factory holes that match the
dimensions in FIGURES 1 and 2. If holes match,
skip to Step 3. If not, drill 5/16 inch holes in curb
cap using dimensions in FIGURES 1 and 2.
2. Attach “L” shaped hinge bracket to curb cap with
two 1/4 inch -20 x 3/4 inch bolts per bracket. Leave
finger tight until all pieces are installed. Refer to
FIGURE 3.
3. Center curb cap on curb. Ensure there is equal
space between curb and curb cap on all sides.
4. On one side, insert a 5/16 inch -18 x 1-1/2 inch
bolt through the upper bracket. Place one of the
remaining two “L” brackets on the bolt. Press
lower bracket up against the curb to estimate the
number of spacers. Use the spacers to take up the
gap between the two “L” brackets. The number
of spacers will vary from unit to unit. Install the
5/16 inch -18 nut until finger tight.
5. Pivot the lower hinge until parallel with the upper
hinge and hold against the curb. Mark the two
holes for drilling.
6. Allow the lower bracket to swing out of the way and
drill a 5/16 inch hole in curb at the locations marked
in Step 5.
7. Return lower bracket to parallel with the upper
bracket and install two 1/4 inch -20 x 3/4 inch
bolts. Leave finger tight.
8. Go to opposite side and repeat Steps 4 thru 7.
9. Center curb cap on curb and tighten all bolts.
10. Fasten side opposite of the hinges to the curb with
appropriate fastener to keep unit from opening up
in high wind events. See FIGURE 4.
®