Damper maintenance, Counterbalance adjustment instructions – Greenheck HB Series (469620) User Manual
Page 2
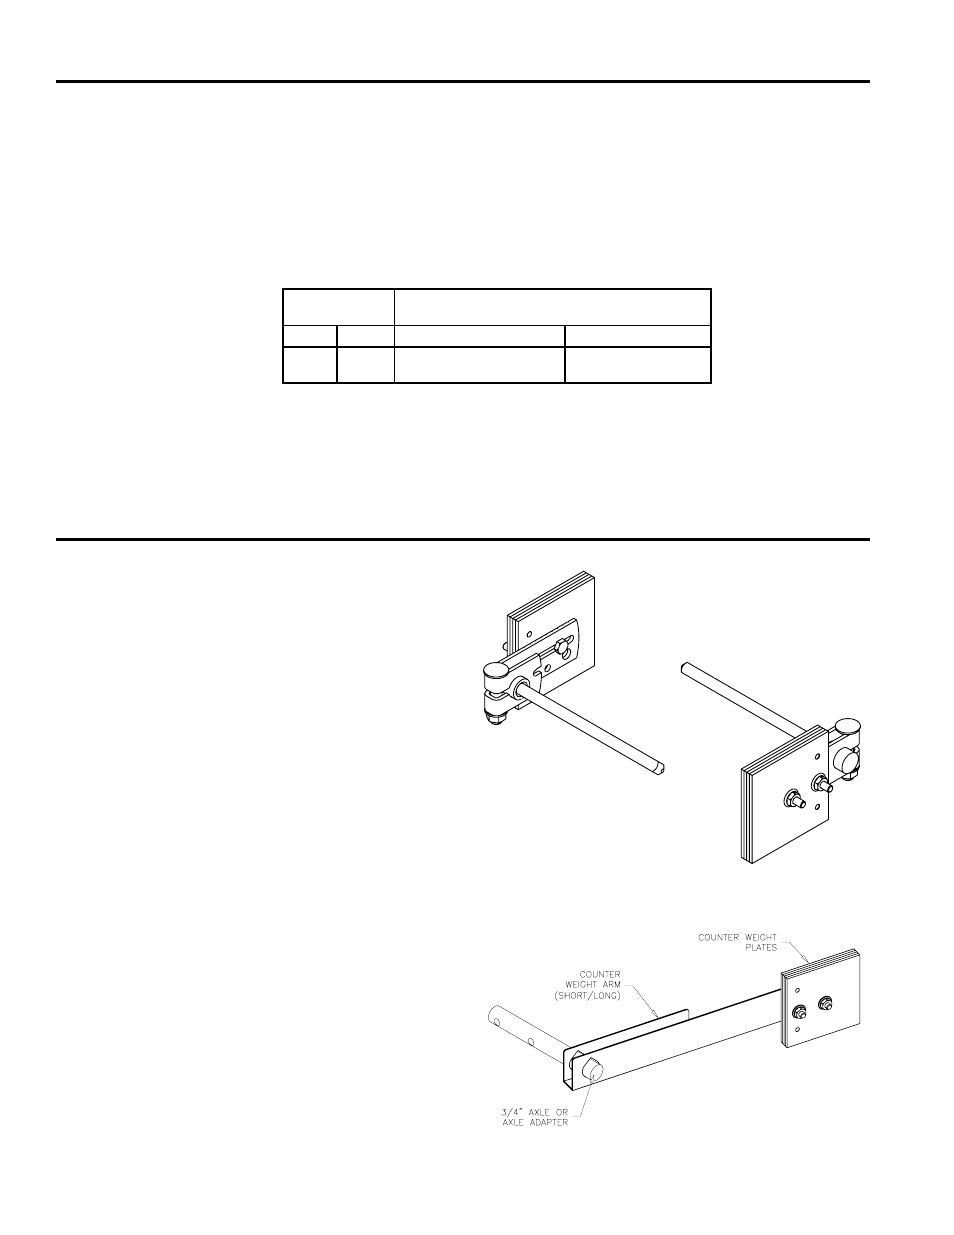
1. Adjust FULL OPEN blade stop first. On most models,
a bolt with a spacer is used through the top linkage
clevis arm. Open and close damper to verify there
is no interference between axles and the nested
counterweight arm.
2. Place damper in the installed mounting position and
flow direction.
3. Adjust blade counterbalance at full open position
first. Fan (flow) must not be operating. Rotate damper
blades open. the crankarms or counterweight arms
are generally 180° from the damper blade centerline.
On very small dampers with aluminum blades, the
crankarm may be inclined towards damper outlet, due
to the torque of the linkage. Adjust counterweight plate
center distance until blades will start to close from
full open position. Moving plate(s) out will increase
counterbalance. It may be necessary to add or delete
a plate. Counterweight plate quantity per arm should
not vary by more than one and the distance outward
from the axle centerline should not vary more than 1/2
inch among counterweight arms.
4. Close damper. Blades should close completely (you
can feel the blade edge seals make contact) without
slamming. NOTE: Counterweight arms are welded to
the axles as shipped. Arm adjustment will require weld
to be removed and to be rewelded after modification.
• If closing too hard, loosen arm fastener to the axle
and rotate top of arm towards upstream of air
entering side. Retighten fastener.
• If not closing, loosen the arm fastener to the axle and
rotate top of arm towards downstream or discharge.
Retighten fastener.
Counterbalance weight assembly
(square axle units)
Counterbalance arm assembly
(long & short arm)
Damper Maintenance
Greenheck's dampers are designed to be trouble free and hassle free under normal operation. Dampers are to be installed
square and straight so as to prevent binding during operation. The following annual damper maintenance suggestions will
help to insure proper damper operation and increase the life expectancy of the damper.
foreign Matter
Over the course of time, dirt and grime may collect on damper surfaces. The damper
surfaces should be cleaned to prevent hindrance to airflow.
Moving Parts
Make sure that parts such as linkage, bearings, blades, etc. that are intended to move
freely, can do so.
Bearings.
Plastic and pressfit ball bearings (without grease fittings) do not require
lubrication. Ball bearings with grease fittings should be lubricated as follows:
Maximum Duct
Temperature
°F
°C
Lubricant
Minimum Frequency
250
121
NLGI Grade 2 lithium
12-hydrostearate grease
twice a year
closure
Remove foreign materials that may be interfering with blade closure or effective sealing
of the blades with each other or with the frame. Inspect blade seals yearly and replace as
necessary.
Operation
While operating the damper through its full cycle, check to see that the blades open and
close properly. If there is a problem, check for loose linkage.
counterbalance adjustment instructions