Pre-installation guidelines continued – Greenheck EM Series (468391) User Manual
Page 2
2
blade surface. Bending the
counterweight mounting
brackets will move the
counterweight stack behind the
blade pivot point and therefore
allow the blades to start
opening at lower airflow rates.
This adjustment should be
performed in small increments
since the blades will not fully
close if the brackets are bent
to far. Performing adjustment #2
will have a small effect on adjustment #1 therefore, if
adjustment #1 is critical, then adjustment #1 may need
to be repeated.
Counterbalance Adjustment for EM/ES-10, 11 &
12 Models: Horizontal Mount - Vertical Airflow Up
Adjustment #1 will effect the balance of the blades in the
closed position. Adjustment #2 will effect the balance of the
blades in the open position along with a small change to
the balance in the closed position balance.
If the damper blades are partially opening under airflow
and you want them to open further or all the way, then
adjustment #1 will need to be performed. If the blades
remain in the full open position then adjustment #2 is
required.
If the airflow through the damper is light and the blades
only slightly move from the closed position, then adjustment
#1 is required. If the airflow through the damper is light and
the blades do not reach full open position then adjustment
#2 may be excessive or adjustment #1 may need to be
The following instructions should be followed when attempting to maximize the counterbalance effect on the EM or
GM model dampers. Be aware that when the balance setting is highly sensitive, friction wear and contamination will
have an adverse effect to the operation of the damper. The sensitivity of the counterbalance should only be set to meet
the application requirements. The damper must be mounted square and plumb and operate freely before any weight
adjustments are performed.
Counterbalance adjustment for EM/ES/GM-30, 31 & 32 Models: Vertical Mount – Horizontal Airflow
Adjustment #1 will effect the balance of the blades in the open position. Adjustment #2 will effect the balance of the blades
in the closed position along with a small change to the open position balance.
If the damper blades do not achieve full open position under airflow and you want them to open further or all the way,
then adjustment #1 will need to be performed. If the damper blades do not open completely and adjustment #1 has been
addressed, then more weight is required.
If the airflow through the damper is light and the blades only slightly move from the closed position, then adjustment #2 and
#1 are required.
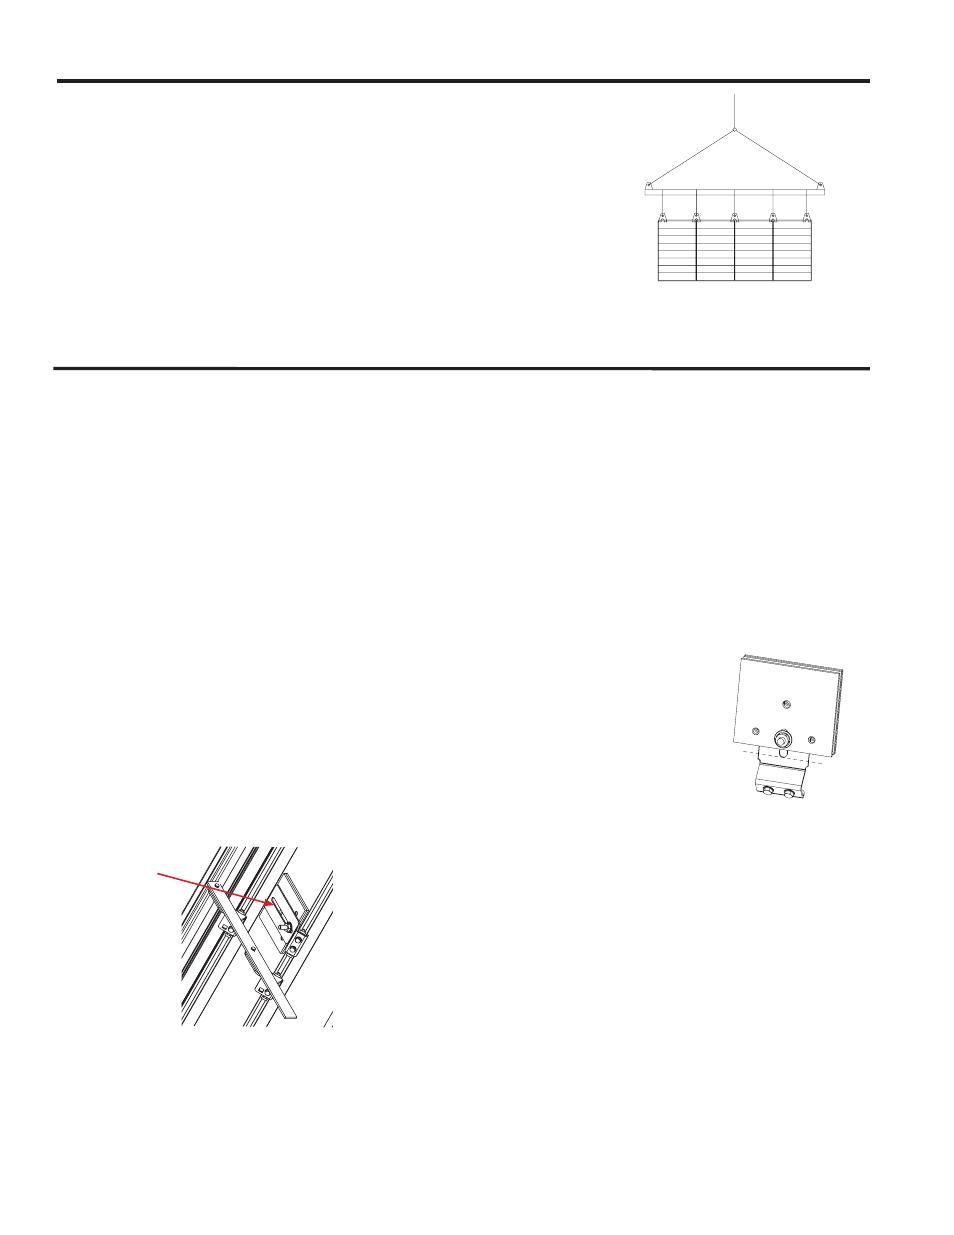
Spreader Bar
Attachments
Multi section dampers
EM/ES/GM Damper Counterbalance Adjustment Procedure
Adjustment #1:
Moving the weight stack along the length of the
mounting bracket slot will effect the full open balance
of the blade assembly. Moving the weights further
away from the blade pivot point will cause the blades
to become more balanced so that at some point, and
with enough weight, the blades would remain open.
Care must be taken to ensure that when the weights are
moved outward from the blade pivot point they will not
interfere with the adjacent blade when the blades close.
Moving the weights back towards the blade pivot point
will allow the blades to close.
Bend Here
5) Damper must be kept clean, dry and protected from dirt, dust and other foreign
materials prior to and after installation. Examples of such foreign materials include
but are not limited to:
a) Drywall/mortar dust
b) Firesafing materials
c) Wall texture
d) Paint overspray
6) Damper should be sufficiently covered as to prevent overspray if wall texturing or
spray painting will be performed within 5 feet (1.50m) of the damper. Excessive dirt
or foreign material deposits on damper can cause excessive leakage and/or torque
requirements to exceed damper/actuator design.
7) ACCESS: Suitable access (actuators maintenance, etc.) must be provided for damper
inspection and servicing. Where it is not possible to achieve sufficient size access, it
will be necessary to install a removable section of duct.
Pre-Installation Guidelines continued...
Figure 1
Adjustment #2:
The damper is assembled with the counterbalance
weights and bracket installed such that, when the
blades are closed, the counterbalance weights and
bracket are positioned directly inline with the blade
pivot points. This position of the weights will provide
a slight load that will hold the blades in the closed
position. To reduce this load, the counterweight-
mounting brackets can be bent away from the adjacent