Fronius Acctiva Professional 35A User Manual
Page 32
30
Connect battery - the de-energised charger leads mean there are no sparks when
connecting to the battery, even if the charger is already connected to the mains supply.
-
Connect the red charger lead to the positive pole (+) of the battery
-
Connect the black charger lead to the negative pole (-) of the battery
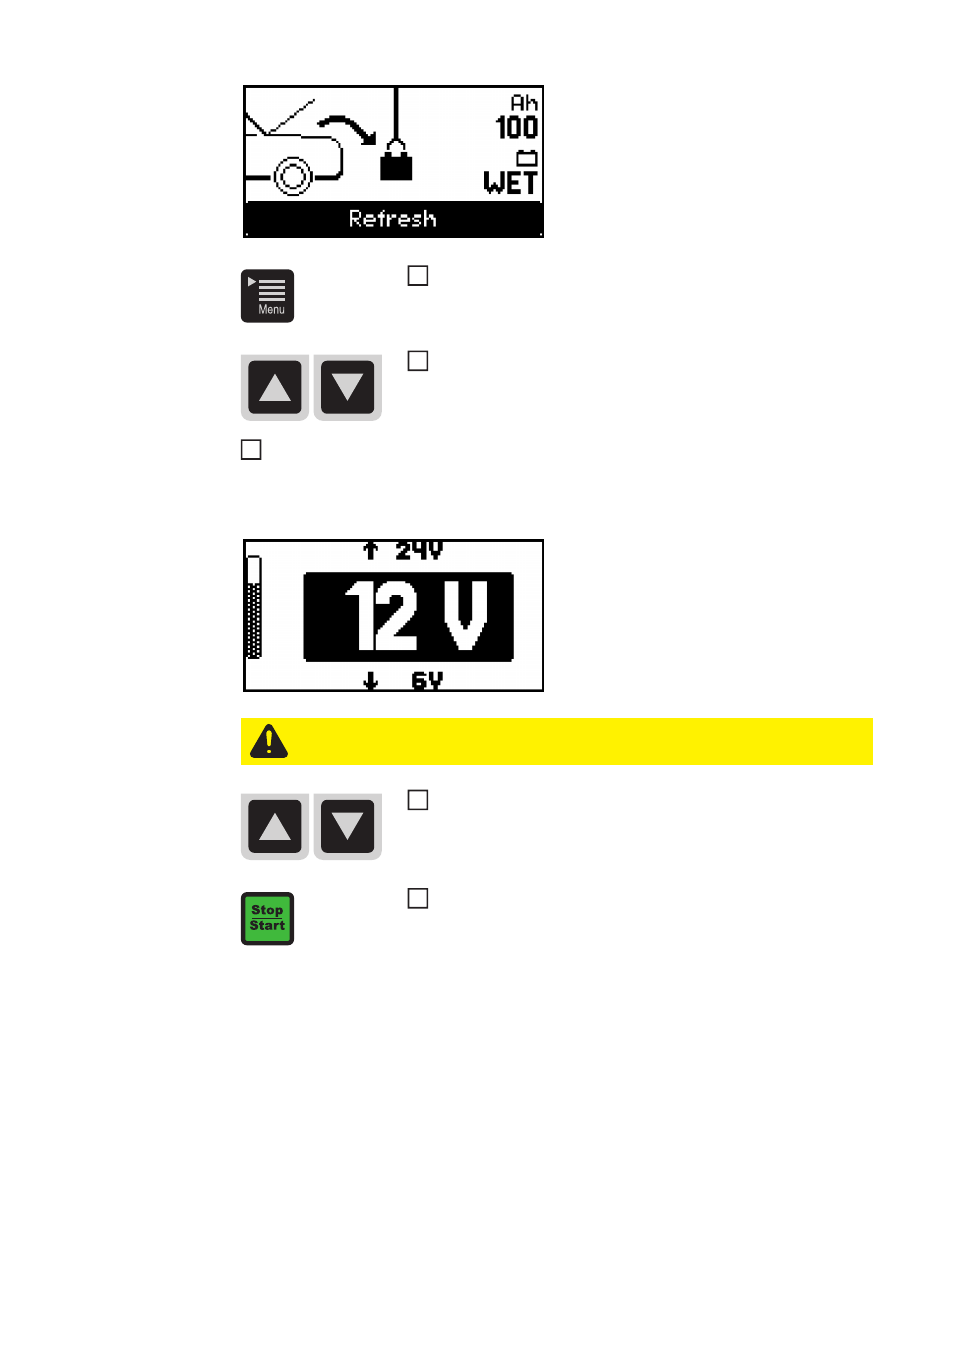
The charger automatically identifies the
battery, e.g. 12 V, and starts the charging
process after 5 seconds.
If the battery voltage is not correctly identi-
fied (e.g. usually the case if a battery is
deeply discharged), you have 5 seconds to
enter the correct battery voltage as follows:
If the battery voltage selection window does not open, then the battery is in a state of ex-
treme deep-discharge (less than 2 V).
-
A corresponding warning appears
If Refresh mode is still required despite the battery being in a state of extreme deep-dis-
charge
-
Acknowledge the warning via the OK button using the Stop/Start key.
-
Use the Up/Down keys to select the correct battery voltage in the subsequent selec-
tion window.
-
Confirm the selection using the Stop/Start key
Use the Menu key to select the 'Ah' or 'Battery type' setting.
Use the Up/Down keys to enter the required value (e.g. 100
Ah or 'Wet' battery type).
3
4
5
CAUTION! Risk of damage if the wrong voltage is set. Always ensure that the cor-
rect battery voltage is set.
Set the correct battery voltage using the Up/Down keys (6V /
12V / 24V).
Confirm the selection using the Stop/Start key.
6
7